I took another look at the picture and the straight tail part is different. Mine didn’t come to a point, I have a small semi circular closeout. For your part annealing is the way to go.
1 Like
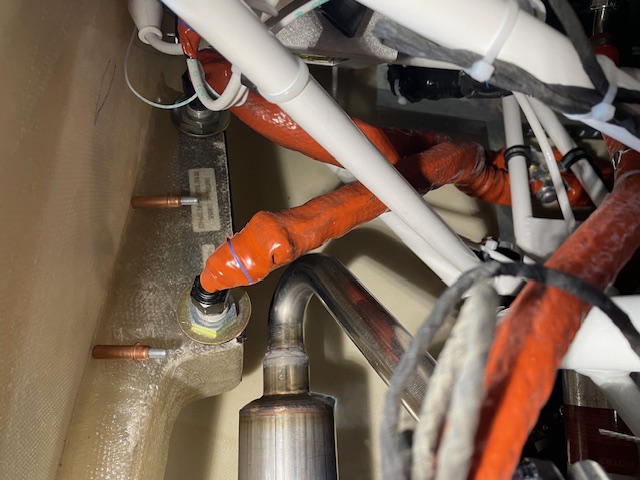
Over the past couple months there’s been a lot getting items almost done and checking off small items. Getting the cooling system all setup and cowling mods fiberglassed is are the biggest items left to complete. The cooling system that I ordered from Casey Cooper/Cooper Aircraft Corporation came near the end of December. There’s a good amount that goes into it and the manual is pretty long and detailed which really helps. There were a couple minor clearance issues with the coolant radiator install to the Rotax 912is block which surprised me how much the block was that different to the ULS. They got sorted out pretty quickly so soon the coolant radiator was mounted up under the engine.
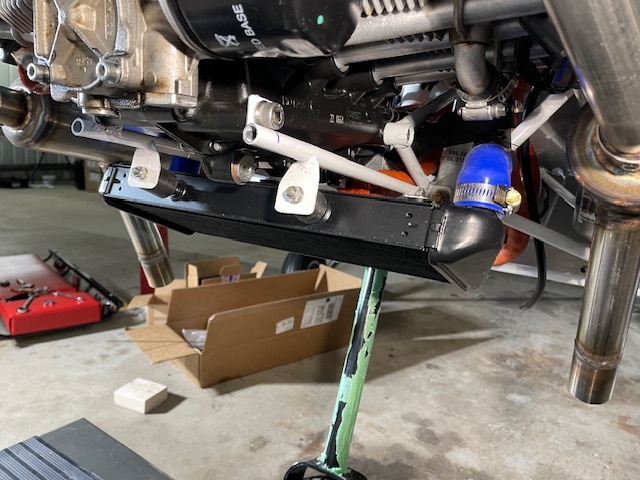
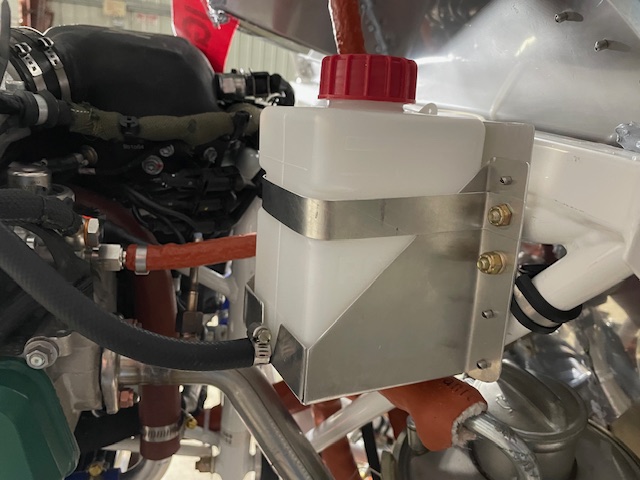
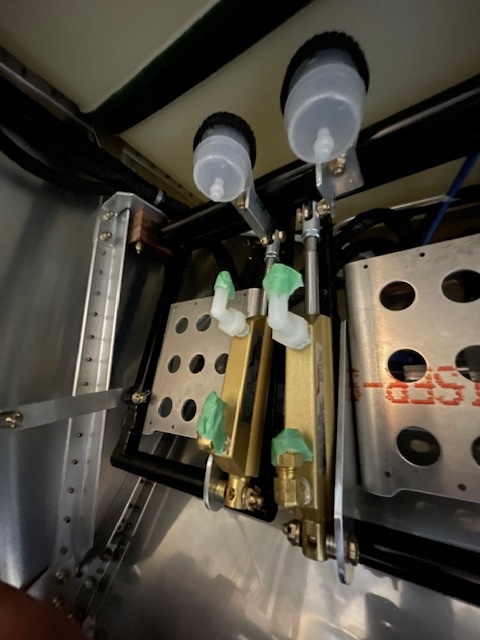
I’d also been waiting on the bracket for the coolant overflow reservoir to come with the kit. I was planning on mounting on the upper firewall which I didn’t realize would cause issues overflowing the expansion tank until I read the manual. And the Rotax installation manual only allows to be so low for suction. So with my firewall real estate taken up in the correct height area I ended up mounting to the engine mount with some P-clips. One nice thing is I made a backing plate with a window so the coolant level can be checked from the oil tank door easily during preflight.
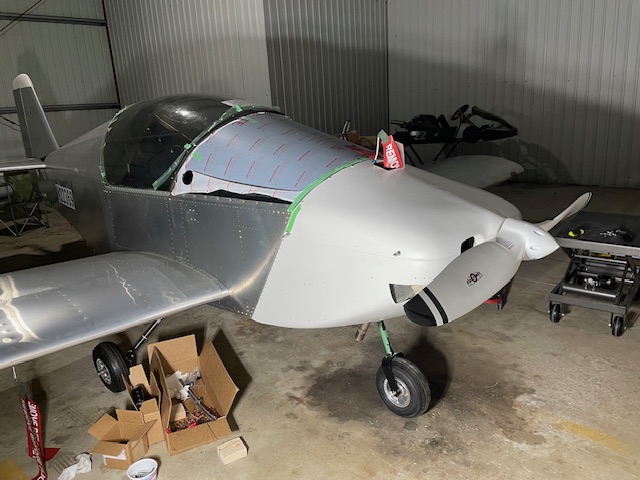
Since I had most items on the aircraft or had weights for them I also threw it on scales for the first time. I’m currently sitting at 644 lbs which I’m quite thrilled with since my goal was to keep it under 700 lbs. I anticipate adding another 20-30 lbs so I’m hoping to come out around 670 lbs. Not bad for how my aircraft is equipped.
4 Likes
670 is excellent. That’s about where I am. You will have a little more power.
That is looking great!
Nice. I’ll be bugging Casey for a cooling system at some point in the next year or so. I’d be interested in some pictures of the installation process.
1 Like
My Legacy tail wheel / 912ULS / Airmaster CS prop / 2 x 30L wing tanks / in fuselage 40L header tank, comes in at 340kg.
I can’t see from the photos - are using a Ring Mount? ![]()
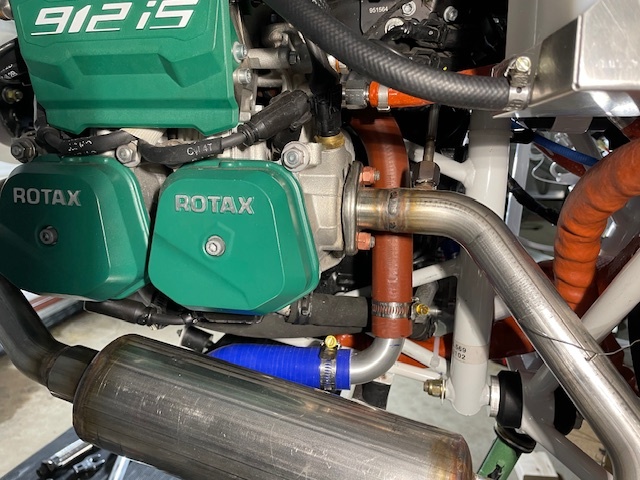
I’ll keep posting them hear although my install will have a few differences I’ll note. The coolant routing is very direct. The expansion tank is in a different location on the 912is vs the ULS but the coolant routing is similar.
Yes, I got mine from the first batch right when they came out. You can see the ring mount in the above image and if you scroll up you can see some more angles.
Because my firewall layout was complete before the Cooper kit was finalized, my oil system install differs a bit but uses mostly the same components. The biggest change is my oil tank is on the left side which mirrors the system and makes some other changes necessary.
The first is due to the oil tank only being able to fit within a couple inches, to get enough clearance to the nosewheel support tubes it’s also mounted too close to the cowling to use the B-model side vents. So the bottom vent is increased up to 14” x 5”.
The second is the oil thermostat doesn’t mount in the location on top of the engine due to the expansion tank being in a different location than the 912ULS on the 912is. I ended up mounting a lighter one that came with my engine on the center nosewheel support tubes as it minimized the amount of oil hose for my setup.
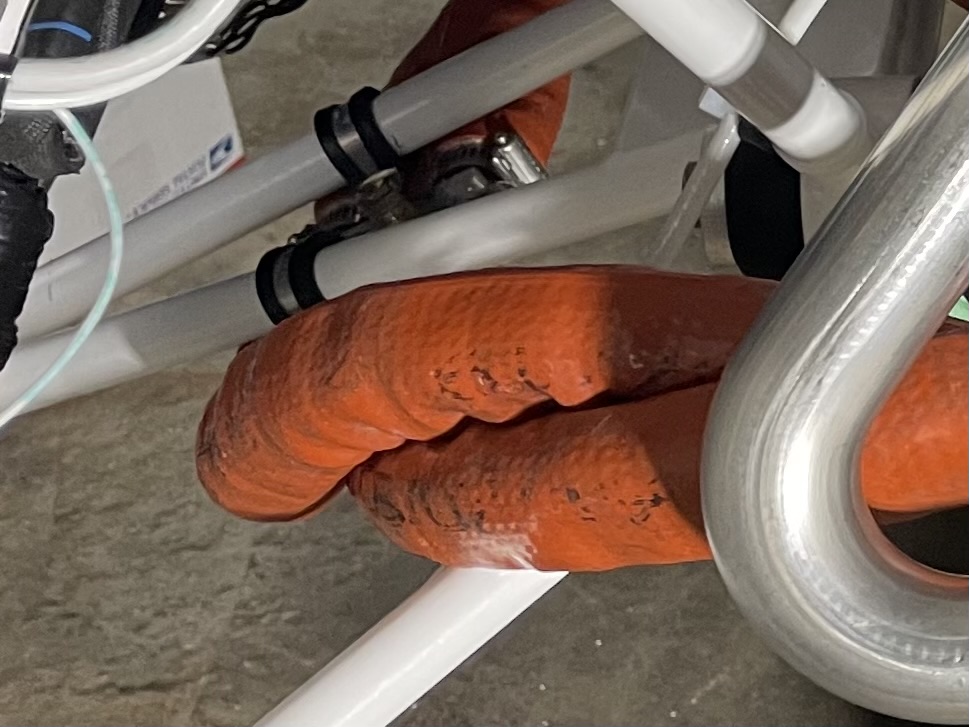
The third is that I mounted the oil cooler duct at a lower location to get the exit location further away from the battery towards the exit. It also gives me room to mount engine air intake above it since the 912is needs cool outside air.
If I were to do it again mounting the oil tank on the right side would make things much easier. It gives better exhaust clearance and more area to work with for the air intake. I’m not super happy with how my oil tank outlet ends up being slightly in the way of my oil check door due to the clocking to get the fittings to clear the fuel return line. Something I didn’t have everything in place for on layout. At least I don’t have to make major changes to my firewall layout and I may be able to reclock it with different fittings.
5 Likes
After the oil system was all setup it was time to get ready for first engine start. I’ve bled plenty of brakes before so I started with a good idea of the methodology. With an assistant, I first bleed the brakes by initially using a vacuum bleeder to fill the lines and calipers monitoring the reservoir for level. After fluid came out started pushing fluid through by pressing and holding the brake pedals and opening the breather valve, closing, and releasing the pedals. Then pressing repeatedly to see if the pressure built. It was nice to be able to see the bubbles in the lines move. The left side went fast but the right side took a little long, maybe because I wasn’t fully stroking the pedal and the lines are longer.
I debated between putting the reservoirs on the engine side of the firewall or somewhere behind the glareshield but I settled mounting just above the master cylinders. I filled them using a syringe with a piece of tubing on the end. Even though it wasn’t the most convenient, it wasn’t too bad, was easy to clean spillage, is easy to visually check, and is lightweight.
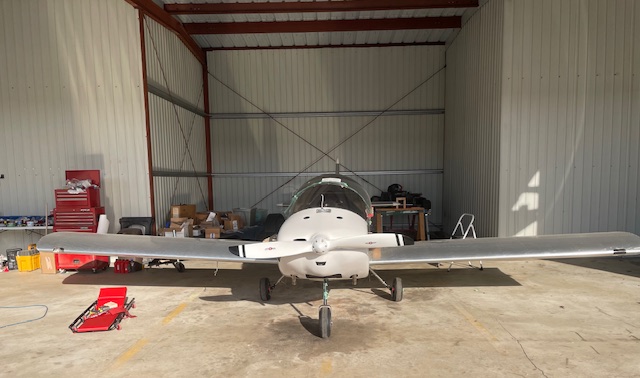
After that was done we purged the Rotax oil system. This involves blocking off the oil tank inlet and applying a little pressure to the tank to push oil through the system. I also prefilled the cooler since oil fills it slower through the oil thermostat. There’s a good video of the procedure here. Then my plane got to leave the hangar for the first time:
2 Likes
The first engine start attempt the engine fired a couple time but didn’t get going. It also threw a fault code and after finding it in the Dynon menu it was for a crankshaft position sensor. I checked to make sure they were plugged in correctly since they were removed to install the suspension frame and they were. After some research I found it also be due to bad start situations. I ended up repurging the oil system and making sure the battery was fully fully charged.
Pro money saving tip, for the EarthX battery if you don’t want to buy the expensive battery charger, a benchtop power supply with a constant current setting works great. EarthX told me I could charge at 14.2V at 6A but slower is better. Since I had a $50 power supply I used for testing avionics and the electrical system, I just set it at 14.2V and 4A and watched as the current tapers off as it hit 14.2V.
After that a spin or two of the propeller and it fired right up. After a quick shutdown to make sure I wasn’t leaking fluids or rubbing or hitting anything I fired back up and did the full warmup. The only issue was the fuel pressure showed low at 38-39 psi where it was showing higher when the engine wasn’t running. On the drive home I figured it out in my head that it was almost certainly not setup to differential so it wasn’t taking the MAP pressure into account.

6 Likes
Awesome Andrew!
Great news Andrew!! A red-letter day for sure!
Wes
Congrats! Big day!
Absolutely a great day, first day out of the hanger, and a good start ! Congrats!
1 Like
I would be intersted to see some photos of how you have installed the Coolant Radiator & Oil Cooler ![]()