Here we go again. again
It’s been a while, So far in 2025, I have been doing surface prep on various parts & skins. The first thing I do is use a random orbital sander to remove the bulk of the surface corrosion. Some of these parts have been sitting around for 15 years and have a considerable corrosion (no white corrosion) built up. Following that, I wash the parts with dishwashing detergent, followed by a rinse in distilled water and a wipe down with acetone. The next step is an acid etch to remove the remaining corrosion, followed by a rinse in distilled water with baking soda added to neutralize any acid. Next another rinse in distilled water to remove any traces of the baking soda. Following that, the Alodine is applied and another rinse in distilled water.
Alodine is a Chromate conversion treatment which does not alter either the dimensionality or the weight of the parts. Chromic acids are nasty. Hexavalent Chromate use has been banned in most places. Alodine uses a trivalent chromate. While this is safer than hexavalent it is still pretty nasty. Take proper precautions to prevent contact. Further more, It is most likely illegal to pour it down the drain. I have a holding tank for used material and rinse water. It has an open top so the water will evaporate. I use baking soda or limestone (CaCo3) pellets (available at big box building supply houses) to fix the chromate in a solid. Caution, CaMg(CO3)2 is Dolomite and does not not rapidly dissolve or effervesce (fizz) in cold dilute acid and not suitable. When the water has evaporated from the holding tank, the remaining precipitate can be safely disposed. Check your local laws regarding hazardous waste disposal.
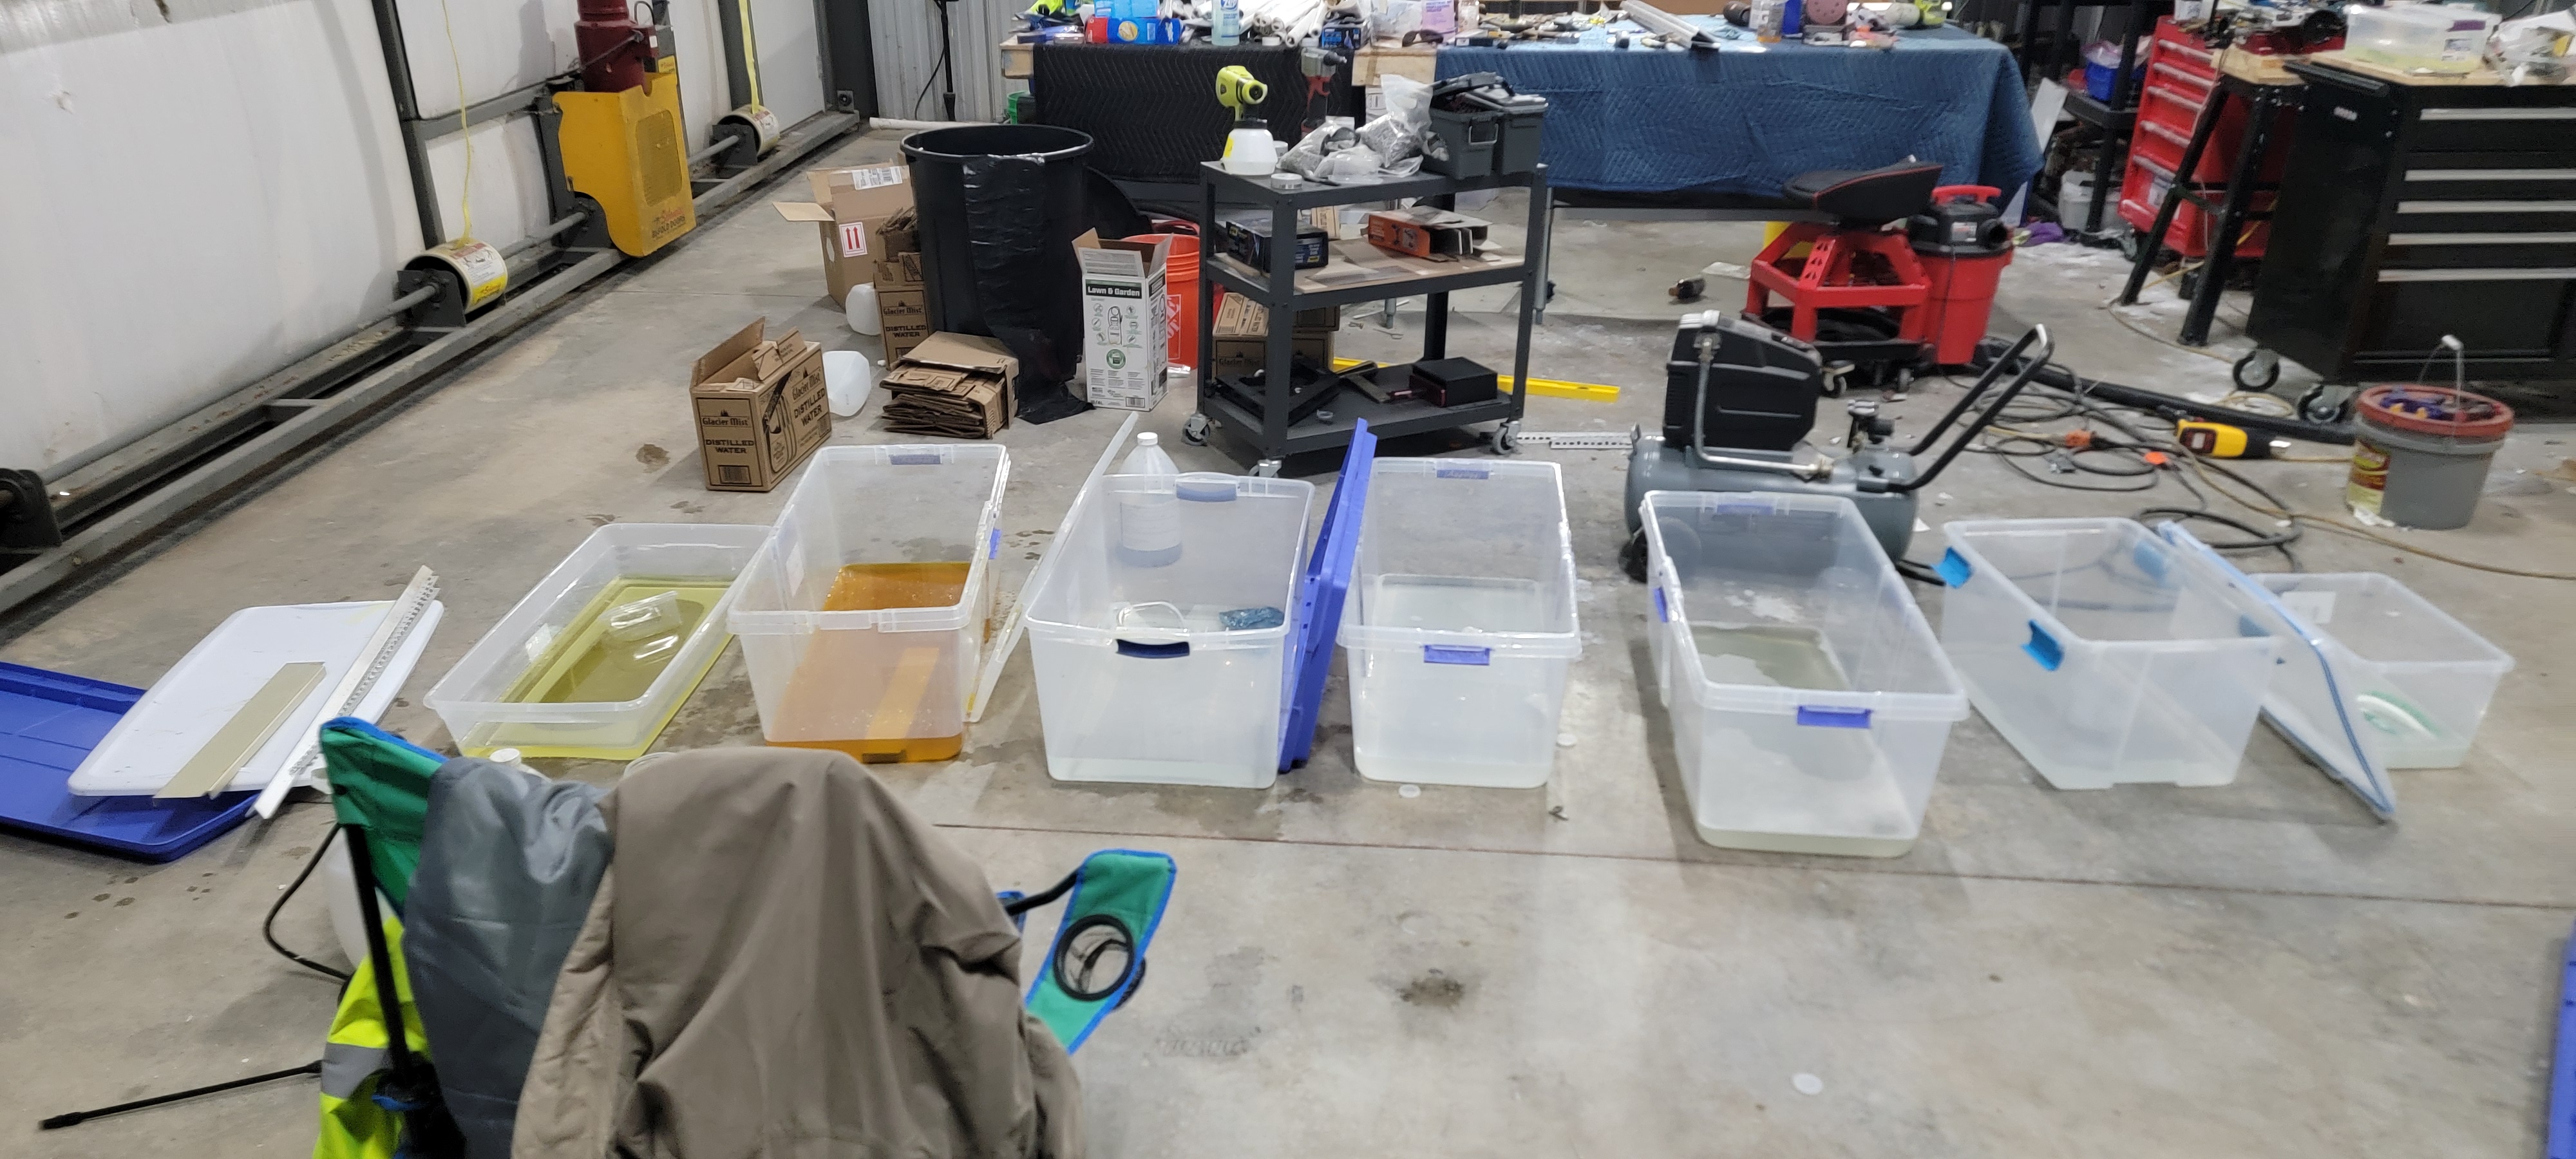
The production line, Right to left, Soapy water for initial wash, Distilled water for rinse, Acid etch bath, distilled H2O & baking soda, Distilled H2O, Alodine bath, Distilled H2O final rinse.
QC notes;
Alodine is a chemical treatment, not coating. It chemically bonds with the aluminum. The bonding occurs during the first 2 minutes after application. The Alodine “patina” is the result of coloring agents. You may see an opalescent shine, or turn blue, it may have no color. Alodine is available in both clear and Mocha varieties.
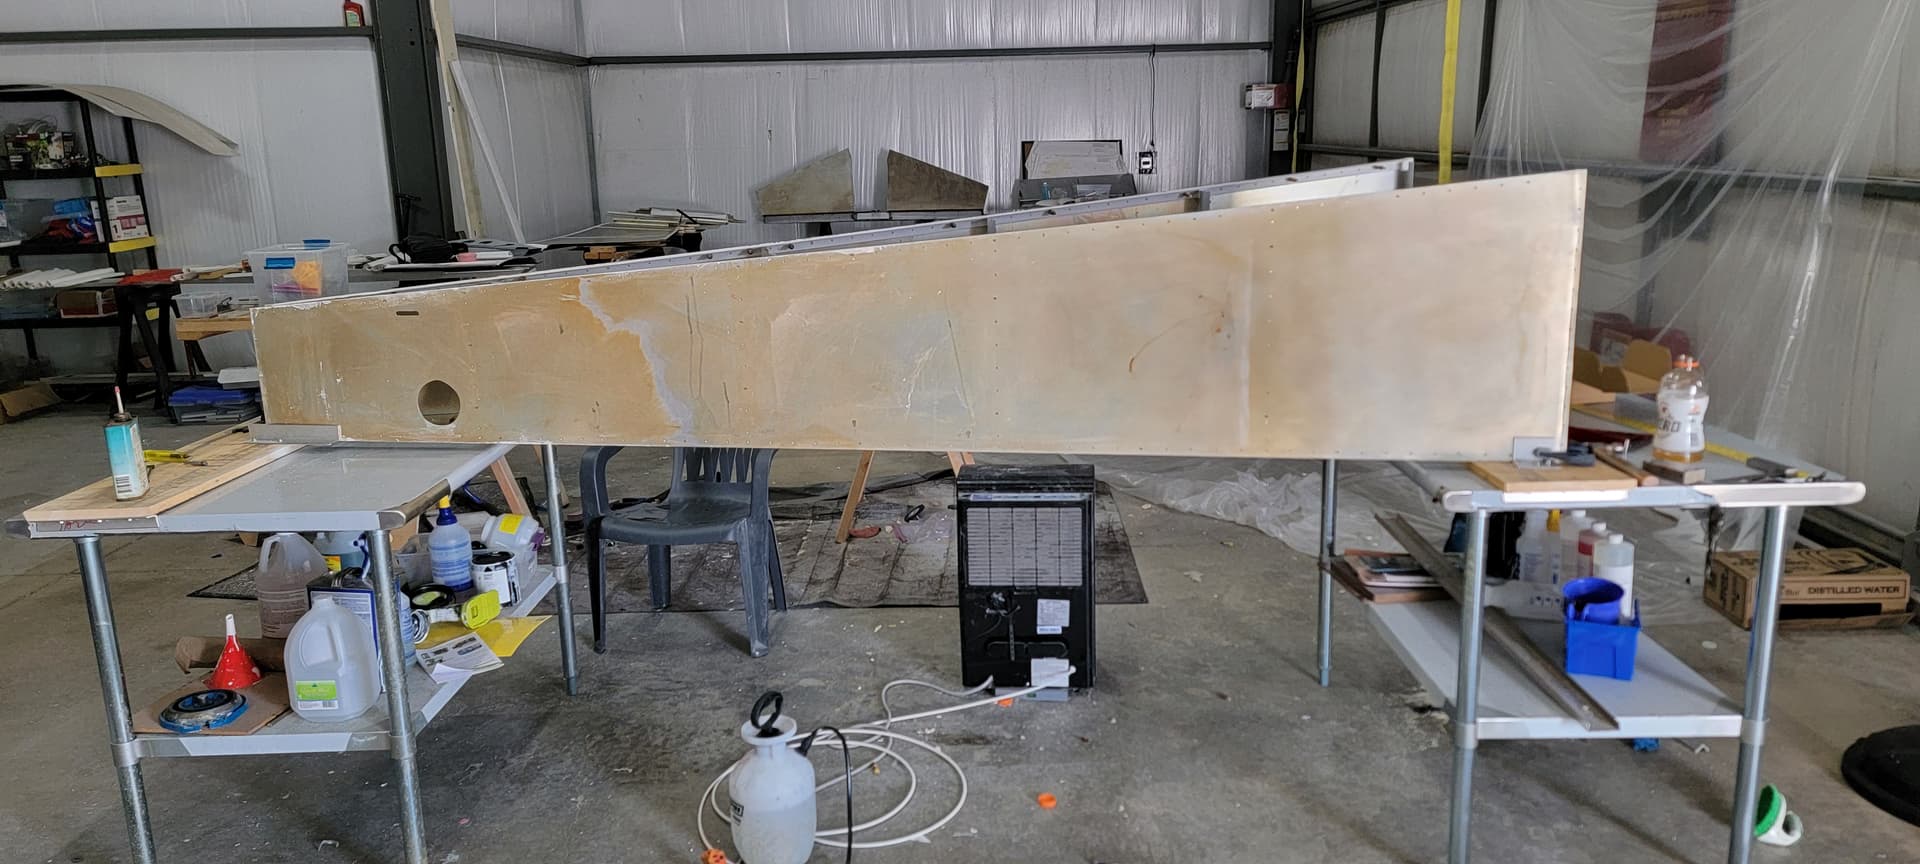
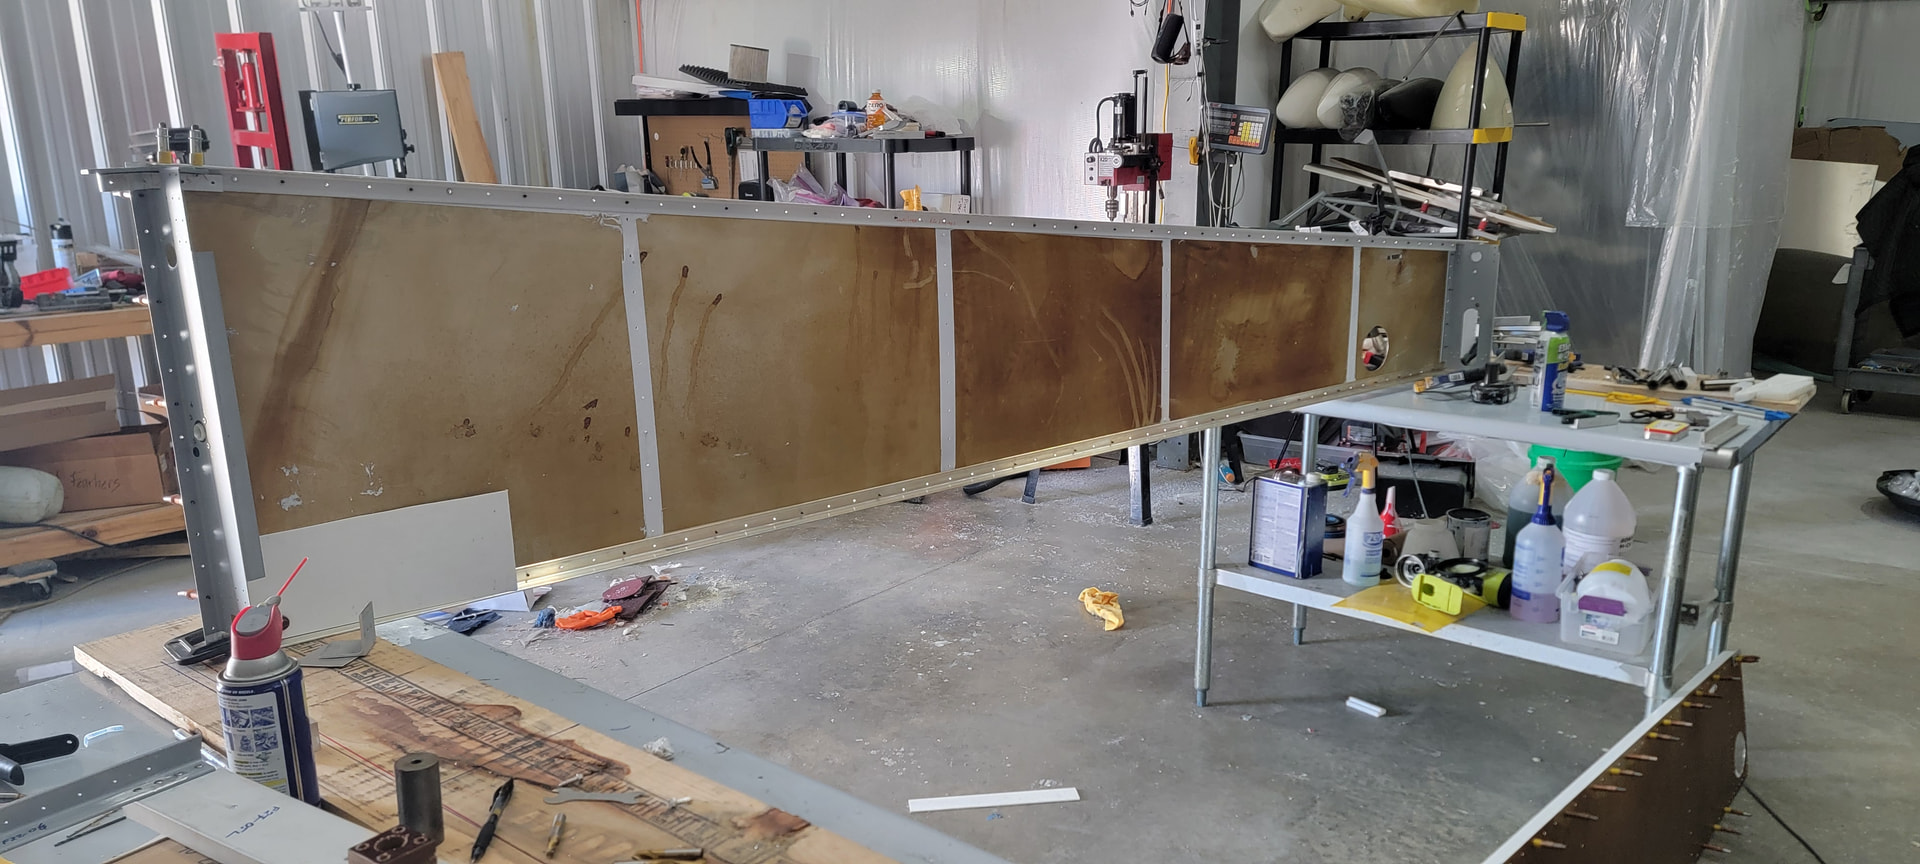
Cutting the rudder cable slots in the aft fuselage skins. THe skins are way to large to plop on an end mill. I used a chain drilling method. Chain drilling is a series of drilled holes to form the slot. The holes should be drilled at a spacing that provides an overlap of the holes that are 1/4 of the diameter. If the spacing is greater, more material has to be removed, if smaller, the drill bit will slide toward the adjacent hole.
1st try..
[grid]
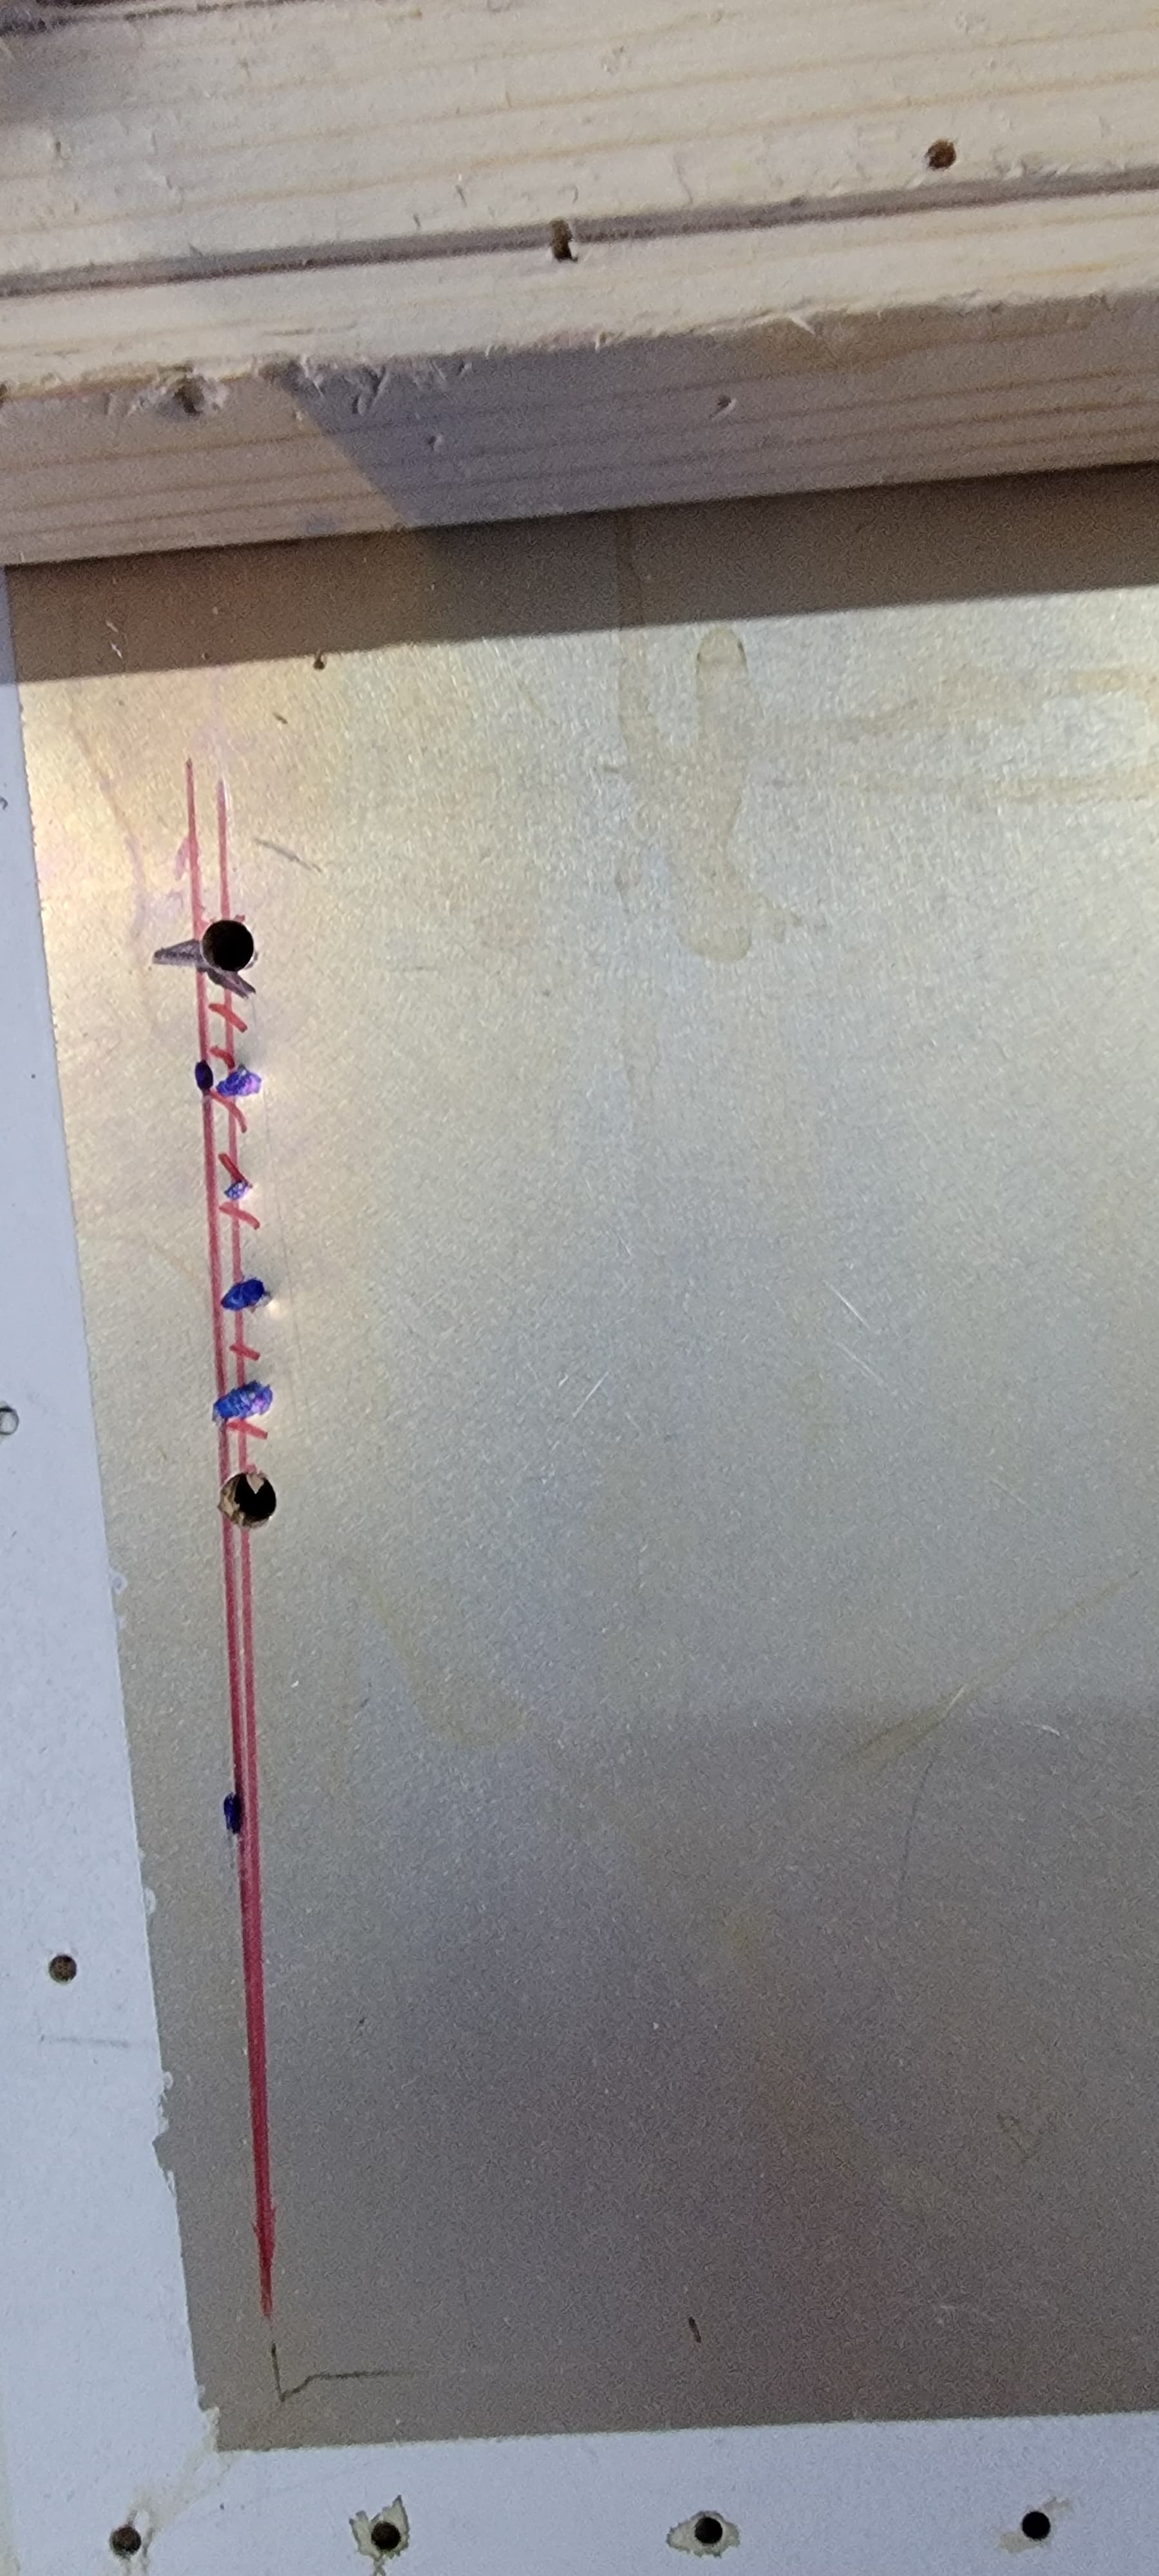
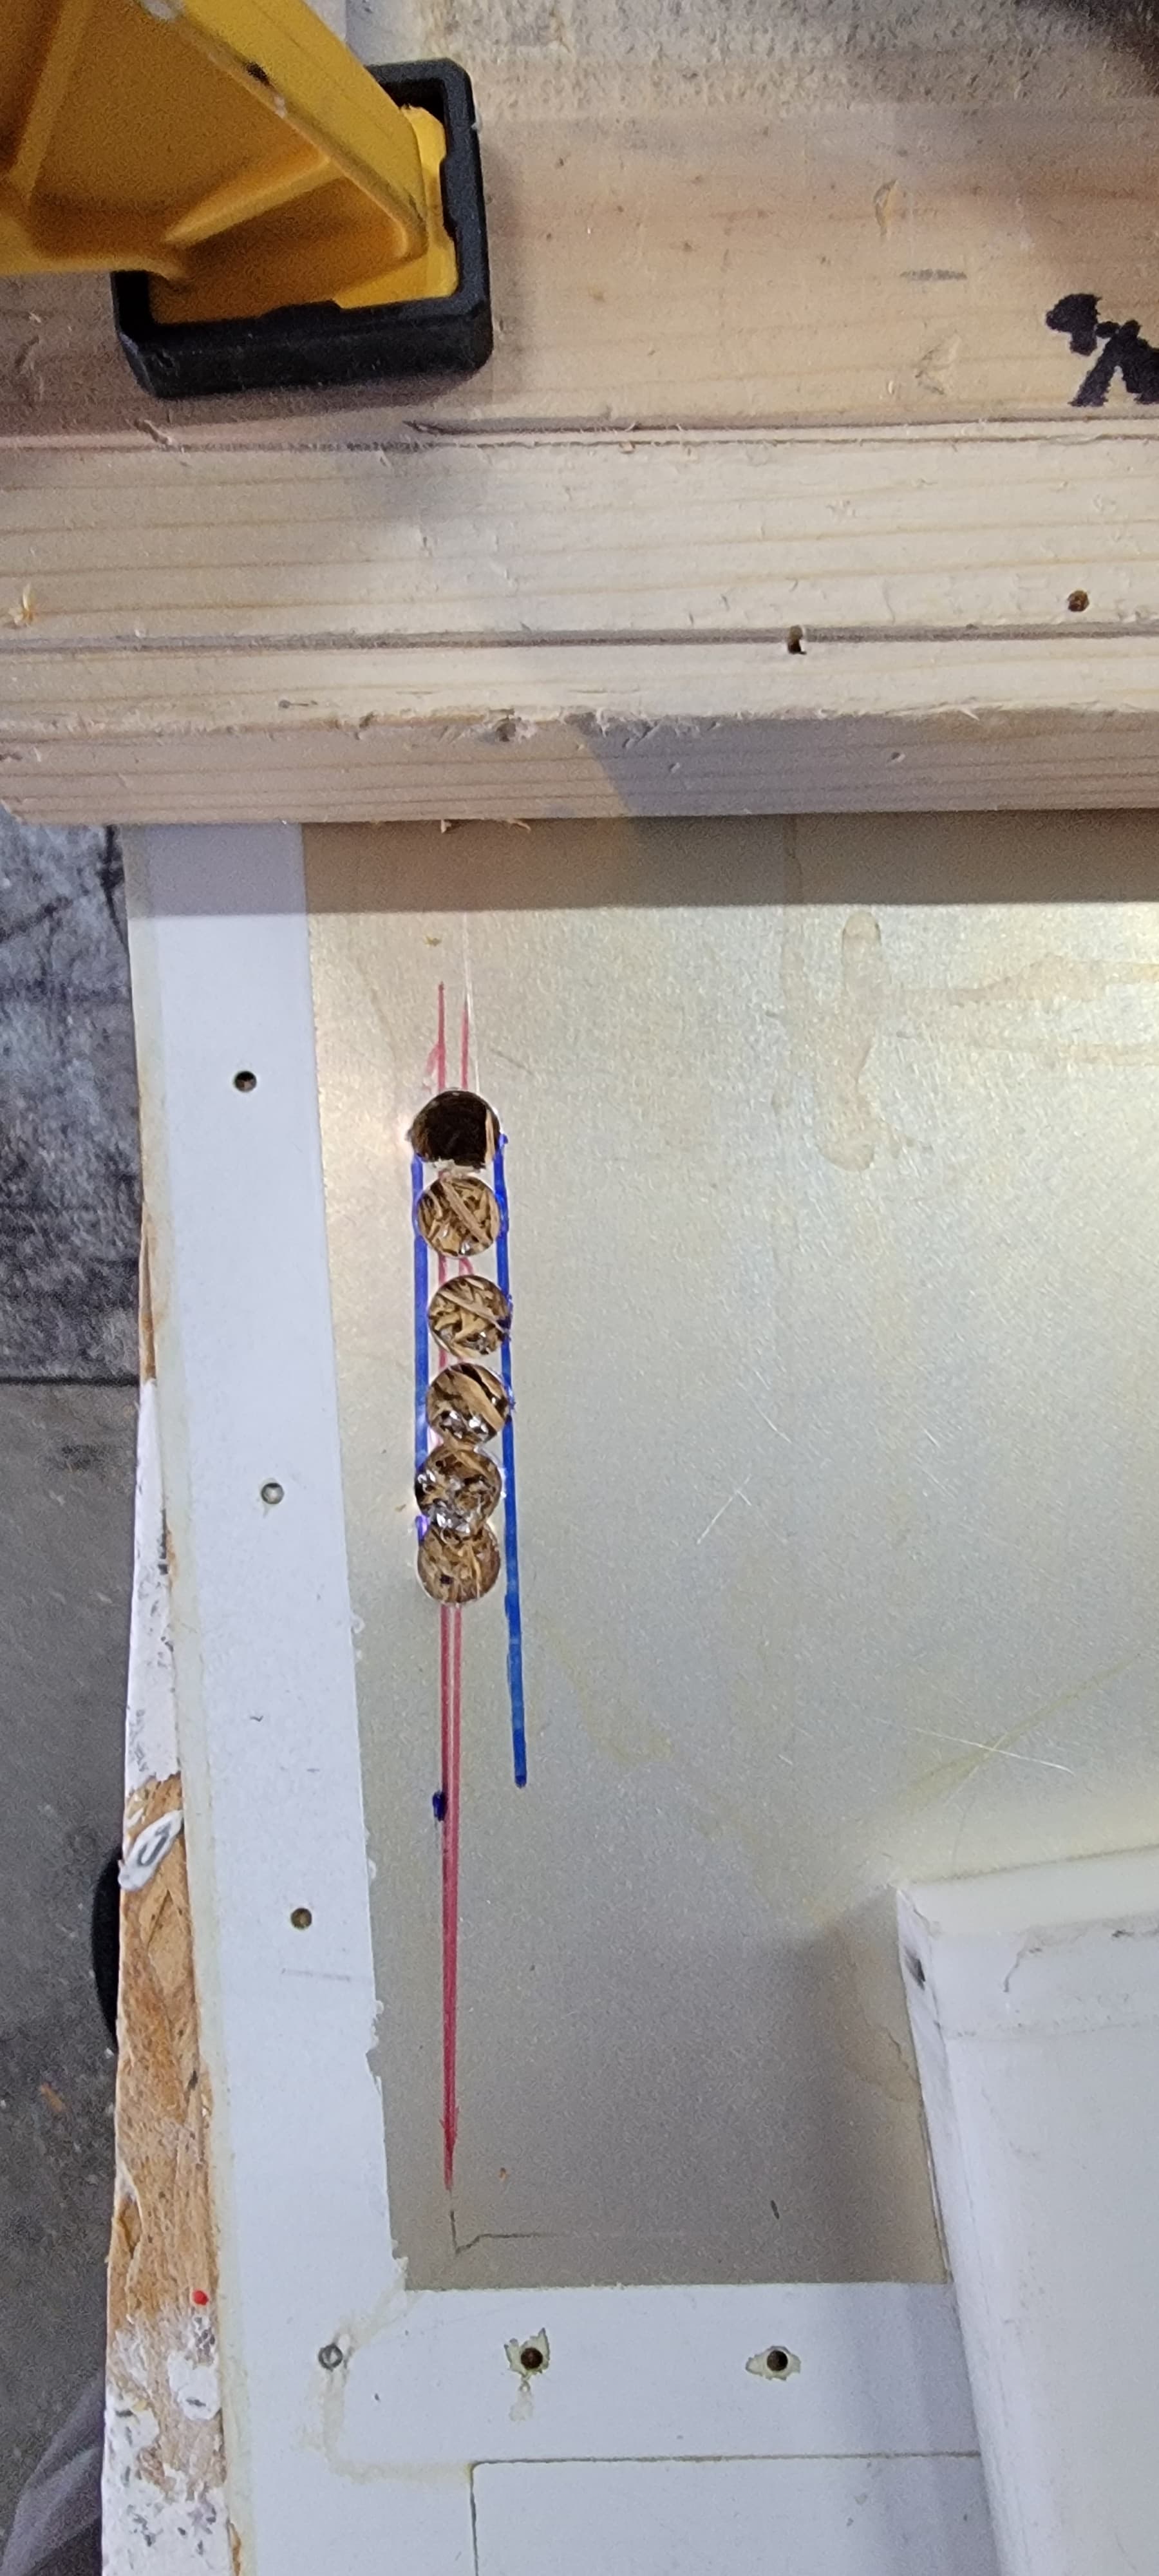
1st photo, layout and punched, 2nd photo, drilled.
Second attempt.
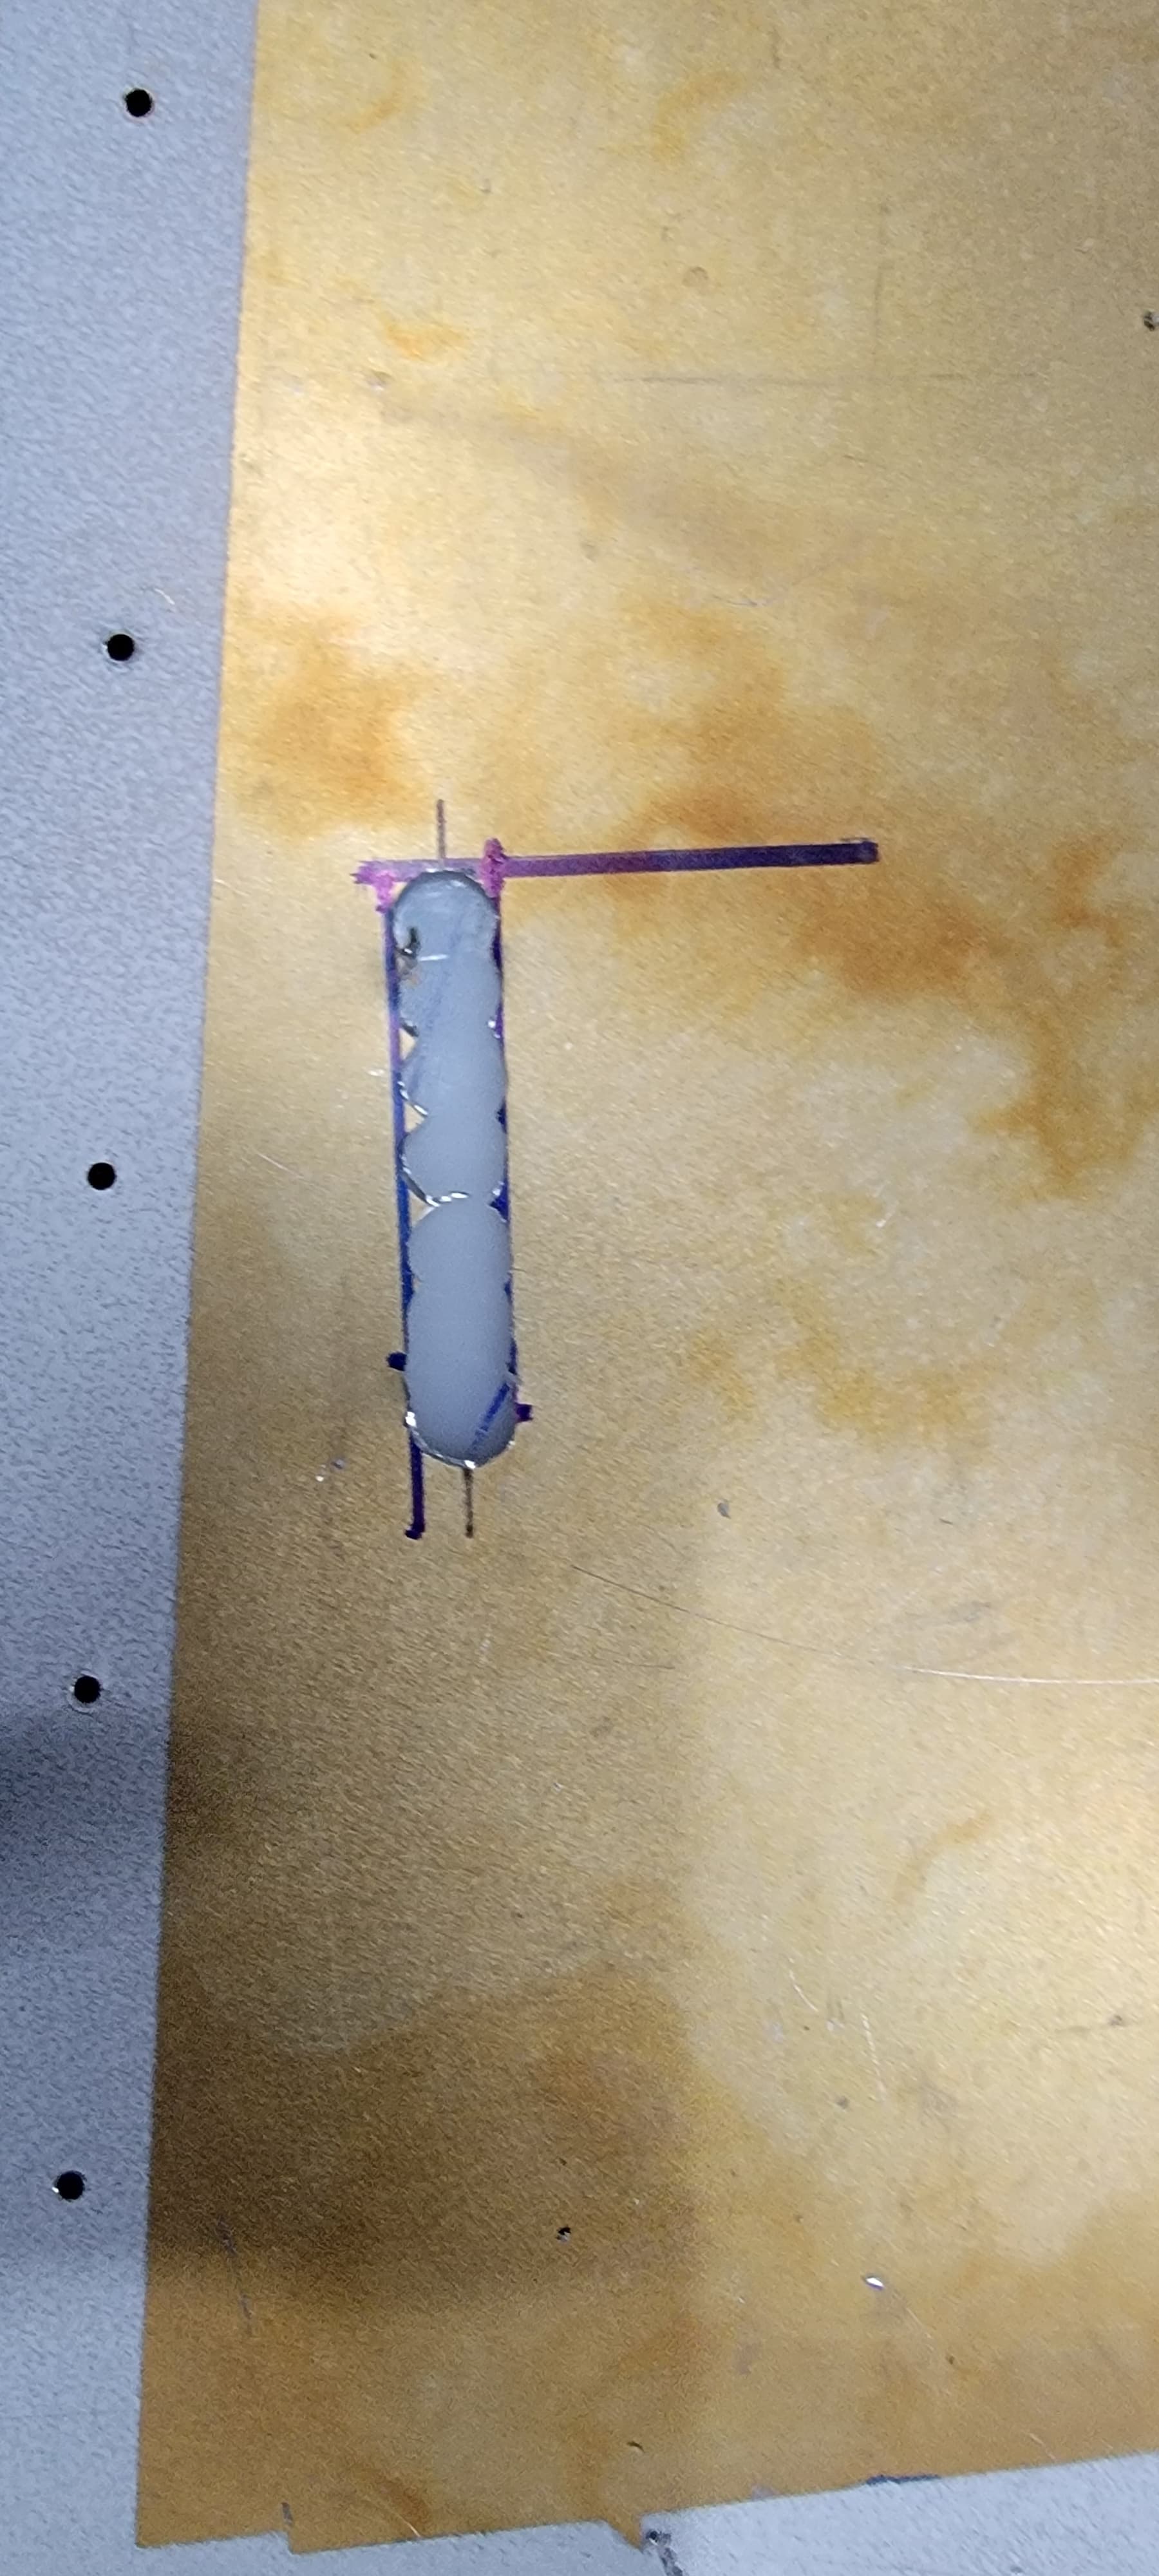
The length of the slot, as called out in the plans, is an odd length for chain drilling. You will have spaces between holes exceeding the optimal length, or at less than optimal distance. The first one was a real chore to finish and ended up a little larger than called for. The second one was easier to finish, and right on spec.
Looks good! I remember doing those. I drilled the ends, cut the straight lines with a Dremel cutoff wheel, finished with a file.
1 Like
Link to video End Mill Tips. https://youtu.be/fMFWJM0jvGE
Continuing Edge Finding. https://youtu.be/G7qH9aIUT0M
1 Like
A good day at the hangar. Looking backward and forward. I’m running out of other things to do before assembly. For example, today, I re-organized and re-arranged my workspace and built a jig for the aft fuselage. Then I test mounted the cleco’ed aft fuselage side panels. The reorganization was about relocating the various and assorted tools now living on my work bench. Most went willingly…. The benchtop was removed, the two smaller tables beneath were relocated a couple of feet and were transformed into the aft fuselage jig. The bench top was plopped on top of a couple of sawhorses. It has been demoted to a parts staging area.
2 days later I was in the hangar and leveled the whole thing out, twice. put the side panels on, added a couple of crossties, and….
1 Like
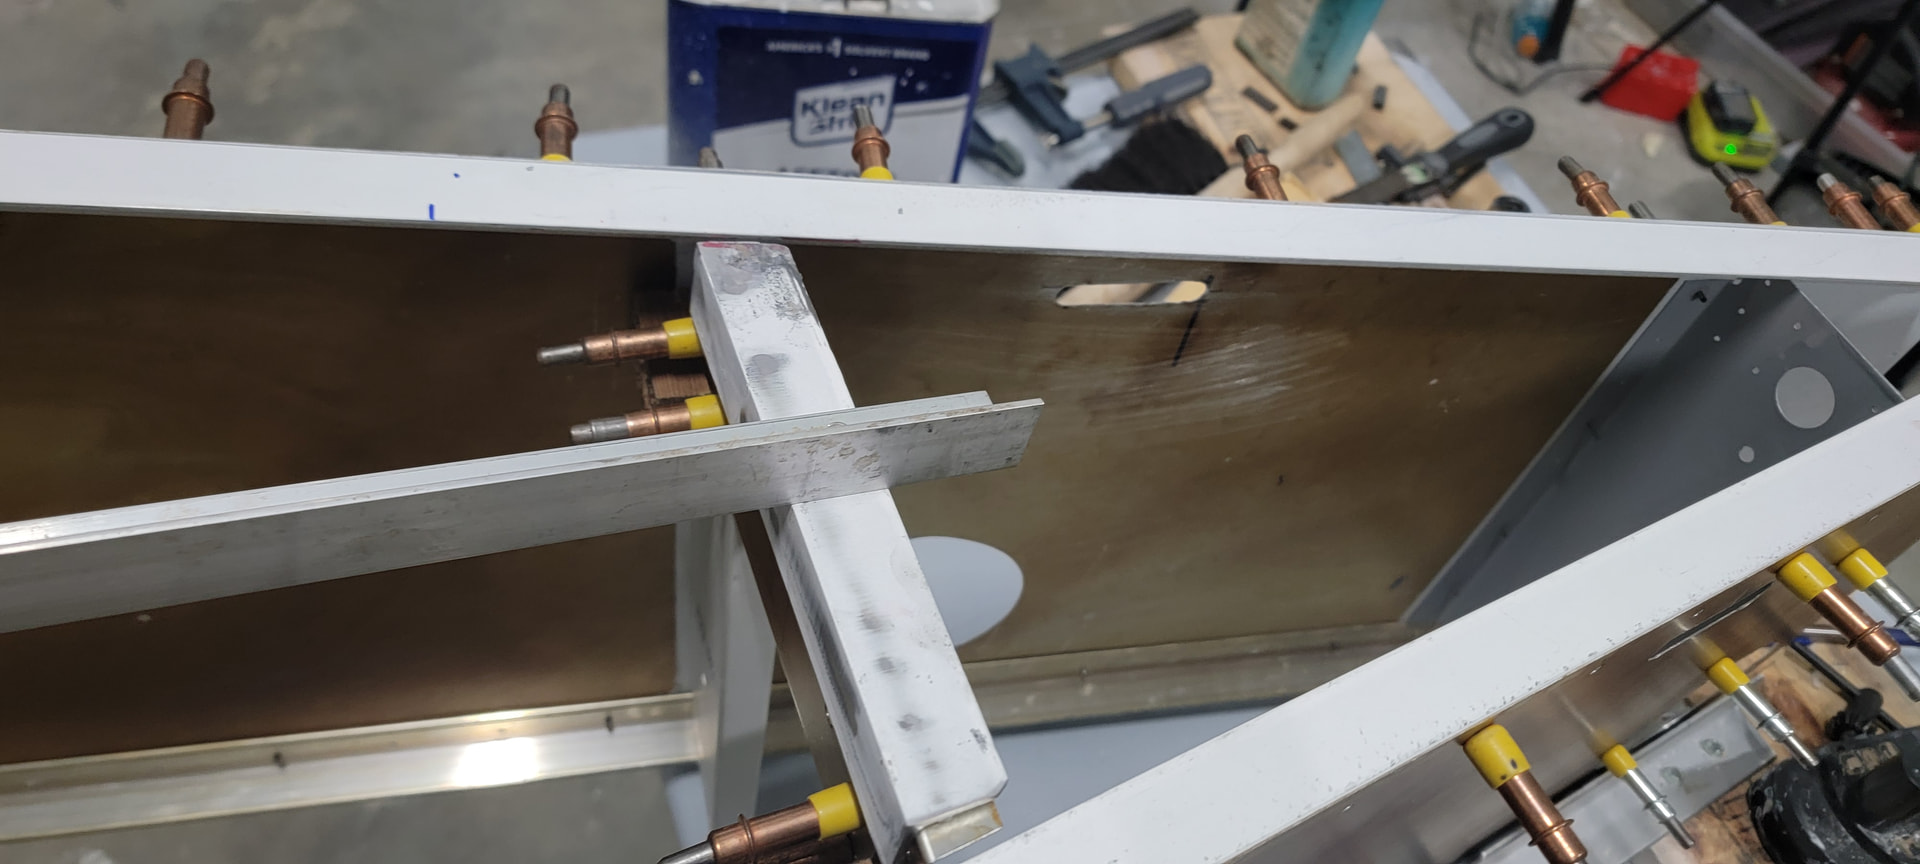
Some times it feels like I’ve been here before, Not Deja Vu, The starboard Lower Vertical Splice Plate just wasn’t quit fitting right. the bend radius was too large and about a 1/16” off. I could order one from Sonex, about 4 or 5 business days to deliver, or I can fabricate myself. The only stock with the required thickness is some angle stock. My band saw doesn’t want to cut this thickness in a straight line. Time to get out the slitting saw for my end mill.
Loaded in the end mill. High quality cut, easy to cleanup. Saw blade in collet.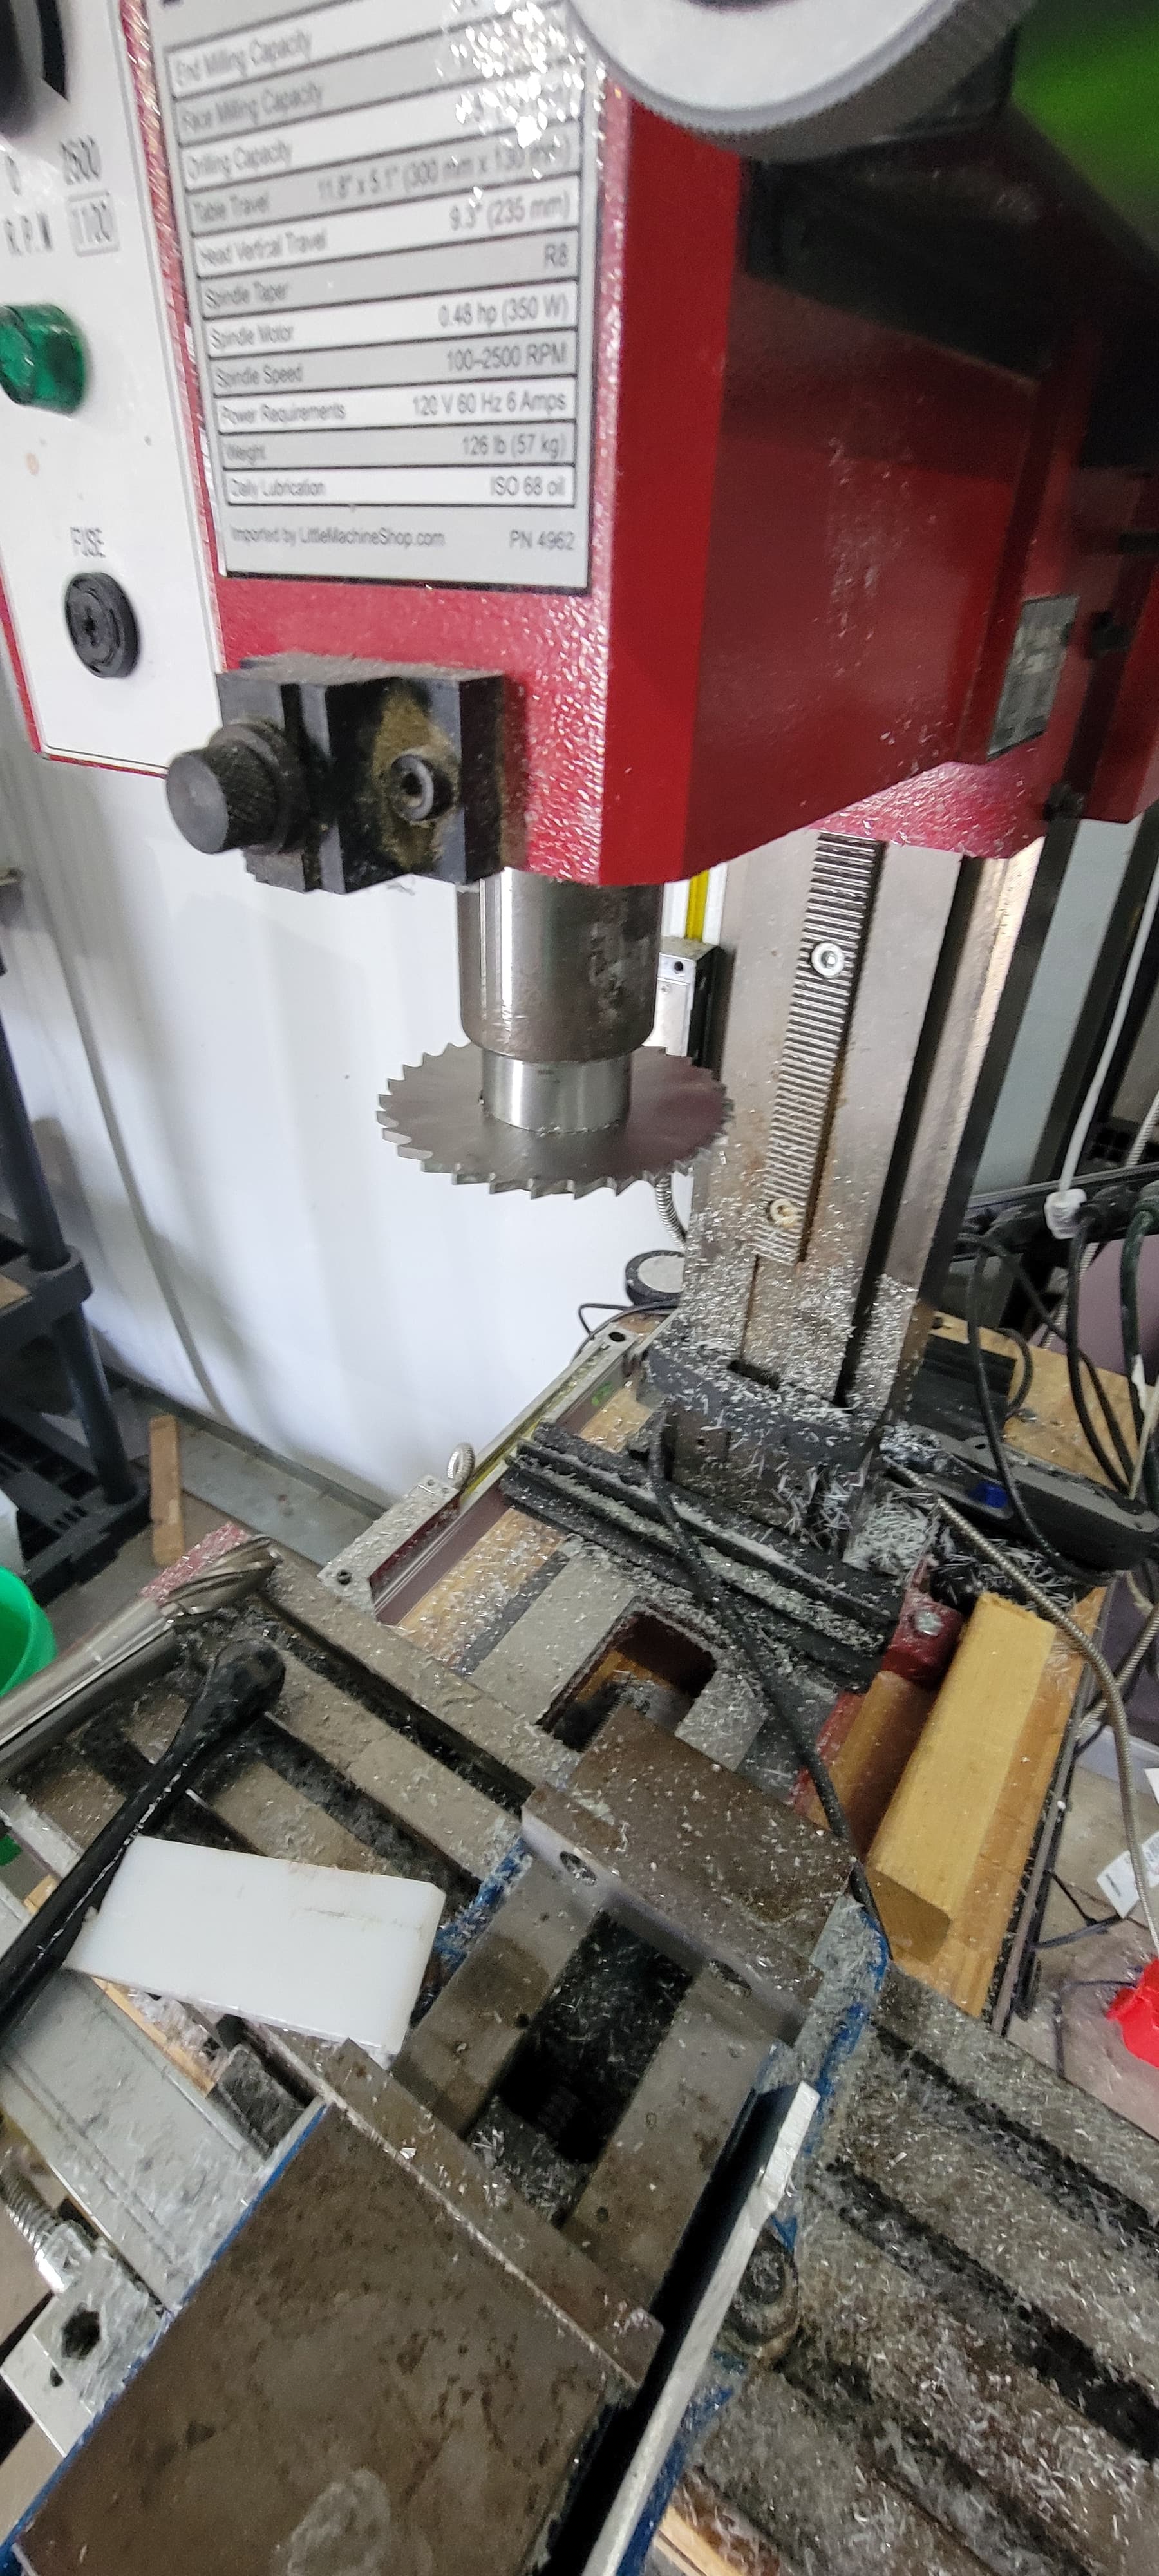
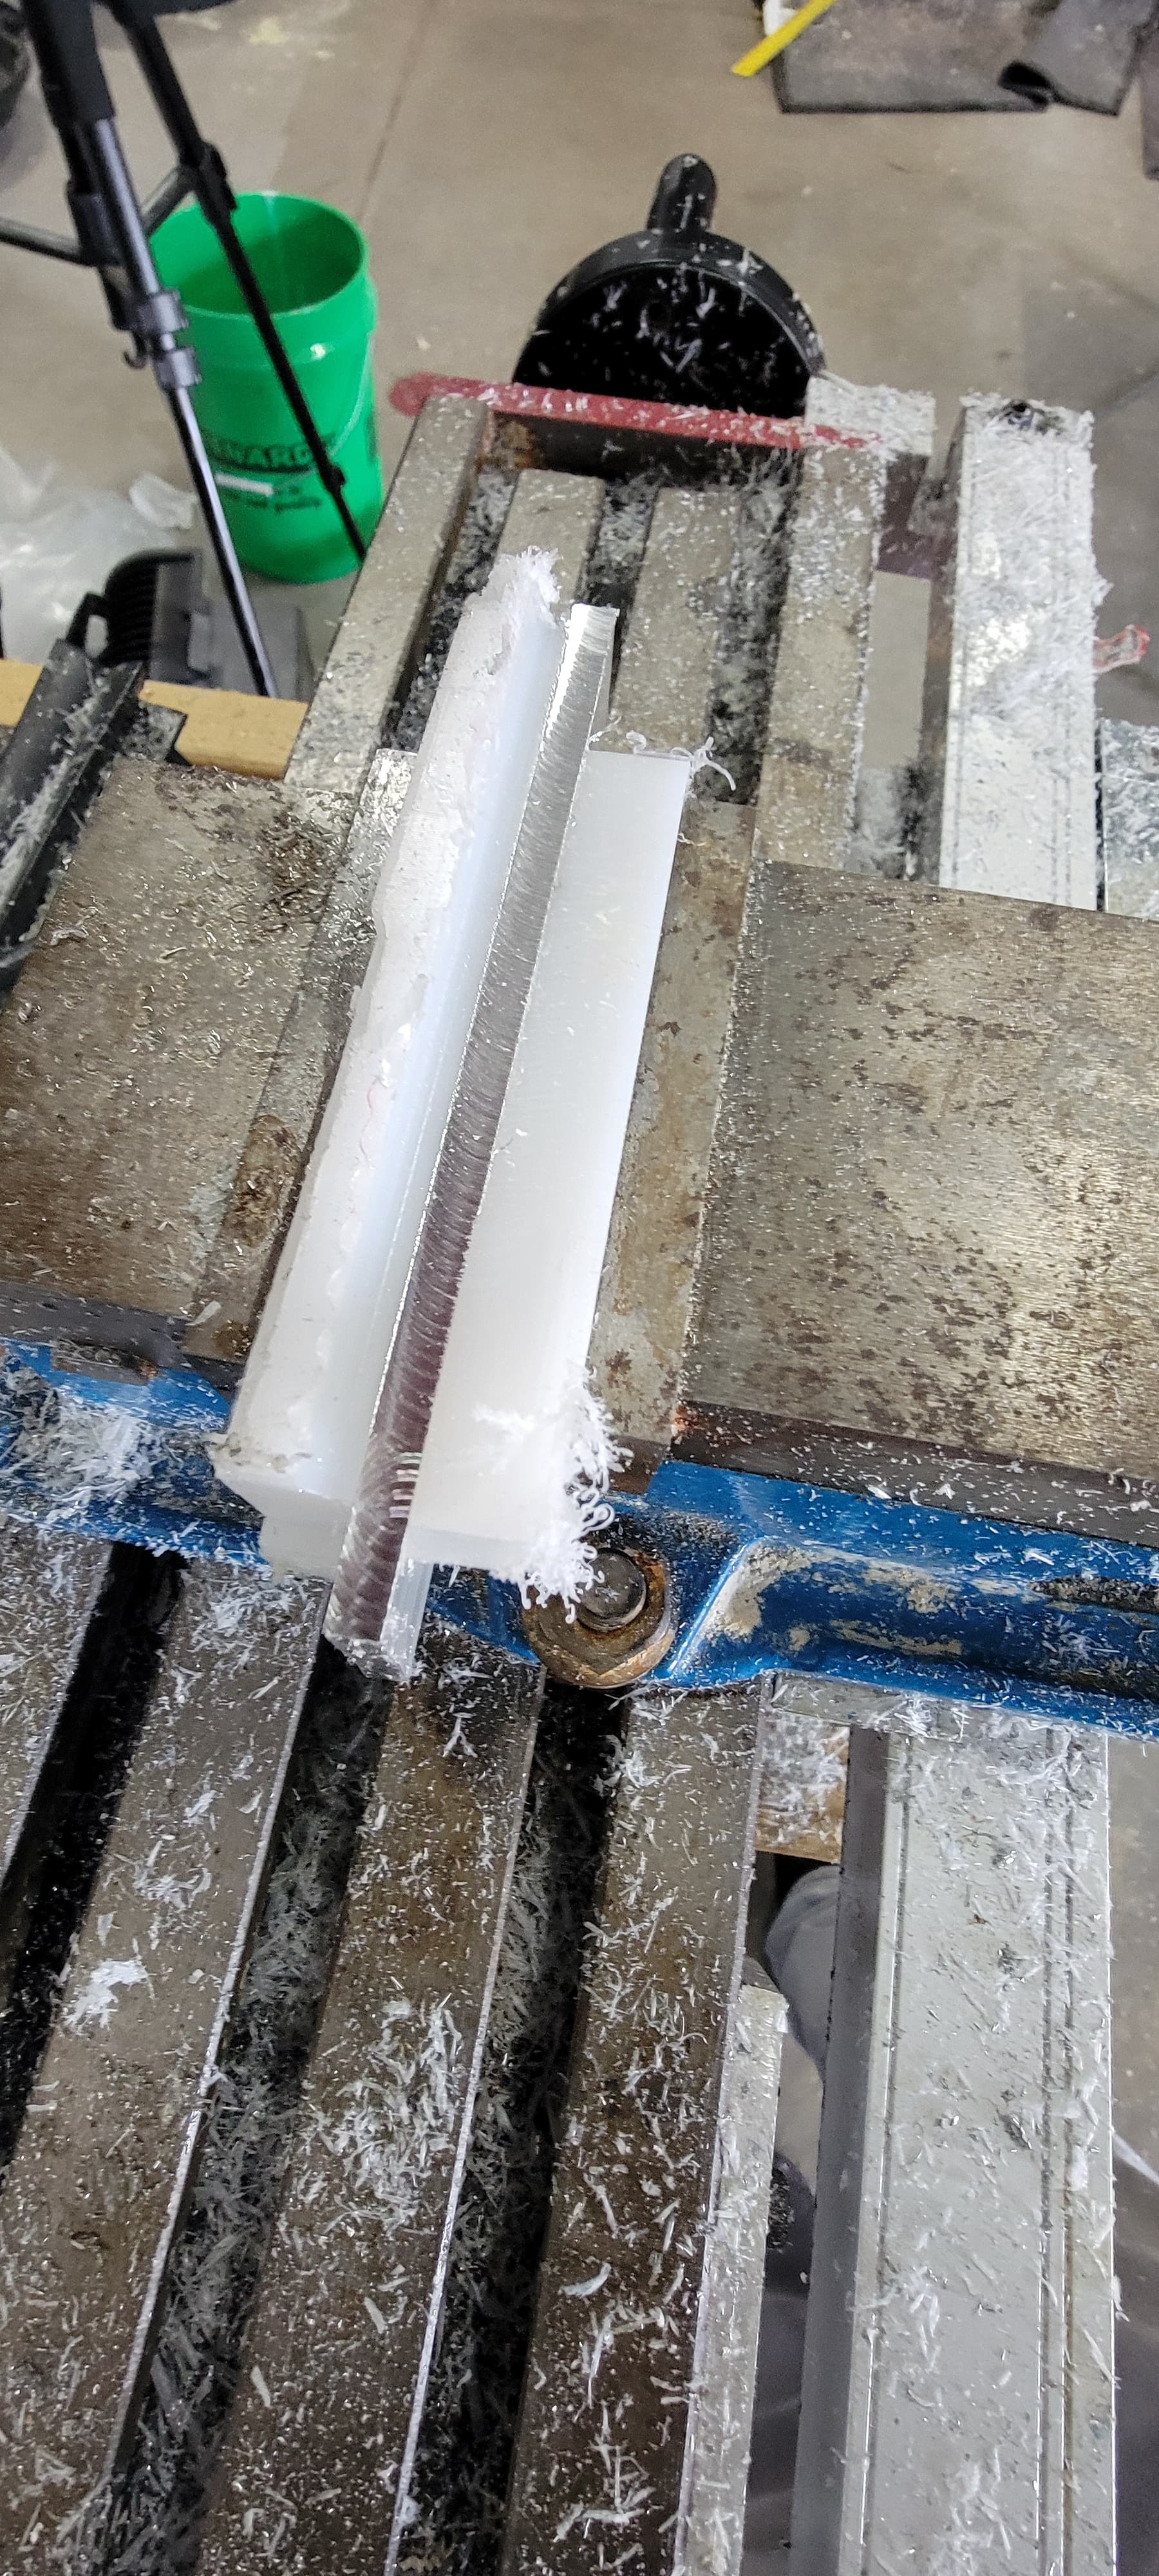
Put the dimensions into a right triangle calculator, discovered that the angle of the kink is 5.124 degrees. My rotary table has about a half a degree in backlash, and lacks the precision for this. I have angle blocks that can be stacked, however, the smallest increment is 1/4 degree. I can get to either 5 Degrees or 5.25 degrees. The difference amounts to 0.005 inches. I can accept that variance. Made a good part, and bent it backward. My scrap pile keeps getting larger and larger.
So, I started over, made the blank, and got a little too aggressive with the cut, and the mill jammed up, blowing the mills fuse and ruining the blank. I decided to call it a day.
Wednesday, I stayed home. I have been avoiding Wednesdays at the hangar since an unpleasant experience.
Yesterday, I cut a blank, and ruined it, and started a new blank. Right at the moment, After three days I’m 0 for 4. The part is $15, with $25 for shipping and handling.
Should I just pony up for the part and get on with the build, or finish the part?
I’d cut it close-ish with a bandsaw and finish with the angle sander or file.
It’s really about being 71 and feeling the pressure of old man time. The goal is to build and fly.
2 Likes
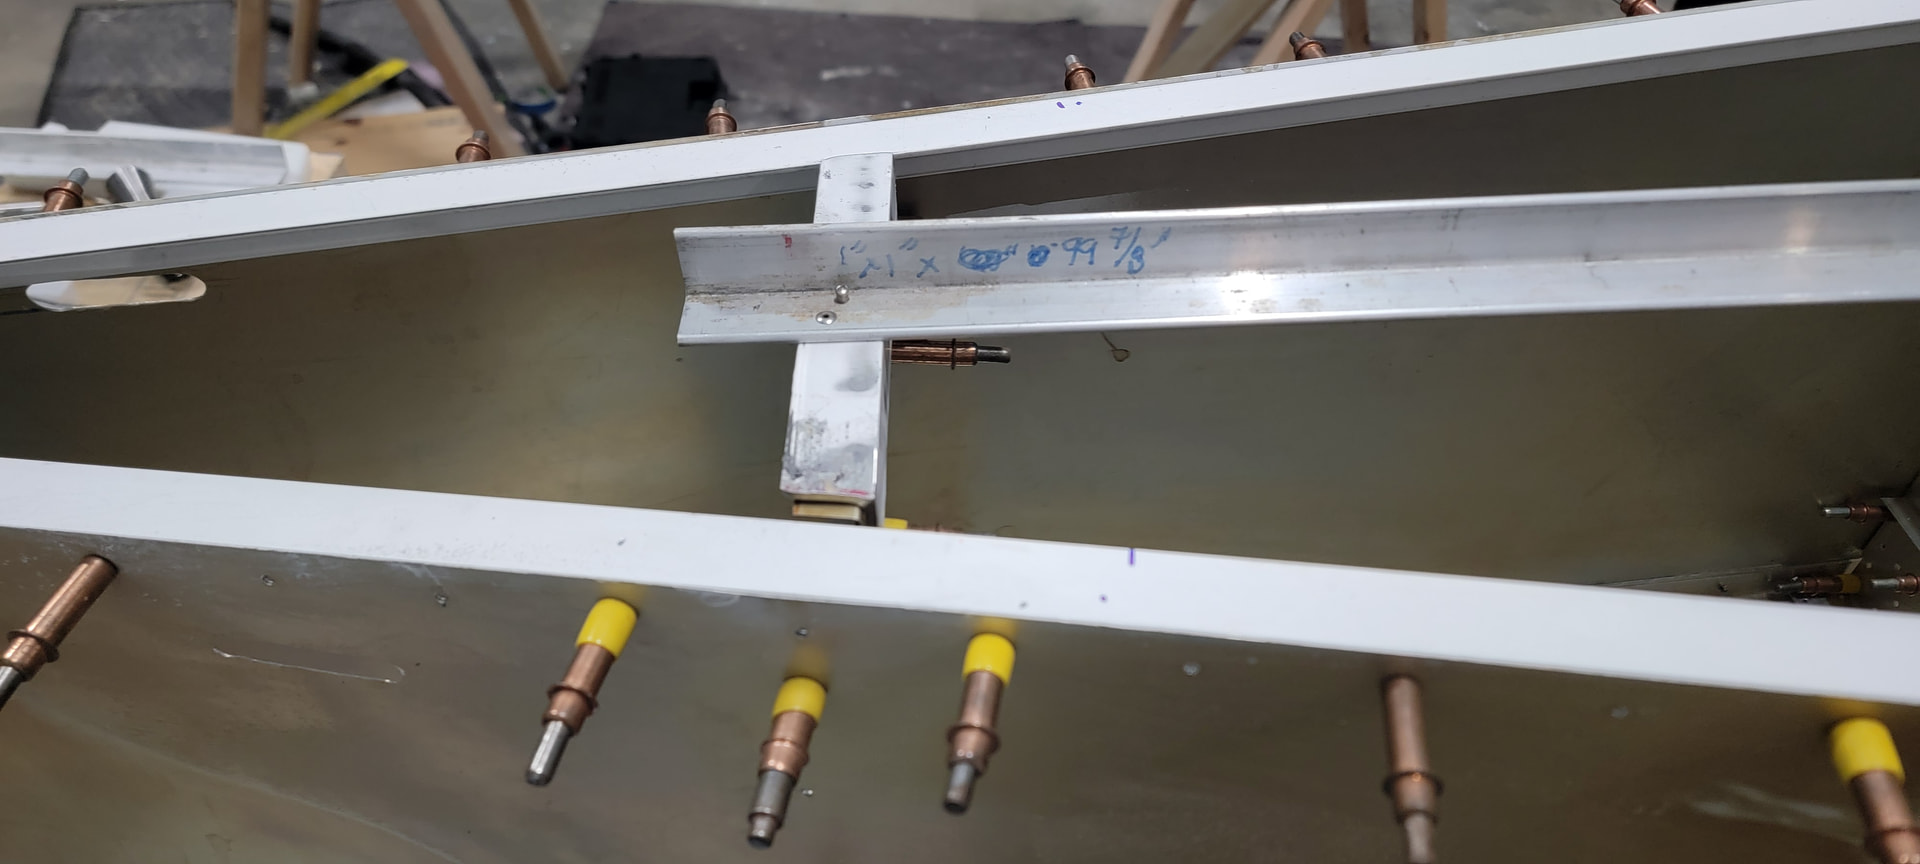
I woke up at 3:00 AM the other day, and my mind was working hard. I seem to do this frequently, most often regarding something Sonex related. Such as, forward hinged canopy, 2 options, etc. I usually discard them in the end as being too much extra work, too much extra weight, and little or no additional utility. Saturday’s solution was a jig to insure the aft fuselage is square and true. As a result of a longeron mistake, I have a considerable surplus of 1” angle stock. I tool a long piece of angle, added some crosspieces. I riveted them together, using a piece of tool steel taken from a scraped die as a corner block to insure the angles are square and checked the results with a large machinists square.
This shows the Jig in place, The angle abuts against the front of the 2nd lower crosstie and the 5th lower crosstie.

5th crosstie
2nd crosstie
The 2nd and 5th crossties were purchased from Sonex, and have a predrilled hole for the lower skin at the center of the crosstie. Line up the vertical side of the longitudinal angle with the center of that hole and the jig is centered.
1 Like
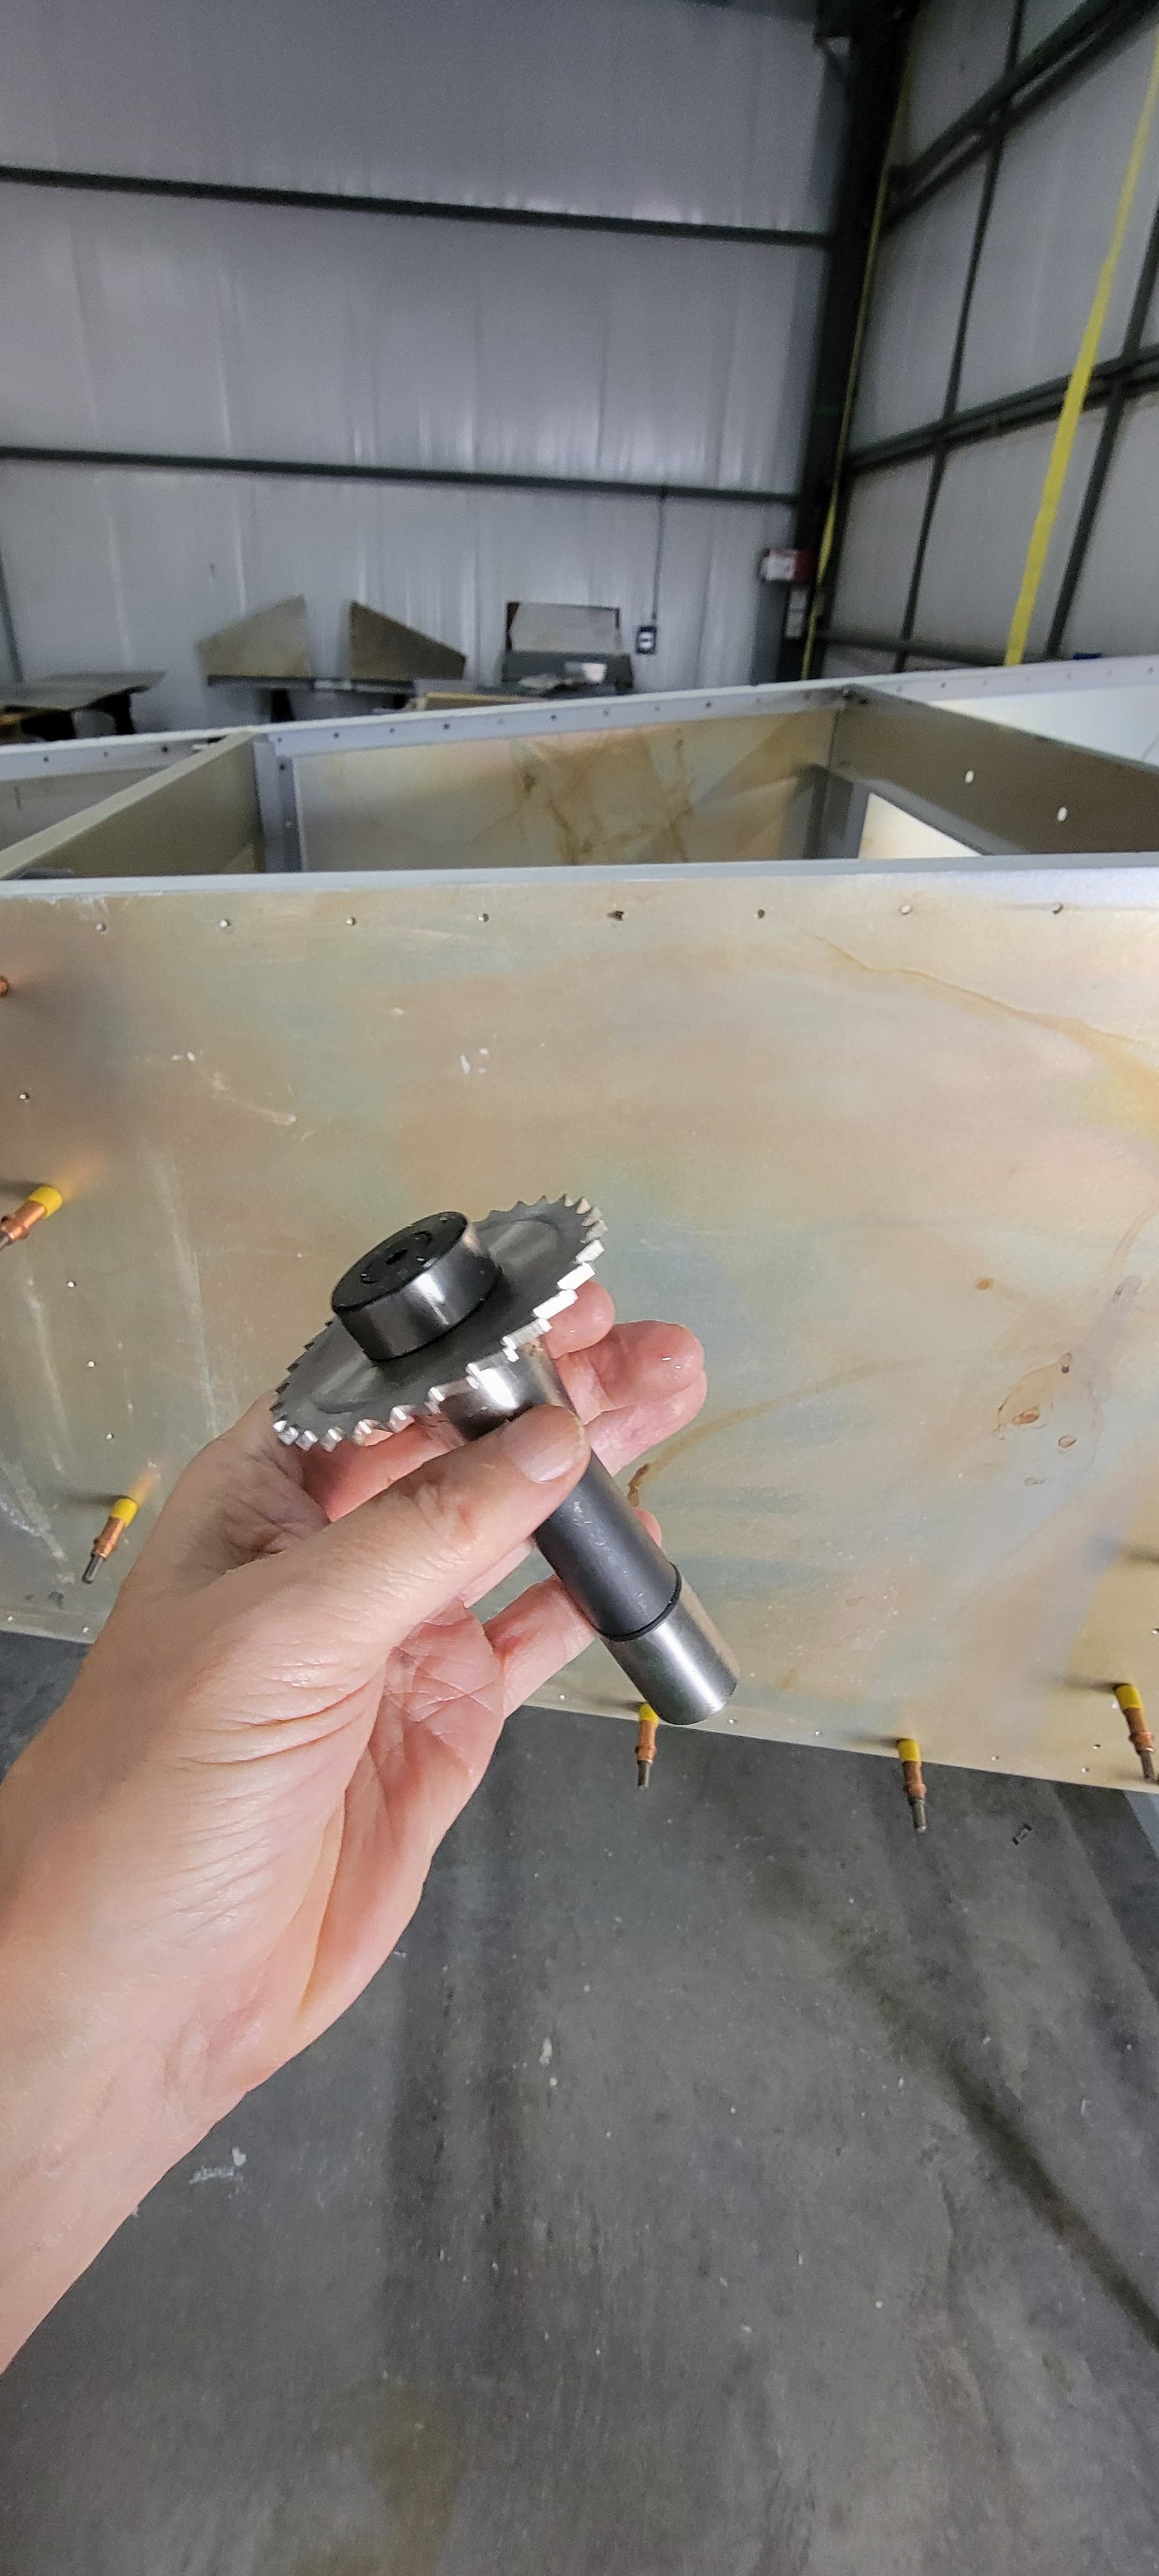
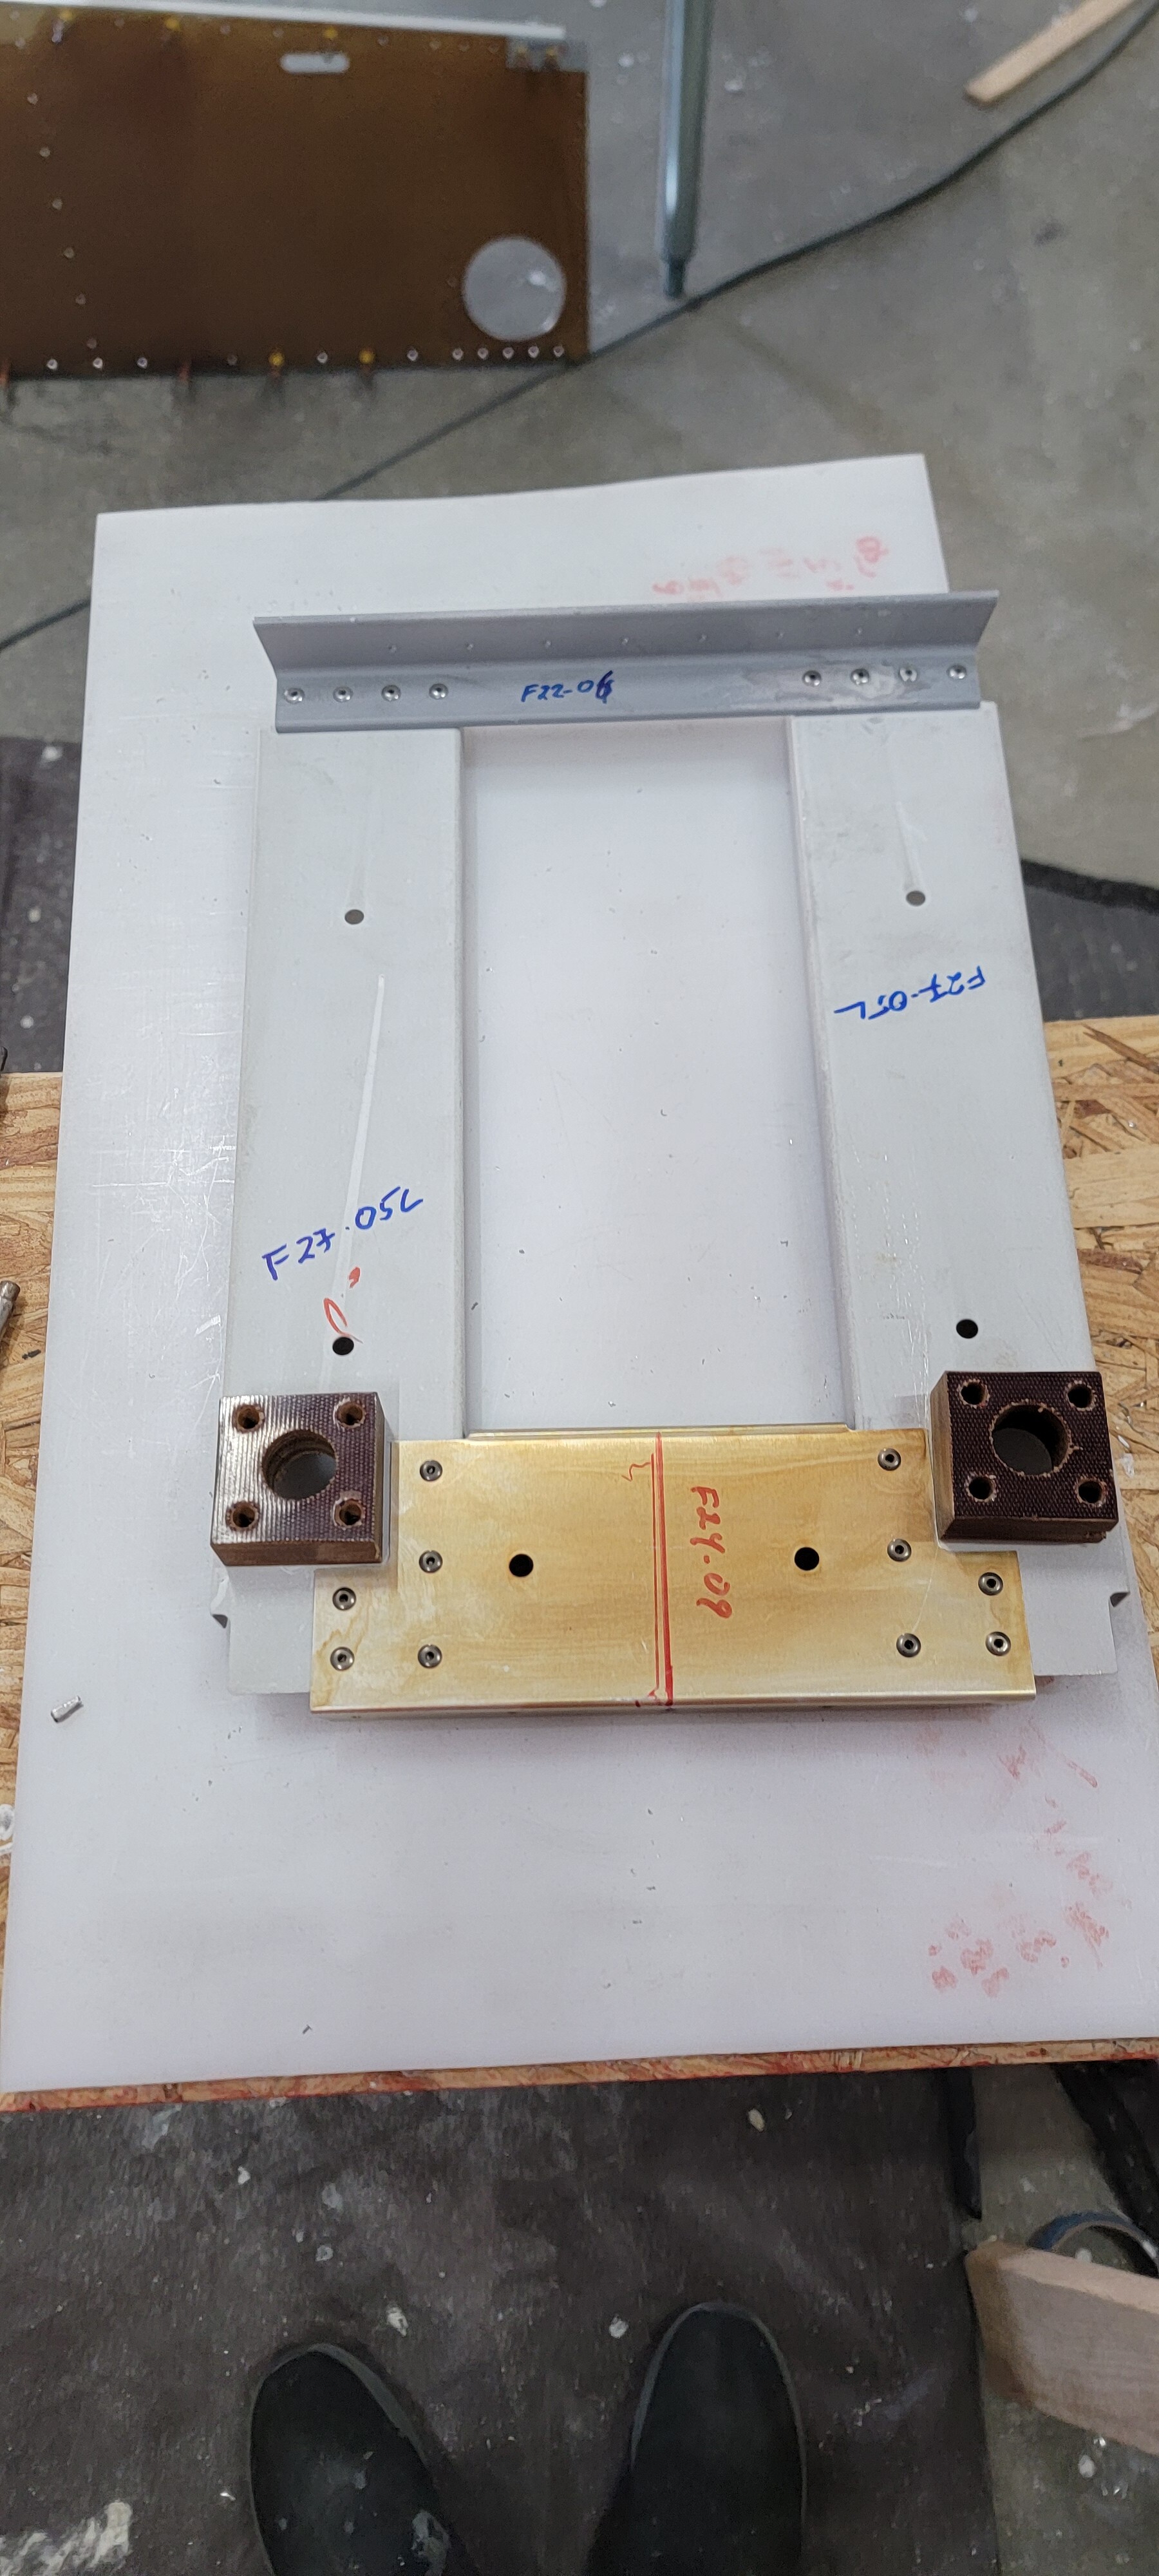
I’m just about out of excuses to avoid pulling rivets. I have the tail-cone box close to ready to rivet. Just one, well actually two small items. part # F22-07 Spacer.
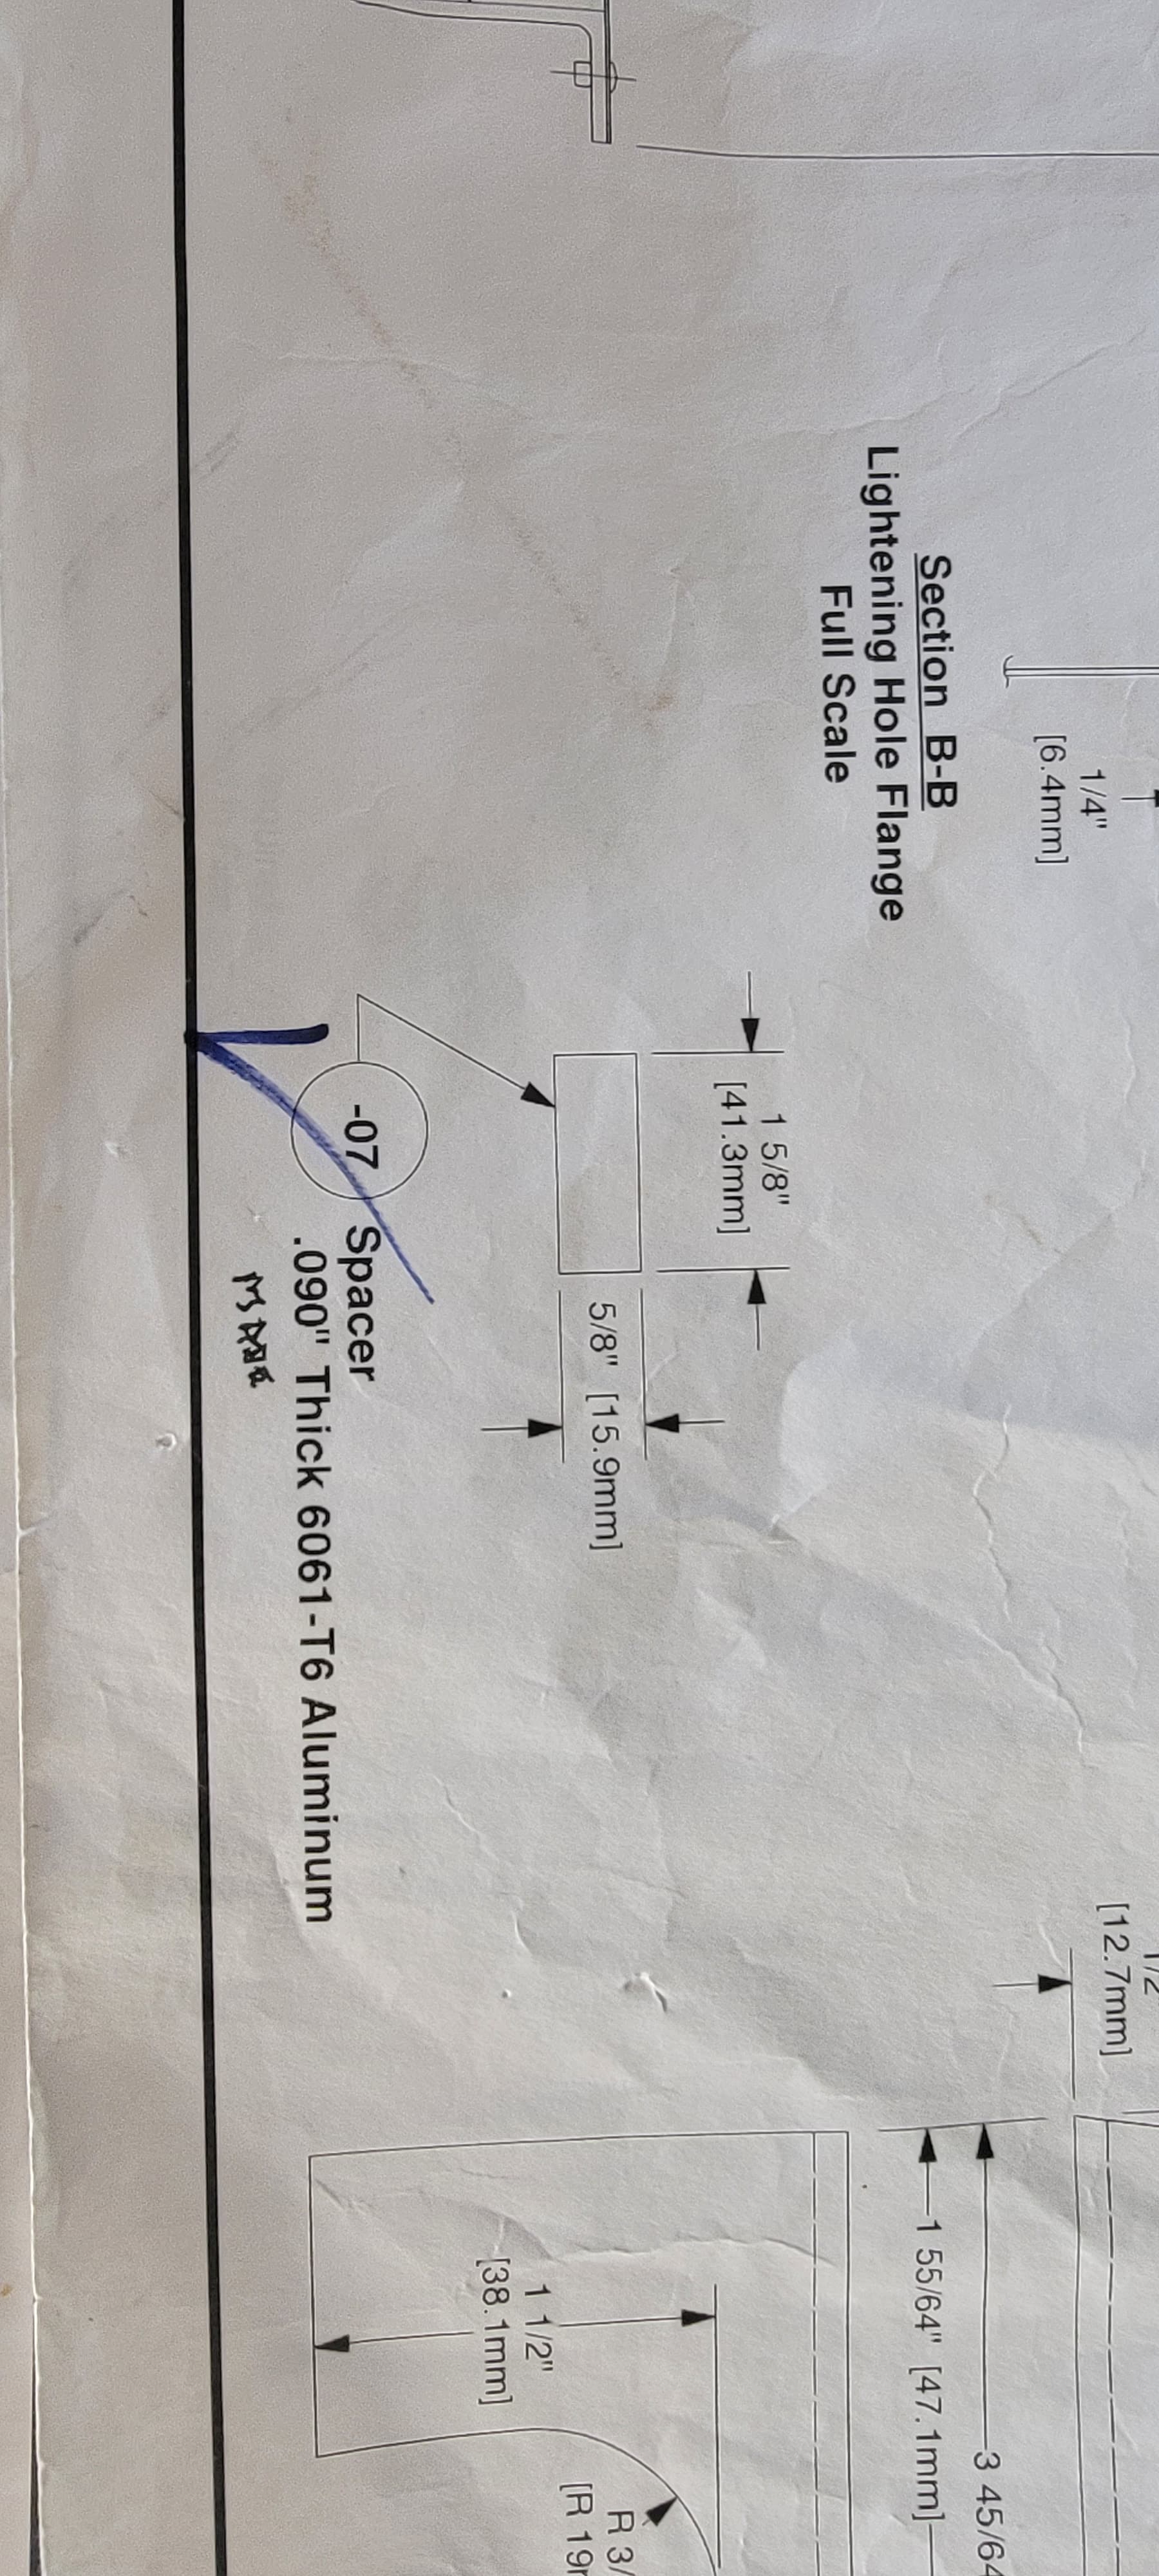
The plans say they are used on plans page F21.
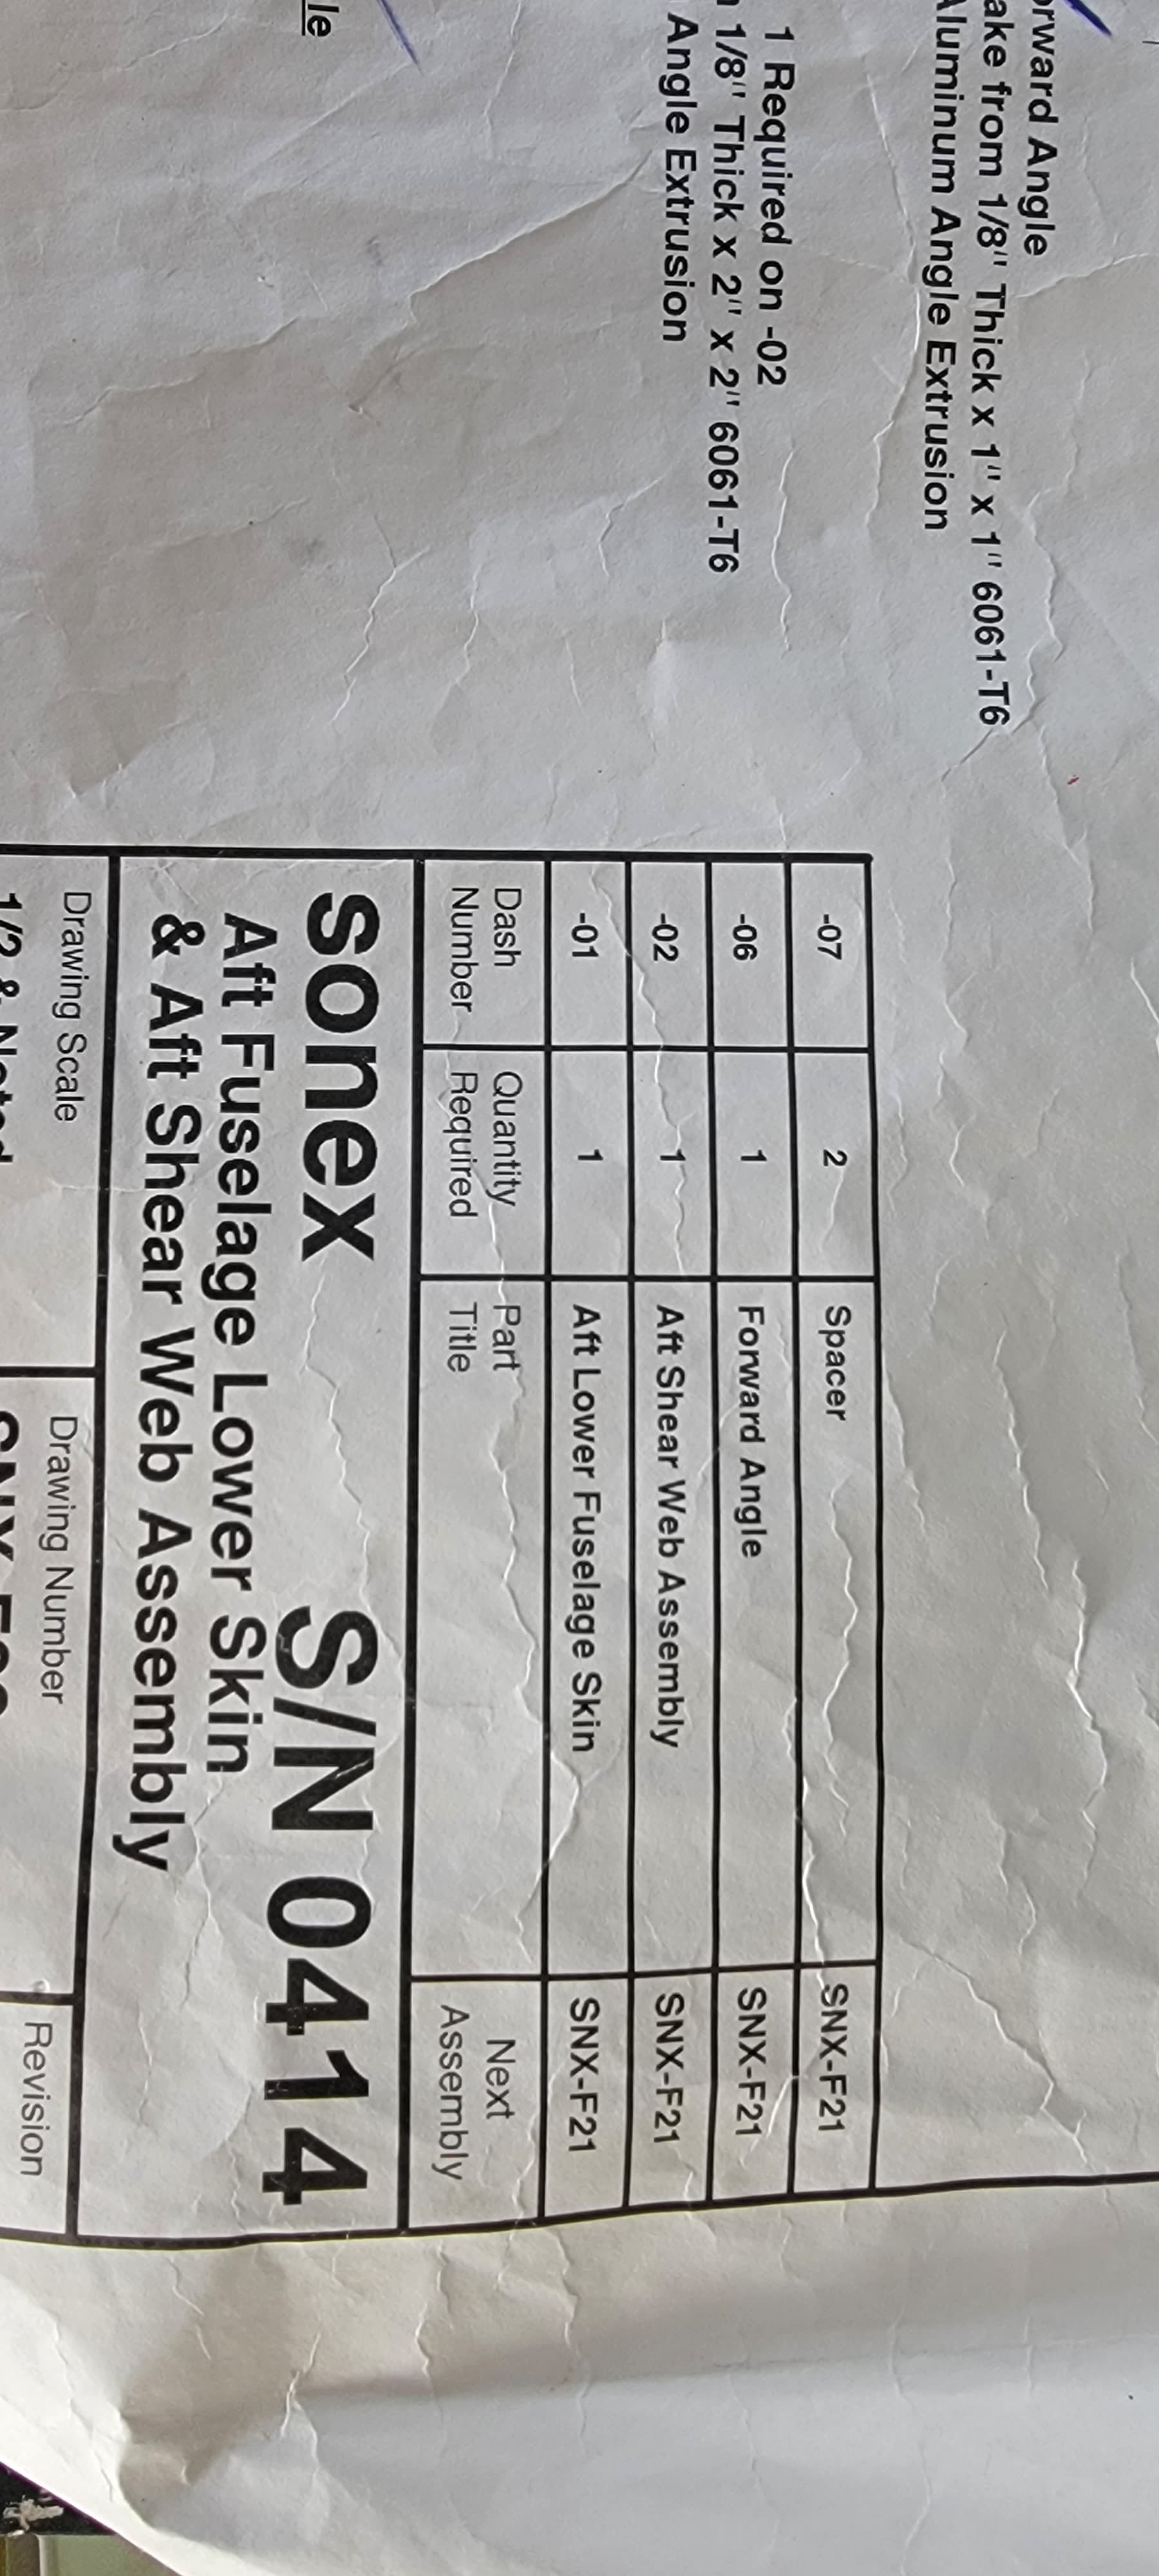
only, I am unable to find any mention of them on F21. I checked the current plans revisions. Nothing there.
The great Sonex customer service seems to have completely disappeared. I sent an e-mail on another question to Sonex Support back at the end of July, no response to date. I had a parts order which was lost in shipment. I called and talked to them a couple of times, then nothing. I ended up repurchasing the parts.
Does anyone know know where they end up?
1 Like
I don’t have my copy of the plans in front of me but I’m thinking that it goes between the lower joiner bracket (the T shaped one) and the floor. This takes up the gap since the plate sets on top of the angle. It goes where my finger is pointing but isn’t installed in this picture.
Also, I’d wait on riveting the floor for as long as possible. It’s nice having access to the tail cone from below. If it’s that spacer it wouldn’t get riveted until both floors are installed.
1 Like
It’s been a long time for me but I think ampzapper is correct.
Checked my plans, precisely what I was looking for. Thank You.
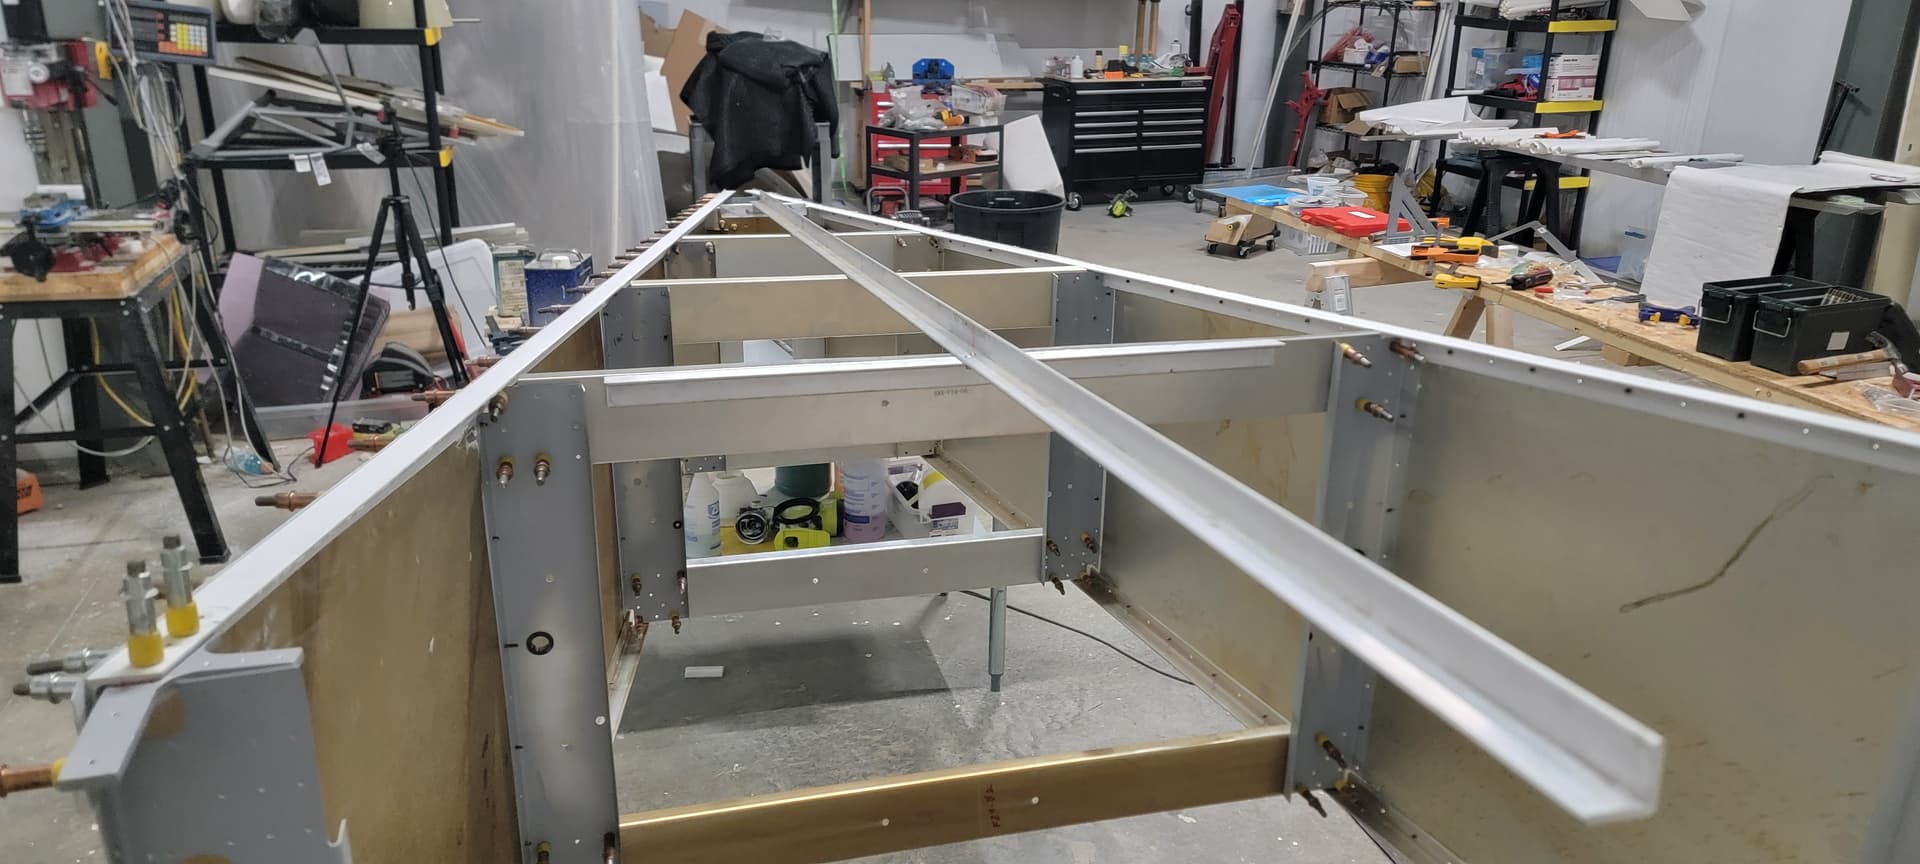
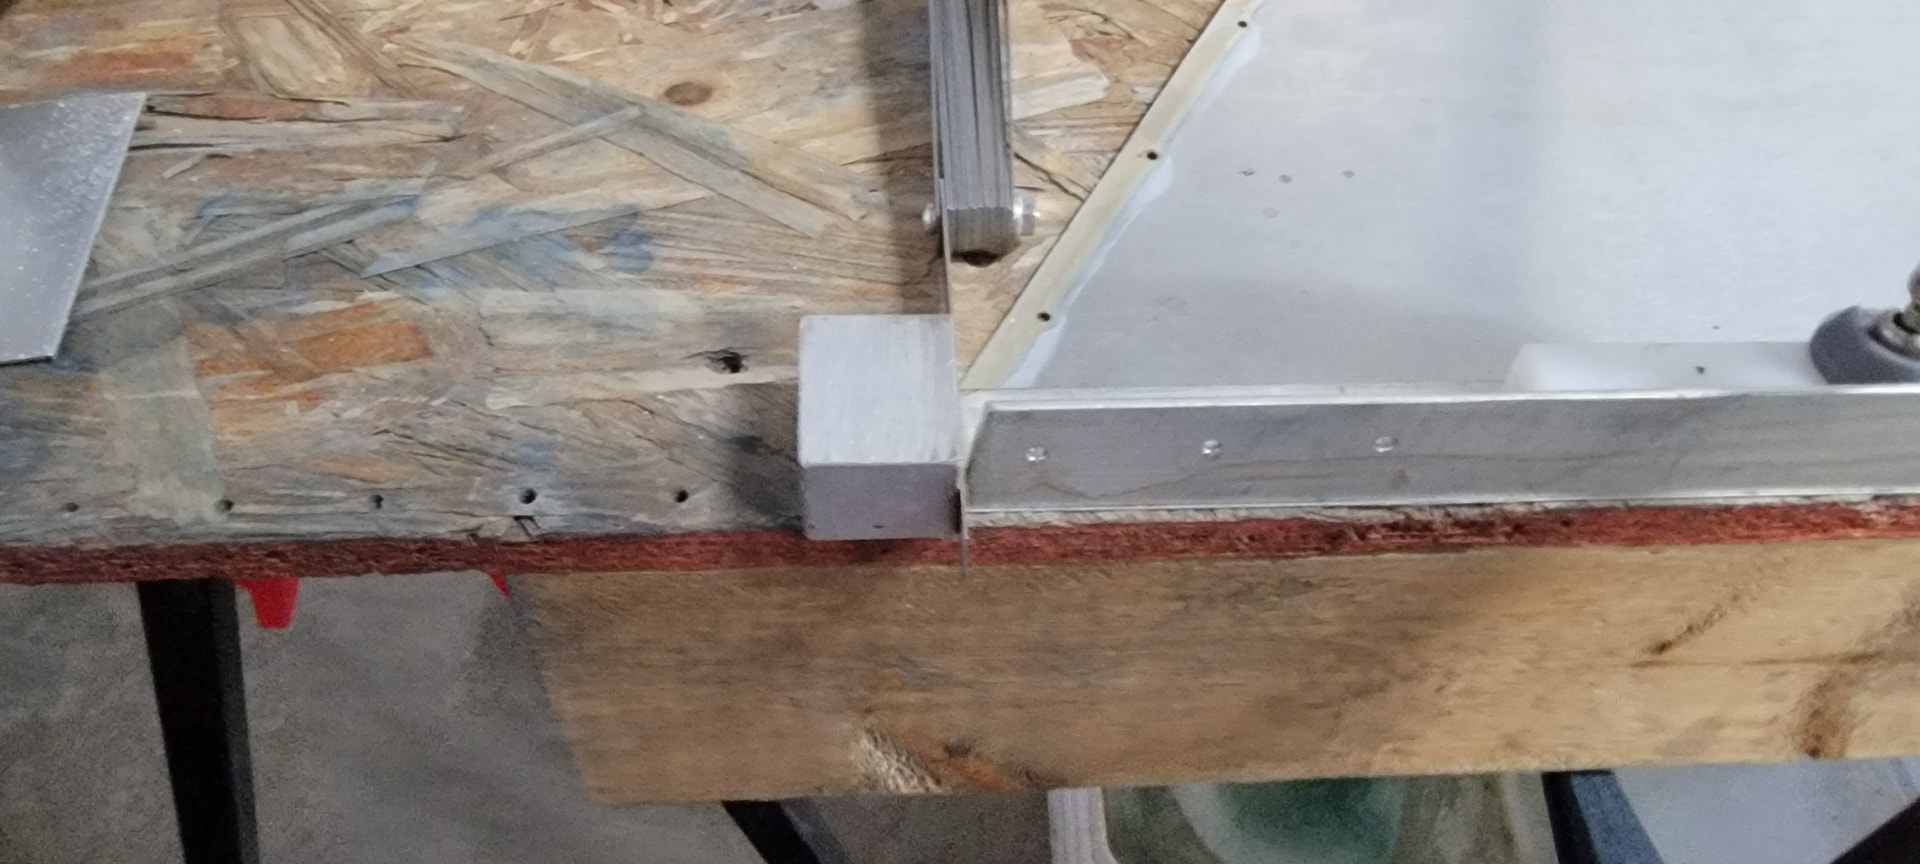
Time for an update. The aft fuselage assembly. I followed the plans to cleco the aft fuselage side panels together, mounted the side panels in the jig and drilled out and clecoed the crossties. I then departed from the usual process by removing the clecoed square formers, clamped on a corner block to make sure everything was square and riveted them together. The corner block is a piece taken off of a scraped press die.
The longerons were match drilled to the skins.
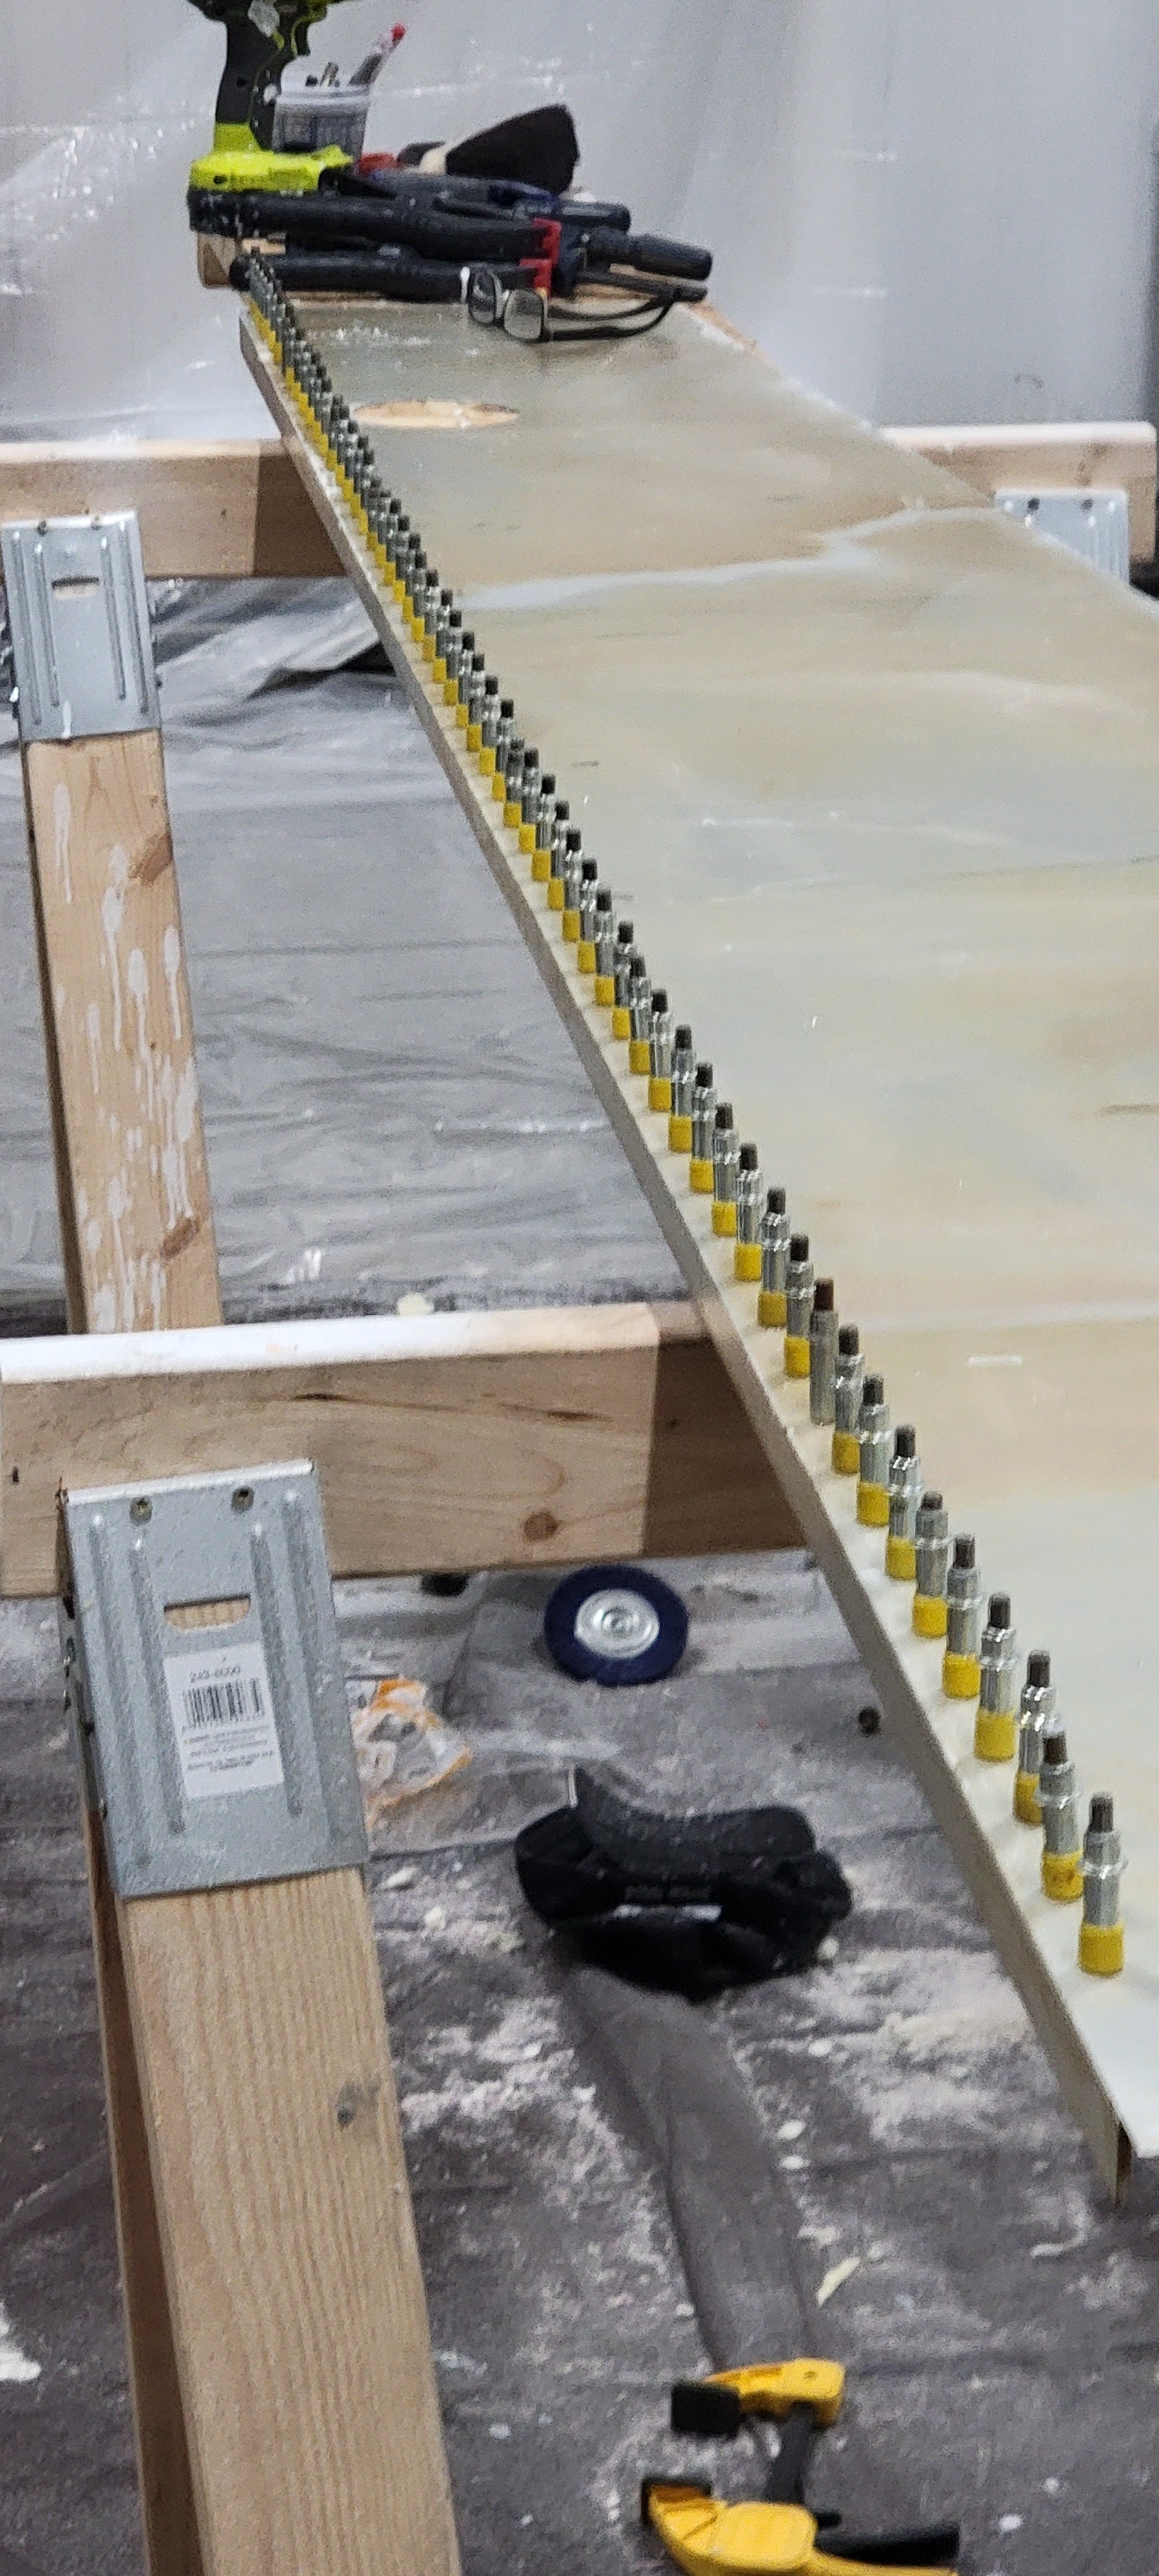
The basic tub was clecoed and a jig to square to the centerline was made and used.
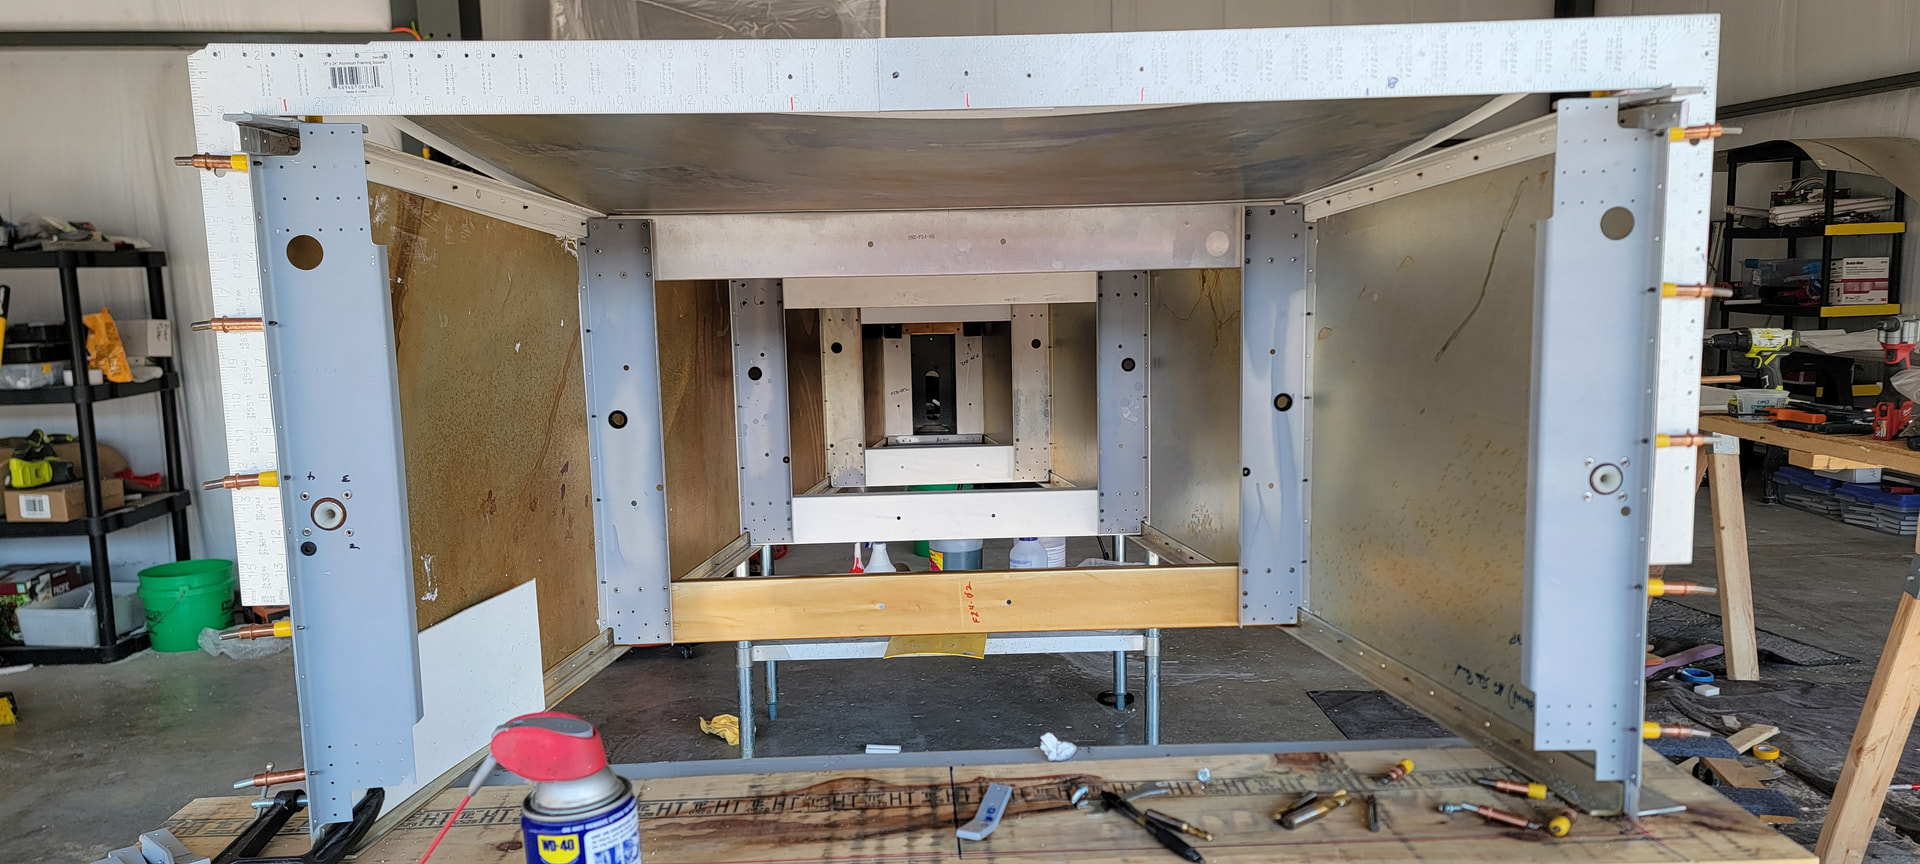


The forward and aft end parts were clecoed., the bottom skin fit like a glove, was fitted, match drilled with pilot holes and clecoed. Next the aft web was fitted, match drilled and clecoed. Since the longerons are not riveted, I removed them in order to match drill the turtle deck skins.
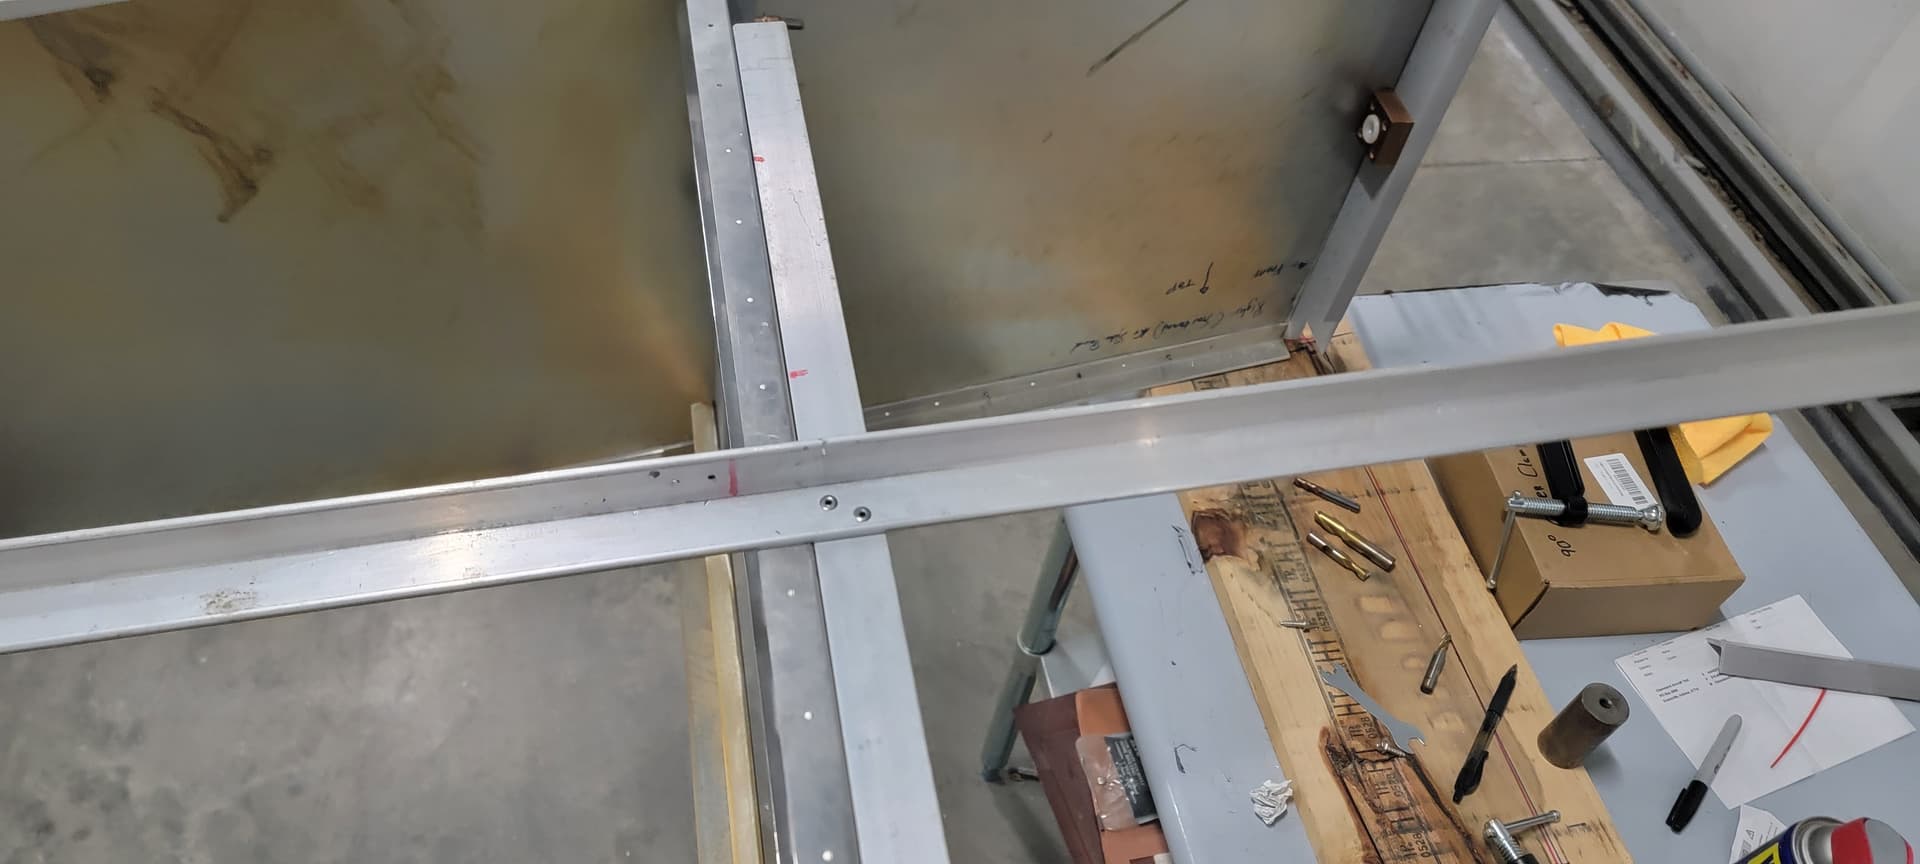
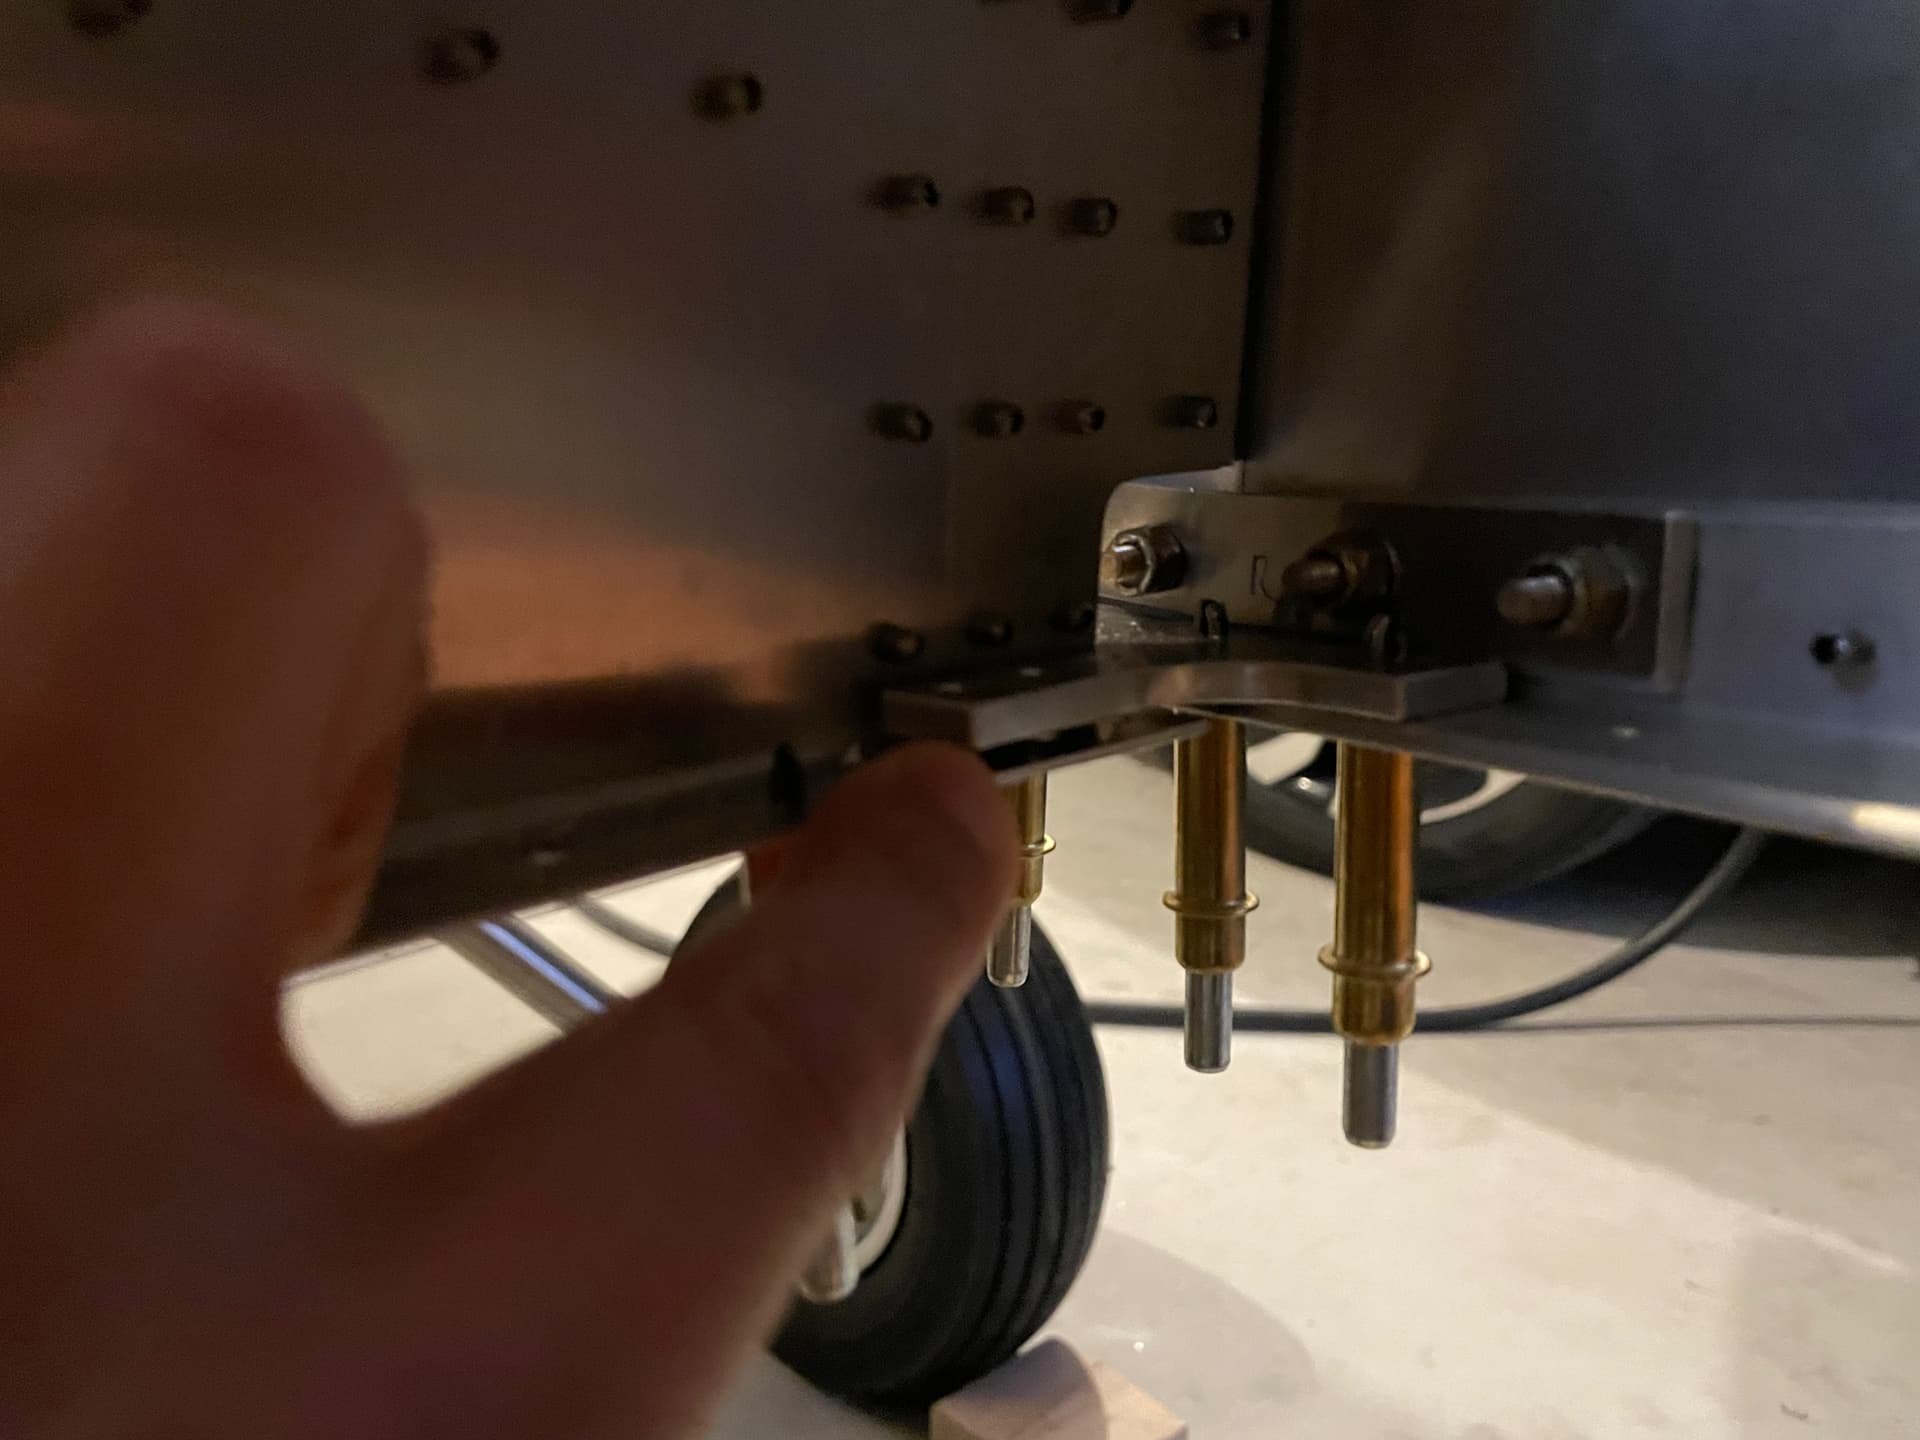
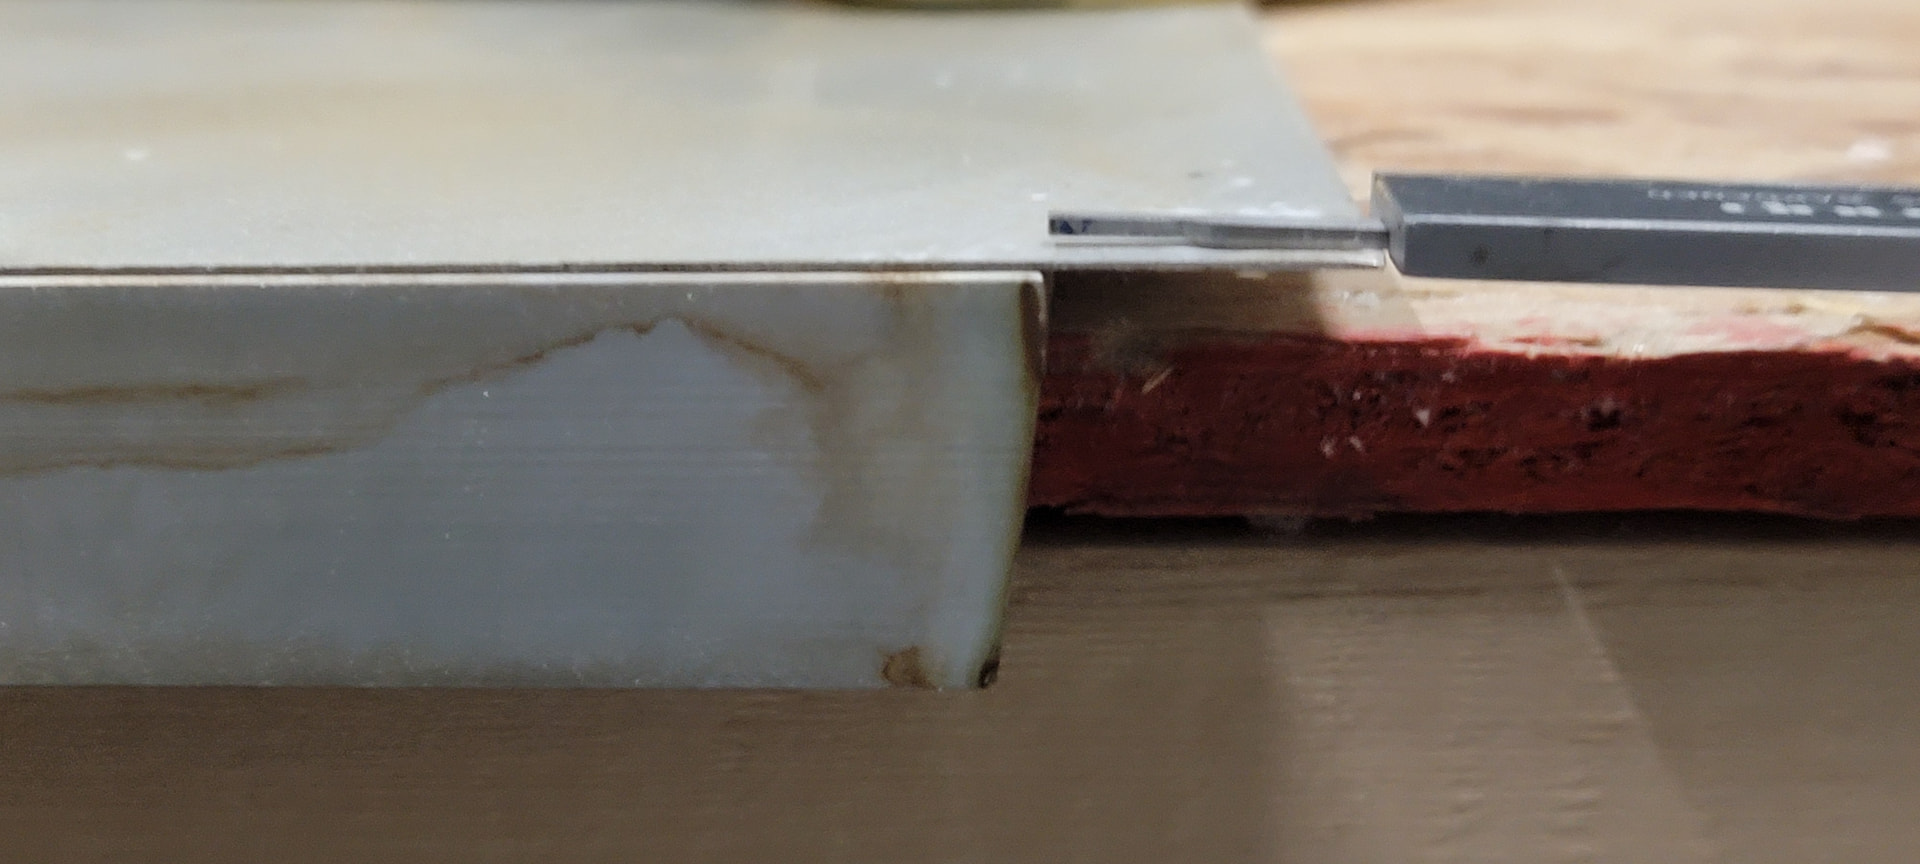
The plans called for a 1/32” setback of the longeron from the forward edge of the skin. Used a smaller block abutted against the edge of the skin, added the 0.032” feeler gauge against the block and resting on the skin, abutted the longeron, clamped everything down and match drilled. I did a test installation and everything fits very nicely. At this point, I decided to install the rudder cables and trim cable housing before installing the turtle deck. I purchased the pre swedged rudder cables. They fit through the black plastic snap rings, but they will not fit through the fairlead nylon inserts. It was a real pita. I ended up removing the aft former to remove the insert to run the cable. Coming from the QC side of machine tooling, I purchased some bright red serial numbered zip ties to help manage loose ends. The SN of each zip tie used on the airframe is recorded in my hangar (hand written ) log as well as an excel spreadsheet. When the zip tie is removed, the removal is noted in the same place and the tag with sn is retained ass part of the build documentation.
Aft zip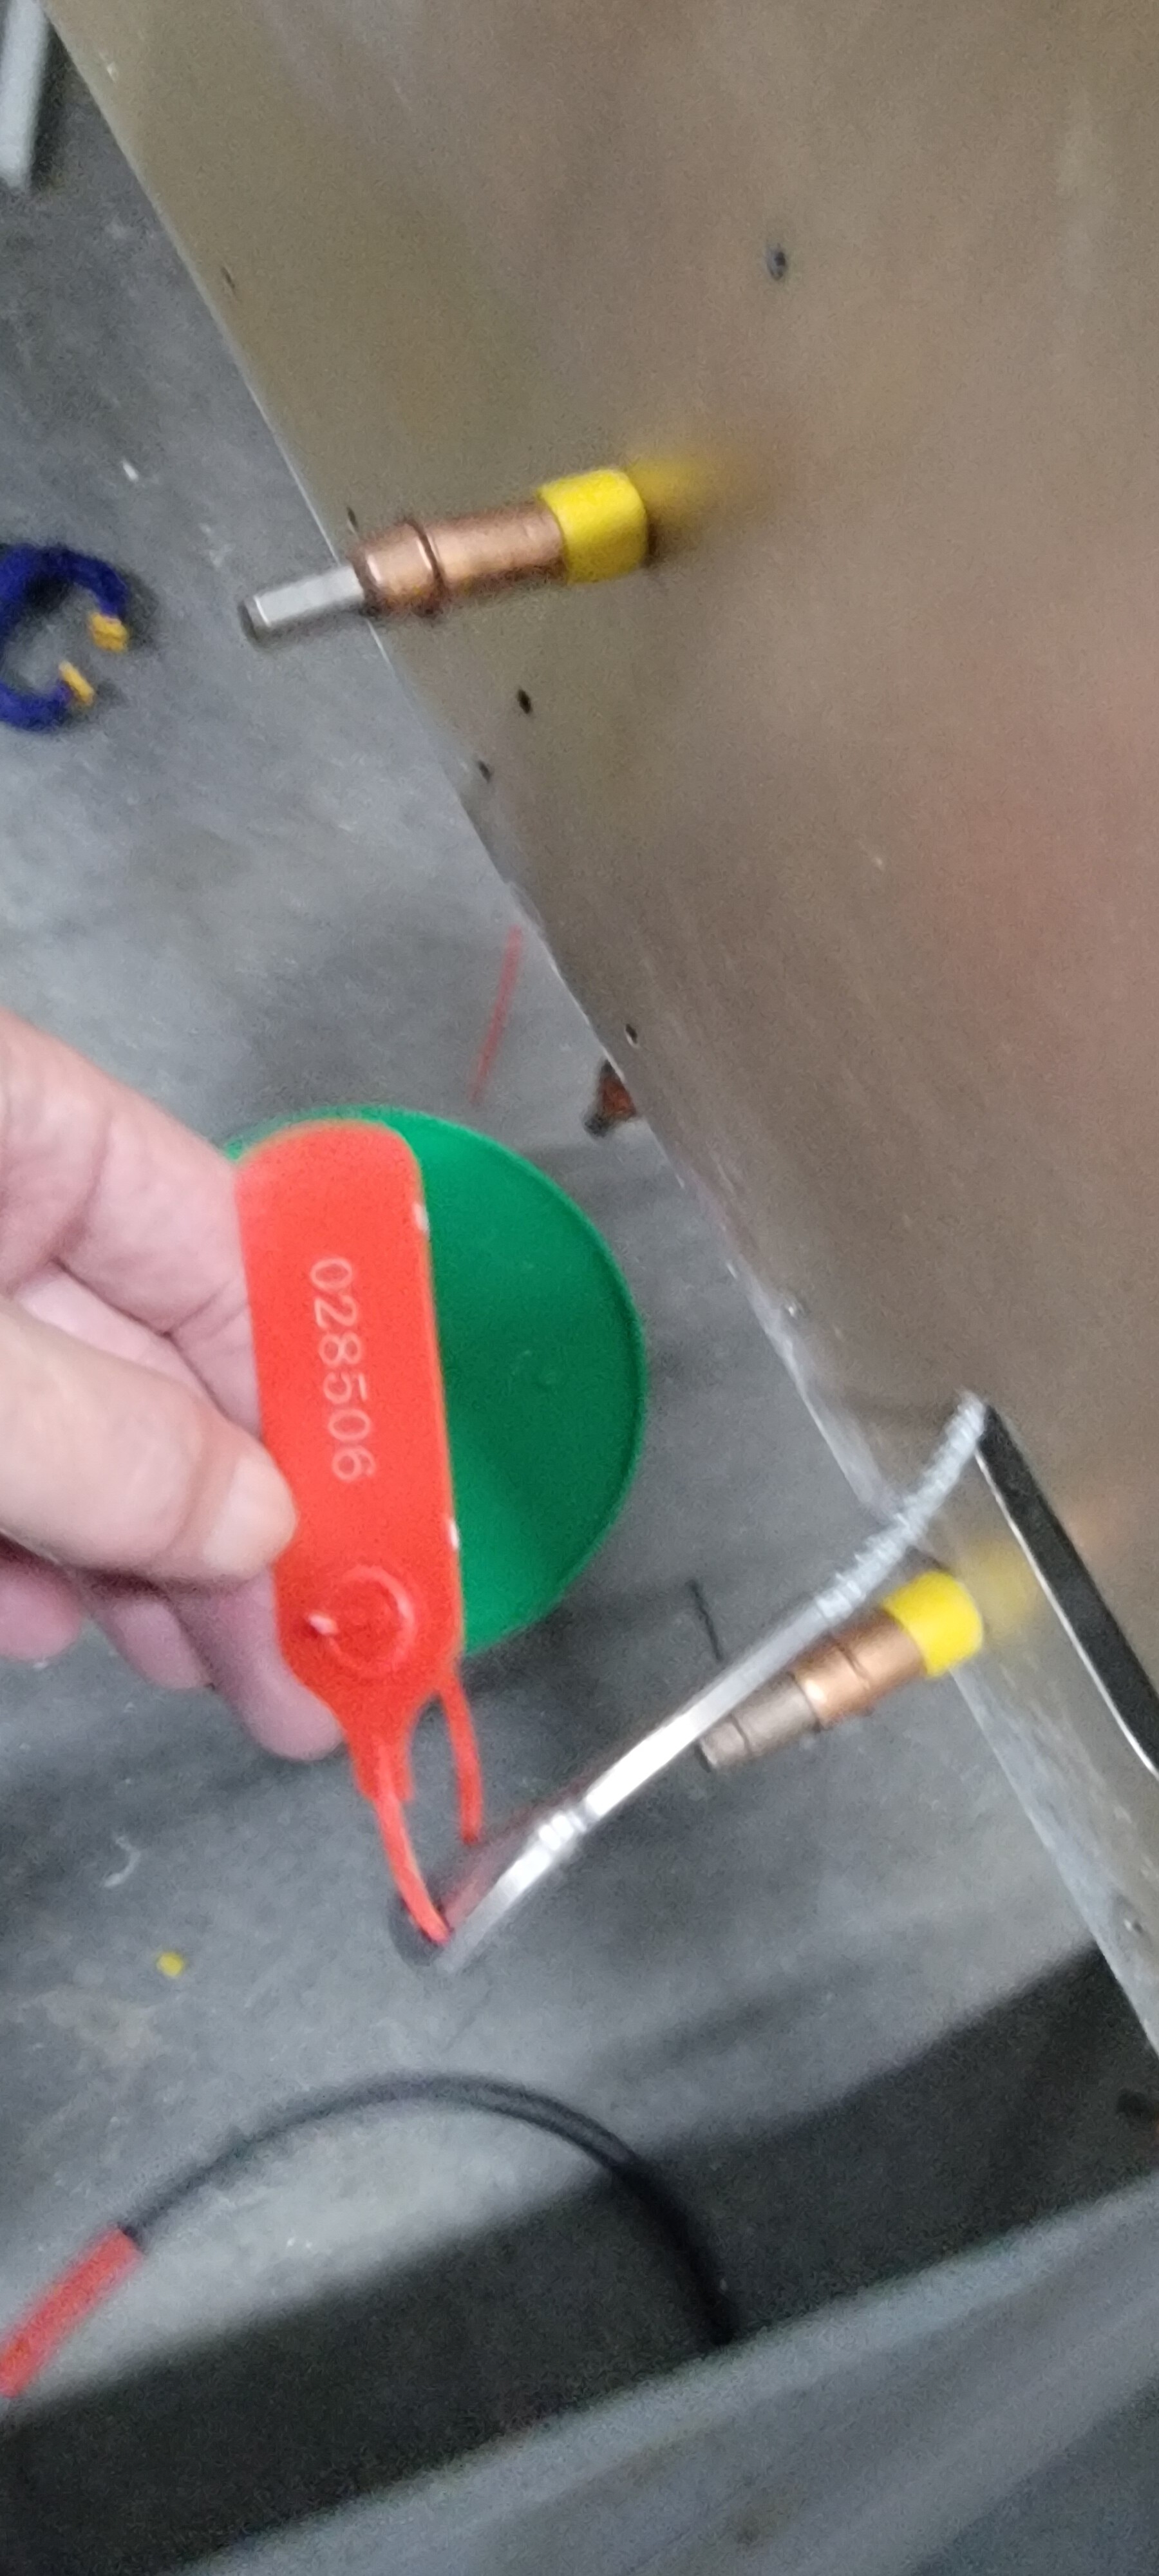
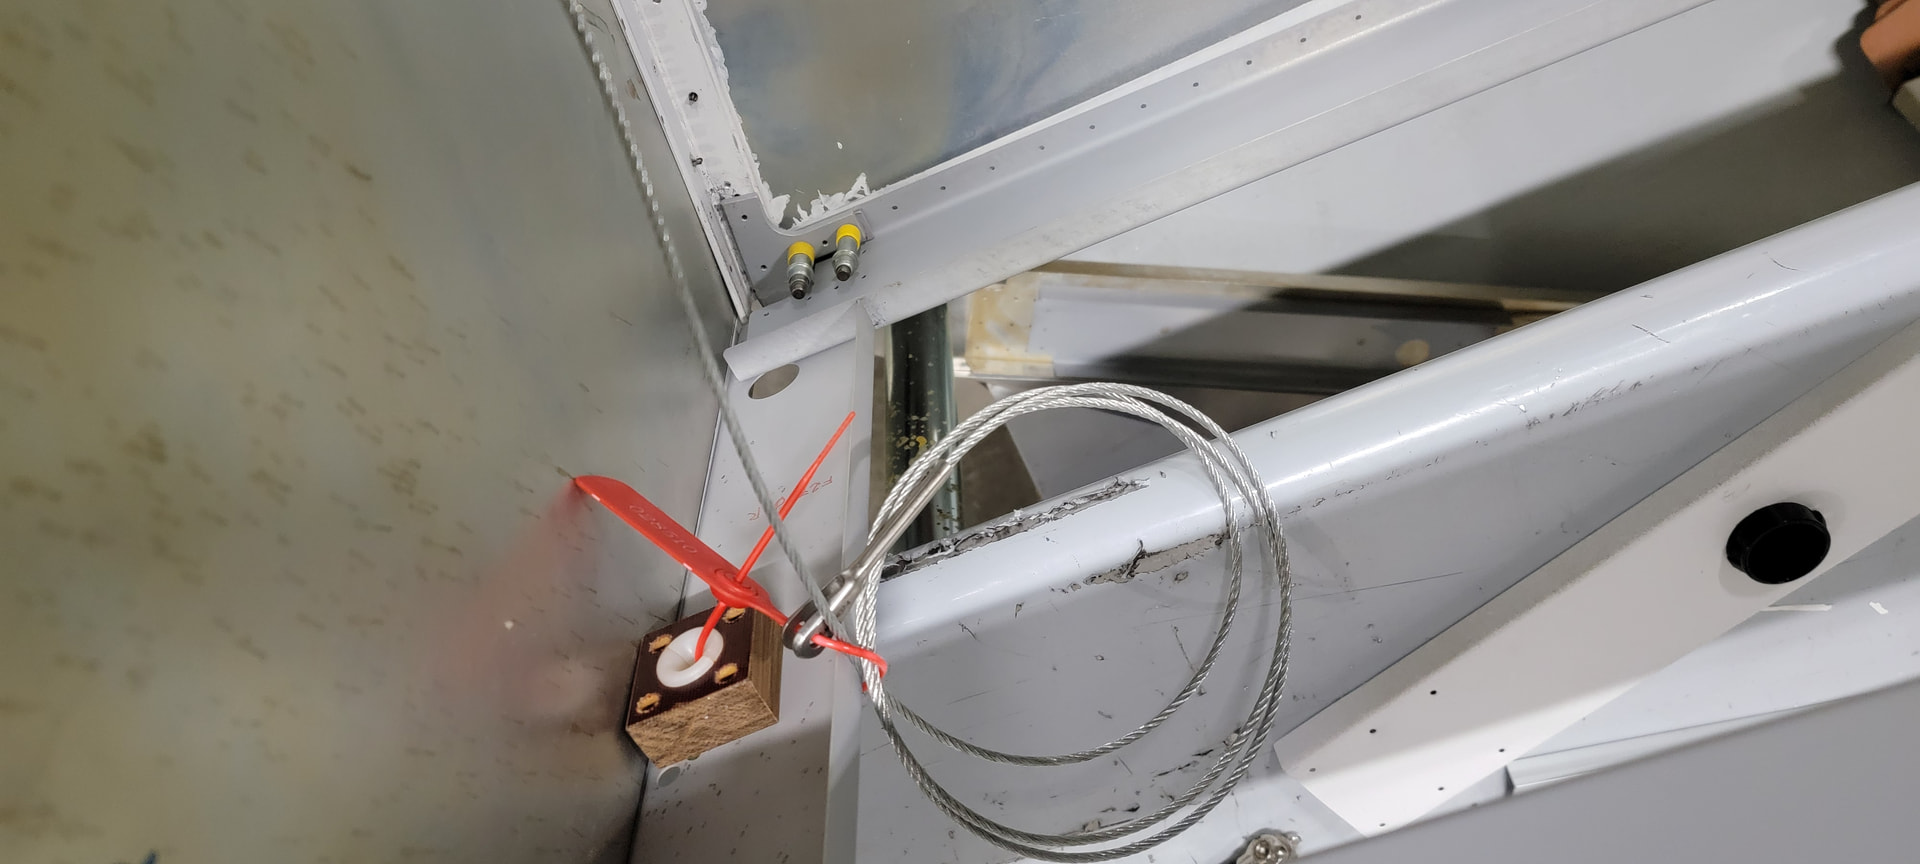
forward zip tie
Looks great! Aren’t those nylon fairleads 2-piece? It’s been a long time since I did mine.
Yes, They are 2 piece. With a stainless retaining ring that’s a real bugger to remove. I ended up removing the former from the fuselage to get the old one off.
I guess the secret is to leave out the retaining ring until the cables are run.
Yea, Gotta be careful. Them retaining rings are pretty vicious. They did a number on my right thumbnail.
All kidding aside, it’s something to add to the lessons learned.