I thought I’d start a thread to document maintenance aspects of my AeroVee ownership. I really like the engine - but it’s not the same experience as you get flying behind a Lycoming. I’ve heard several times on the old forum that the VW is an engine for people who want to work on it, and the other engines are for people who want to fly. I believe most of the people saying that were repeating hearsay, but I’ve also heard it from some high time VW guys like Mike out by Boston. There is some truth to the statement, but despite all the maintenance I’ve had to do we have managed to average about 120 hours a year, including the phase 1 flying. We have been all the way south to Knoxville TN, all the way north to the border of Wisconsin, we have many hours of flying at night, and we trust the engine. But when it talks to you, then you need to knock it off and work on it. The engine is easy to work on and the parts are cheap. That is the beauty of the engine. Performance wise, it was really low performance in the beginning of our journey and we have made some modifications that have changed it for the better. A lot of that stuff I’ve documented in the forums. For the new folks reading this, the most important consideration in flying behind VW power is weight control. You have to keep the empty weight down. It’s a great motivator to control your own weight, something which is a bigger struggle as we age. At least for me it is!
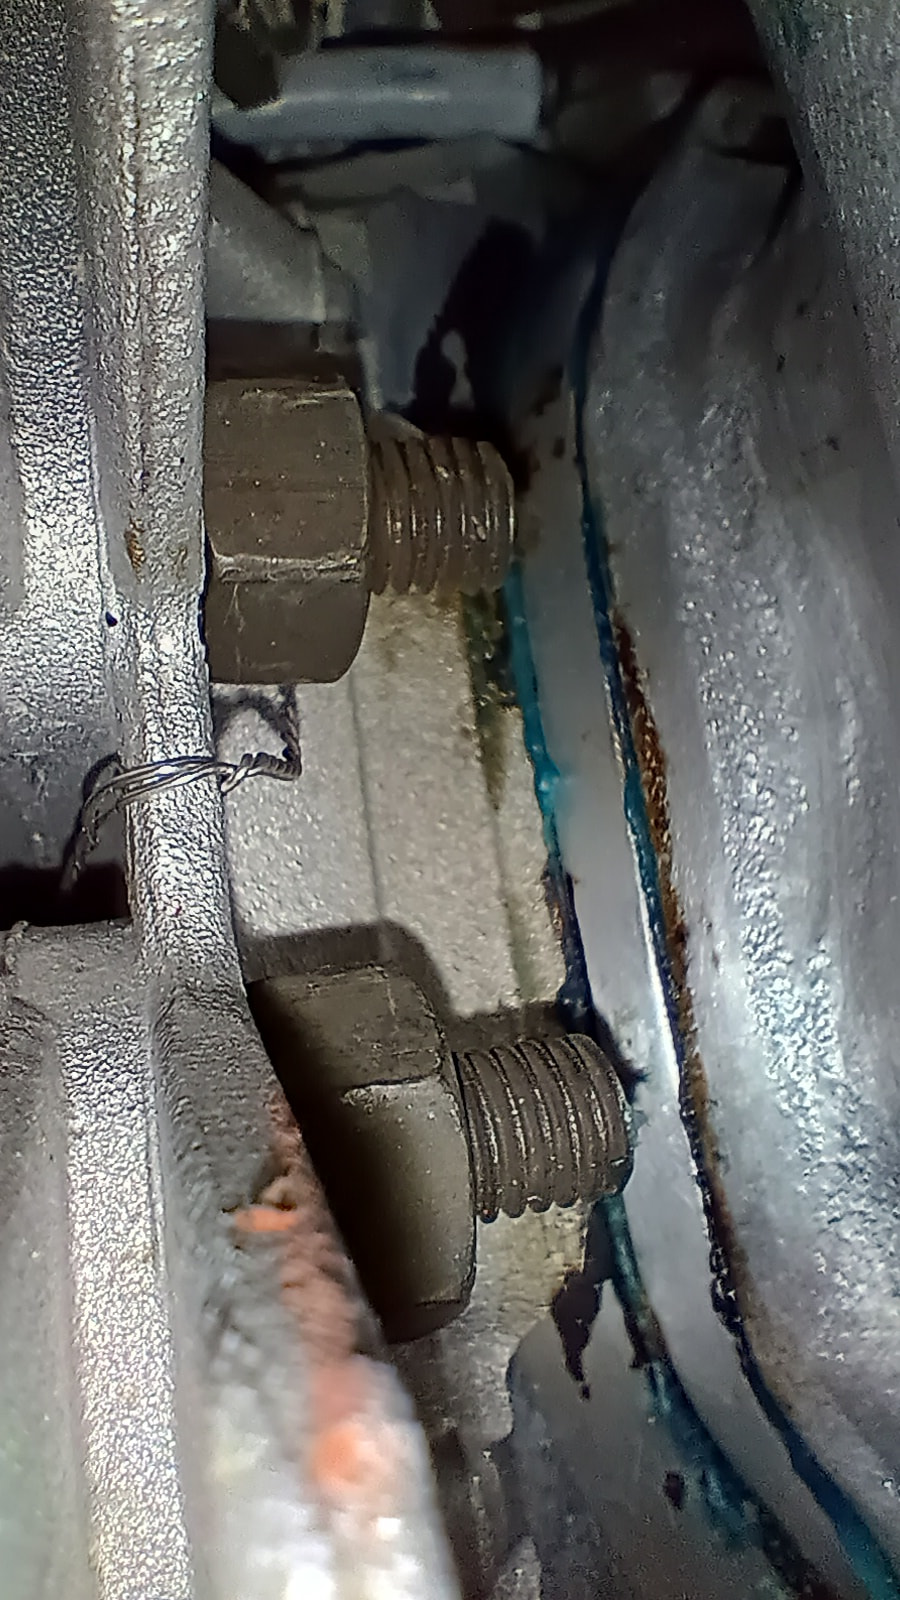
My latest journey started off with a miss at cruise. I had configured for flying at 0 degrees F (on the ground) and I think this was the first time I flew in temperatures this cold with my fresh air induction. So, I wasn’t sure if it was an engine issue or a configuration issue. It was fine in the pattern, but when I throttled back to cruise over the airport it definitely had a miss. Later I noticed the engine would idle at 900 RPM on the stop, but usually it barely runs on the stop and the MFD can’t even sense RPM and indicates zero. Here is what I found under the cowl. This is the left side manifold, nice and clean.
And here is the other side, sorry I didn’t keep the orientation the same.
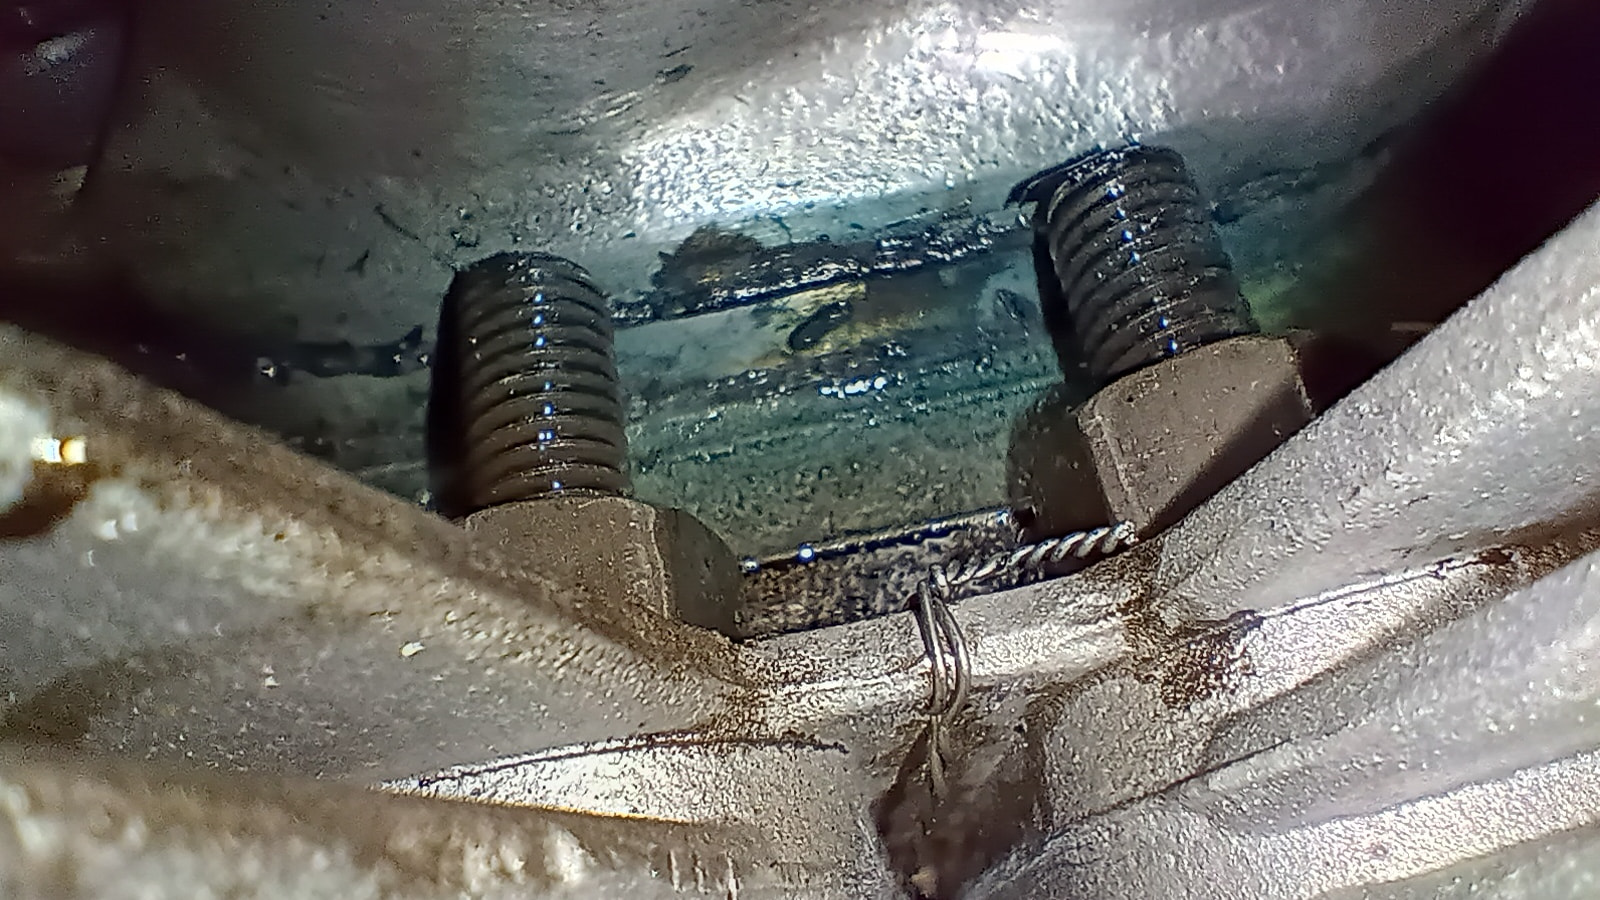
All that blue stuff is sealant. Somehow it was getting blown out. I’ve been using Hylomar blue to seal the manifolds. Spoiler alert, next picture shows the head off. The threads I’m pointing to with the red sharpie were pretty ugly. I ended up helicoiling that hole.
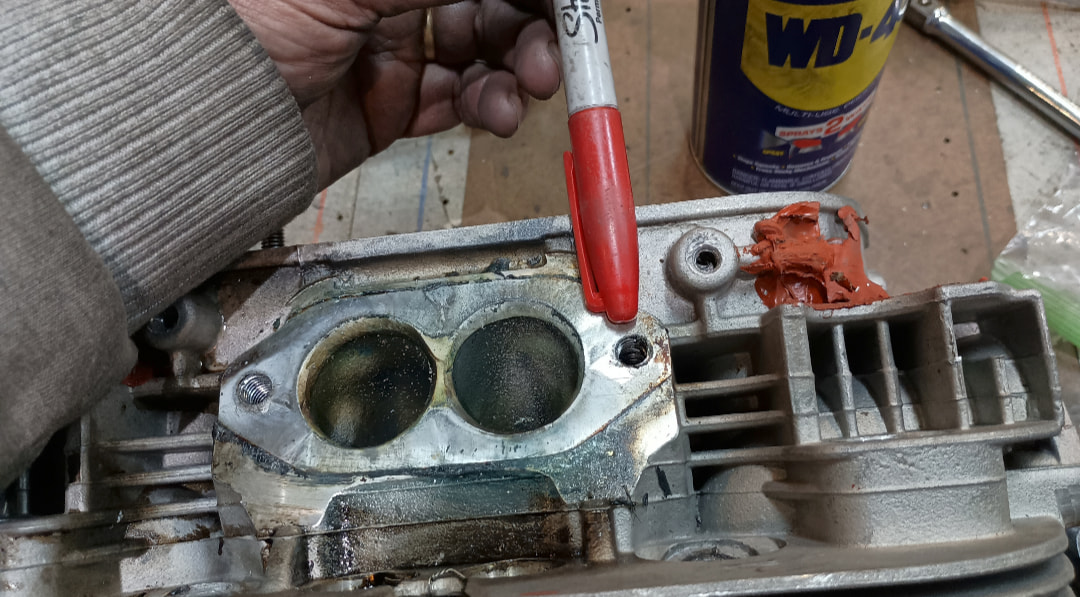
The one challenge with the manifolds is you always get sealer in the holes, and it can be a challenge to thread the bolts in. I usually take a spare M8-1.25 bolt with a couple of slots dremeled into the length to clean them out. I think that the torque wrench may have clicked because of binding, but there was not enough clamping force on the manifold. It held in there for a while, but started leaking.
I’ve been using the excellent advice @q2rd2100 posted. In preflight, I now pull through 4 blades when cold to feel compression. I also do it in postflight to check it hot. My compressions felt low on 2 cylinders, #1 and #3 so I did a check while I had the cowl off.
Compressions 12/17/25
Taken cold
1 80/55 rings, intake, exhaust
2 80/75 rings
3 80/60 mostly rings, some exhaust
4 80/78
Hot
1 80/50
3 80/74
Ok, time to pull the #1/#2 head.
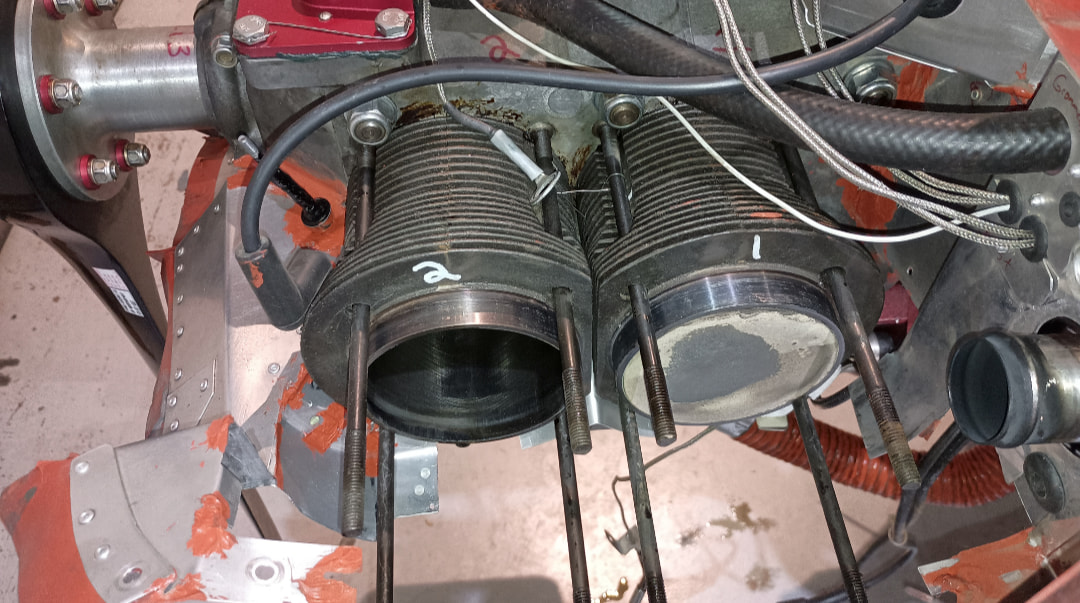
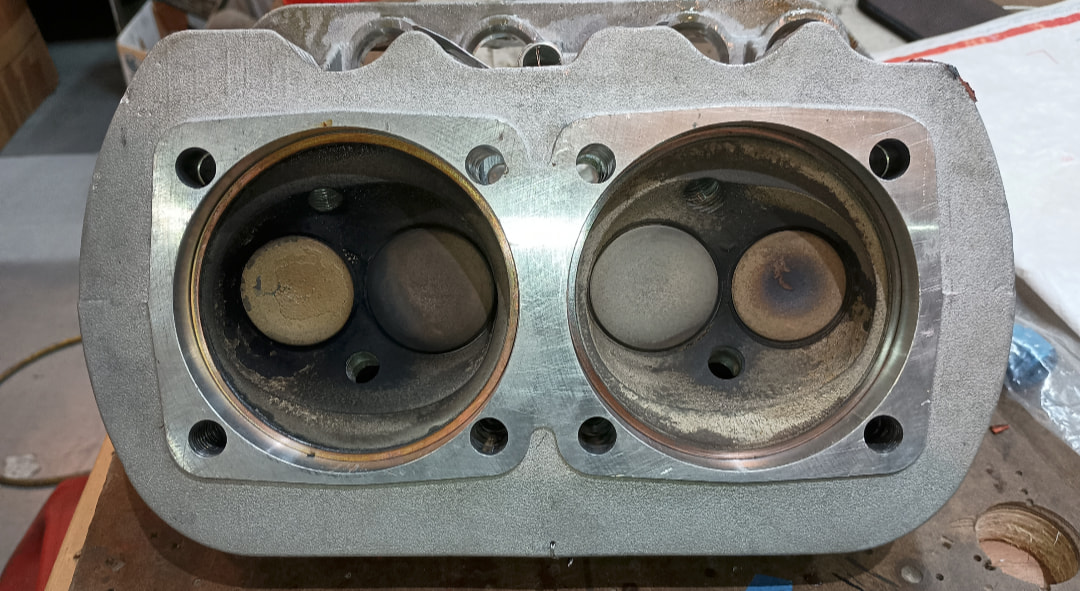
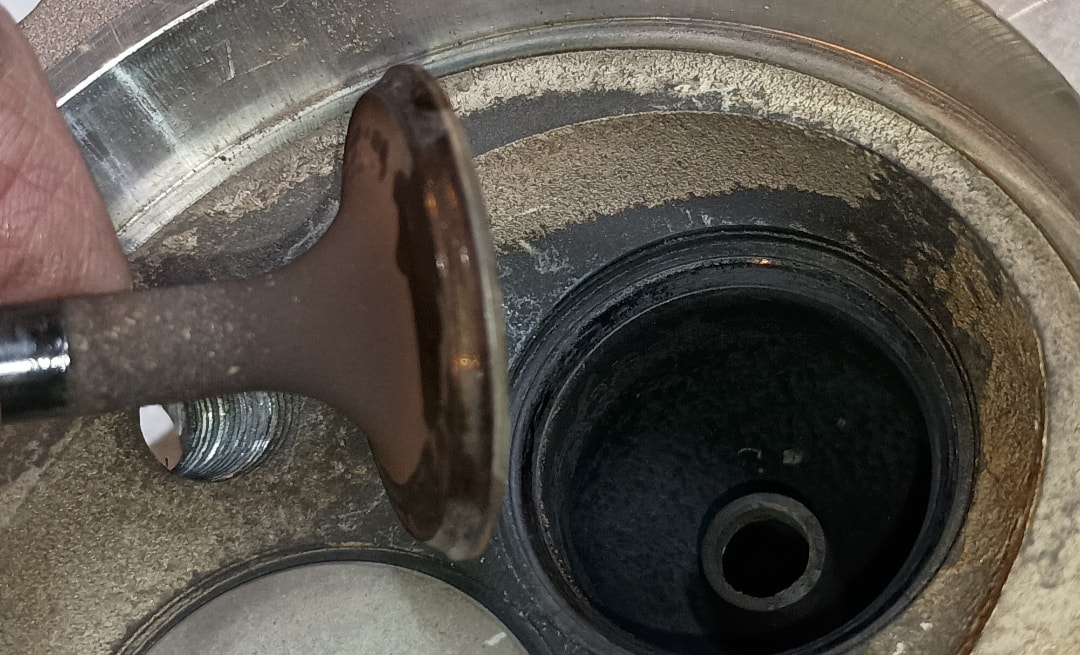
Those valves and seats were not horrible, but not perfect either. My big discovery was that the deposits on the valve stem seemed to be impeding free motion of the valves. The classic stuck valve symptom. So I cleaned up and lapped the valves.
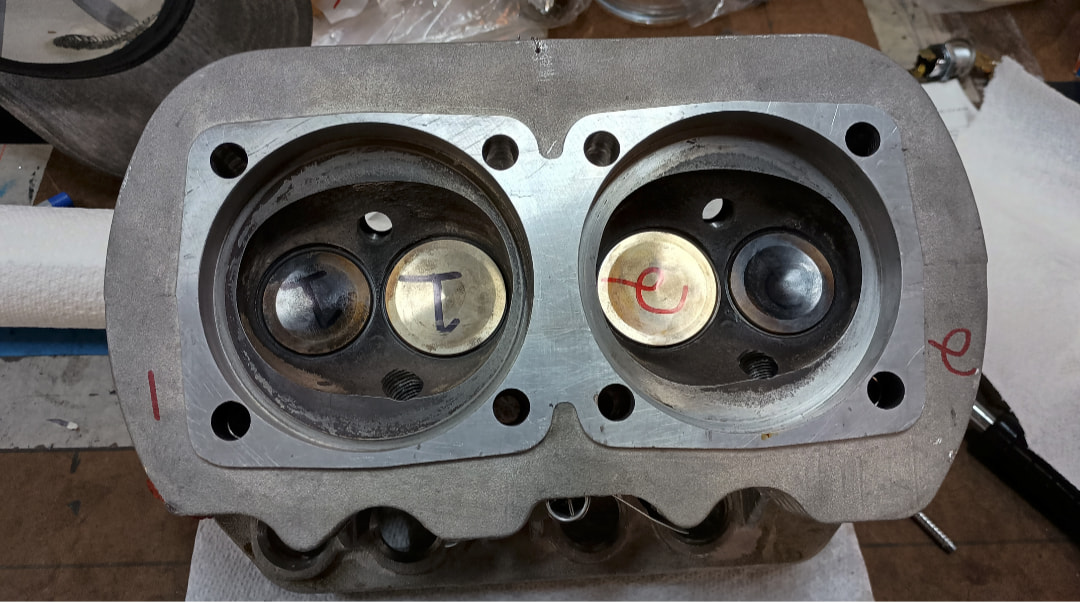
I had also stripped out one of the exhaust threaded holes when I was taking out the bolt, and I helicoiled that. I ran a tap through the spark plug holes just to clean out the anti-seize and junk that collects there.
Since I was down, I decided to pull the other head and clean/lap the valves.
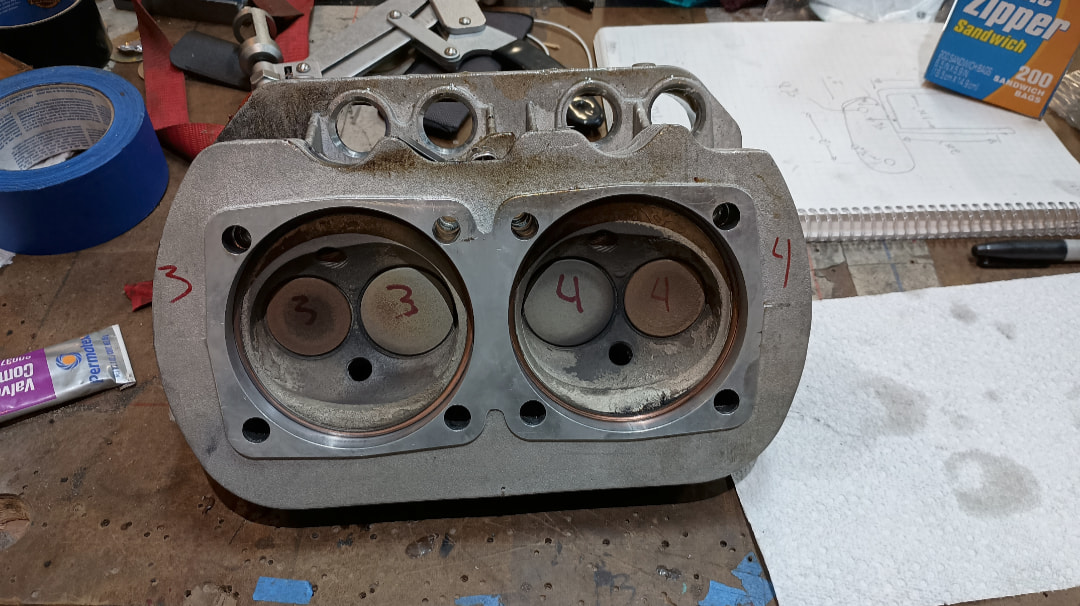
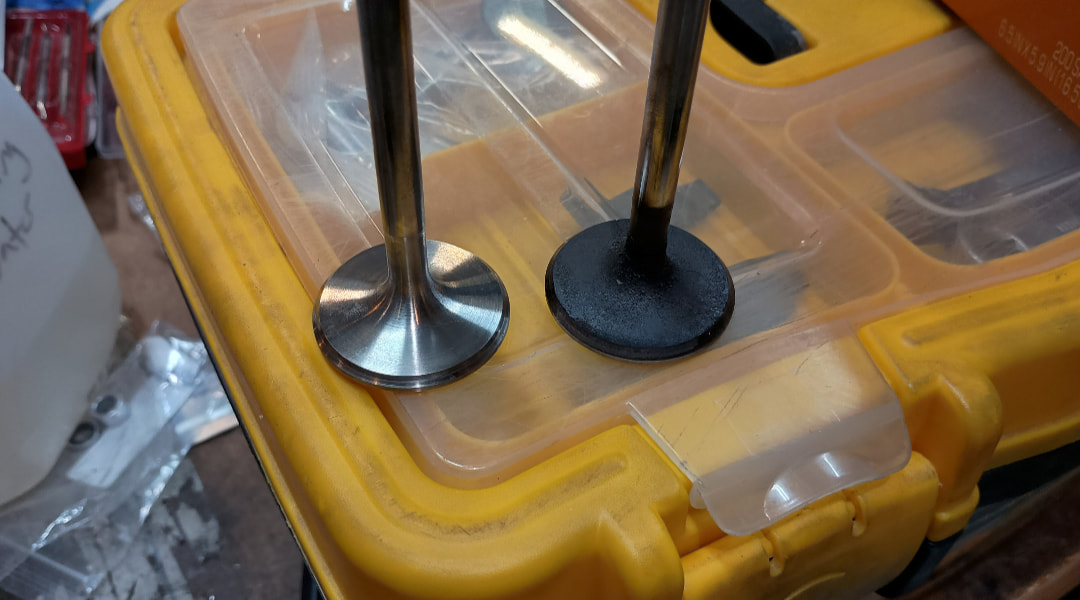
This next 2 pics are before and after on the intake valves. I got the big deposits off with a wire wheel and then chucked up the valve in a drill to polish it up with some scotch brite.
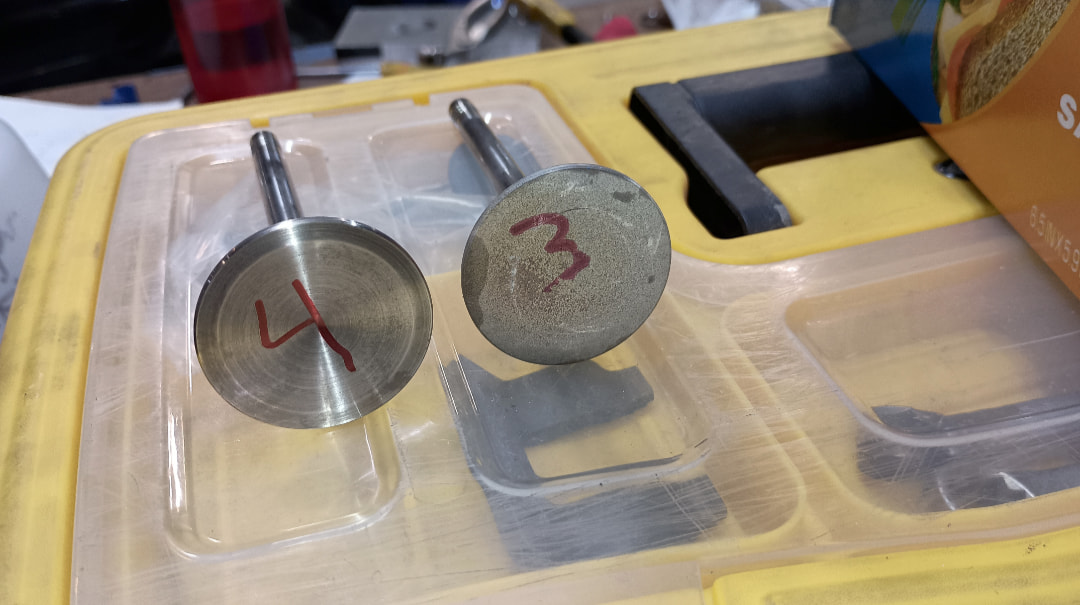
Here’s the #4 exhaust valve. It actually looked pretty good. After I lap it later today it will be even better.
Good catch Bryan and nice work on the clean up/lap. Everything still looks in good condition and an early catch makes it possible to lap instead of having to replace the valves/seats.
I am starting to feel a weak cylinder #3 on cold pull through, but still feels strong under a hot pull through. I’ hoping to make it to spring when it’s a bit warmer to pull the head off. Don’t have a heated hangar and I’m starting to turn soft as I age 
I have read that the black deposits on the valve stems are lead deposits. As they build up, clearance decreases and causes a stuck valve. The only additive I know that helps with this a bit is IXL. I add 2oz of the stuff to the oil at every oil change. Someone at our local airport had a stuck exhaust valve, brushed IXL onto the stuck valve stem through the exhaust port, let it sit overnight, the valve unstuck and he kept flying. My advise was to pull the head, but it sold me on the IXL. Previous to IXL, I used MMO for long periods of time then switched to CAMGUARD. Neither helped with the valve stem deposits.
Rene’,
Where do you get it?
#3 exhaust valve lapped. I’ve since lapped all the valves in that head and need to reassemble.
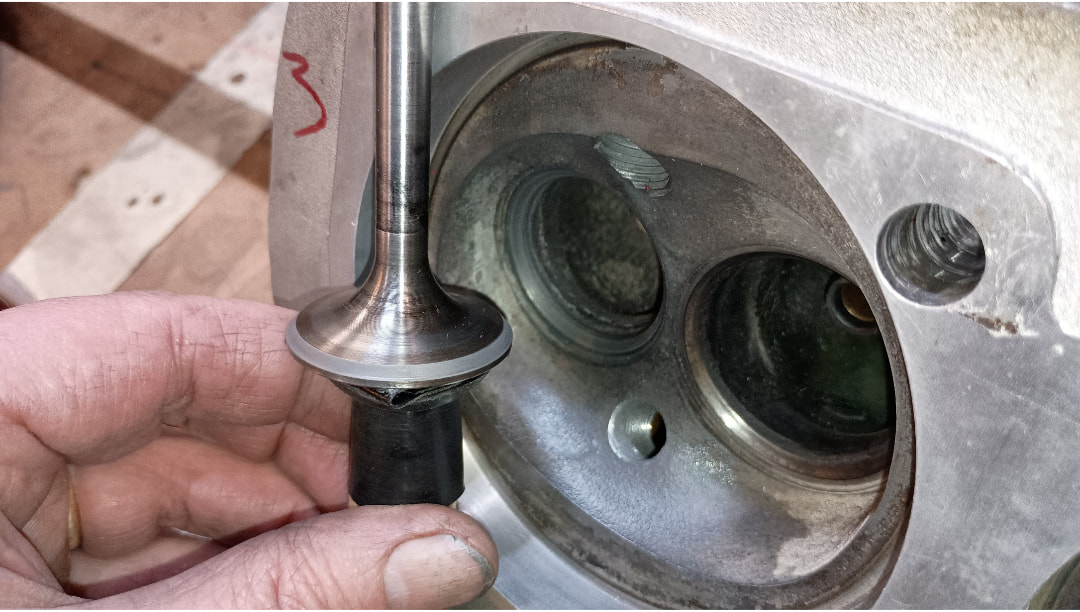
Just as a comparison, Scott Casler (Hummel Engines) uses gaskets in that location.
Compressions 12/17/25
Taken cold
1 80/55 rings, intake, exhaust
2 80/75 rings
3 80/60 mostly rings, some exhaust
4 80/78
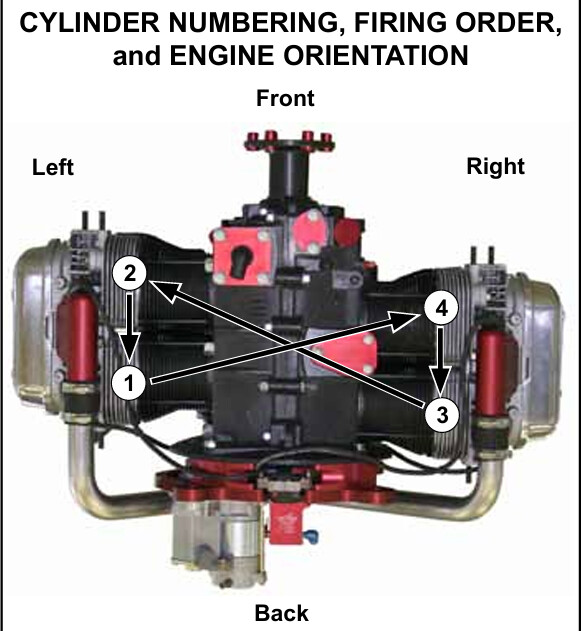
Aren’t the rear cylinders always the first to go soft? During normal operation the rear cylinders lean out early and burn the exhaust valves?
Unless you specifically ask for something different, Scott Casler will build your engine with 7:1 compression. The reason is that he wants you to burn auto fuel in his engines. I asked him to build my engine 8:1 because AvGas is all that is available at my airport. He said OK but you will have to use TCP fuel additive to scavenge the lead.
Wes
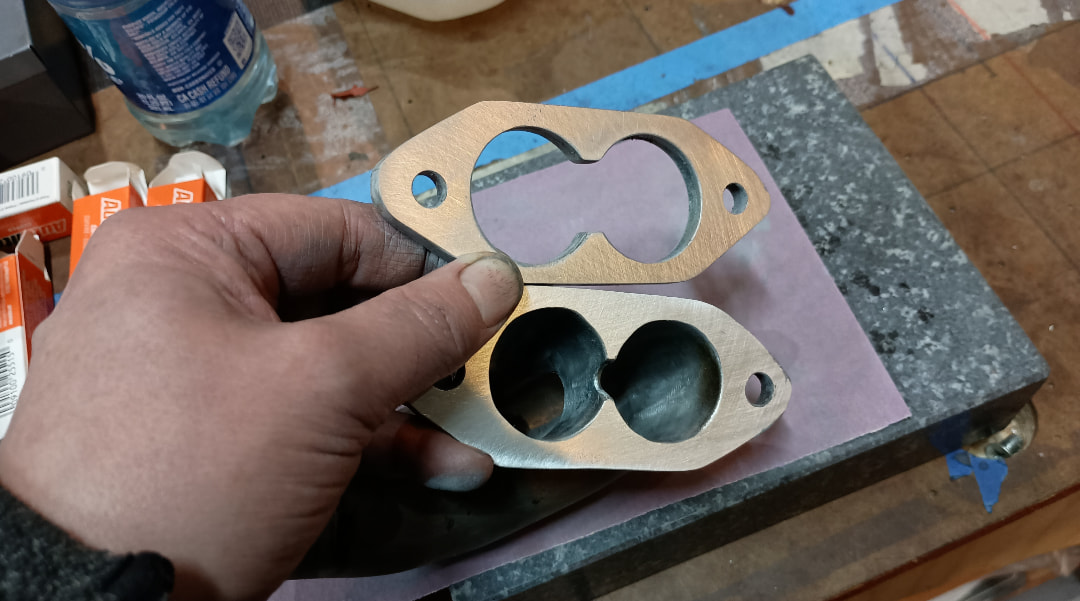
For whatever reason, Sonex has these spacers under the intakes. If I had a single surface to seal, I’d probably use a gasket. I have a future manifold idea which would be a single sealing surface configuration. I’m going to steal this idea:
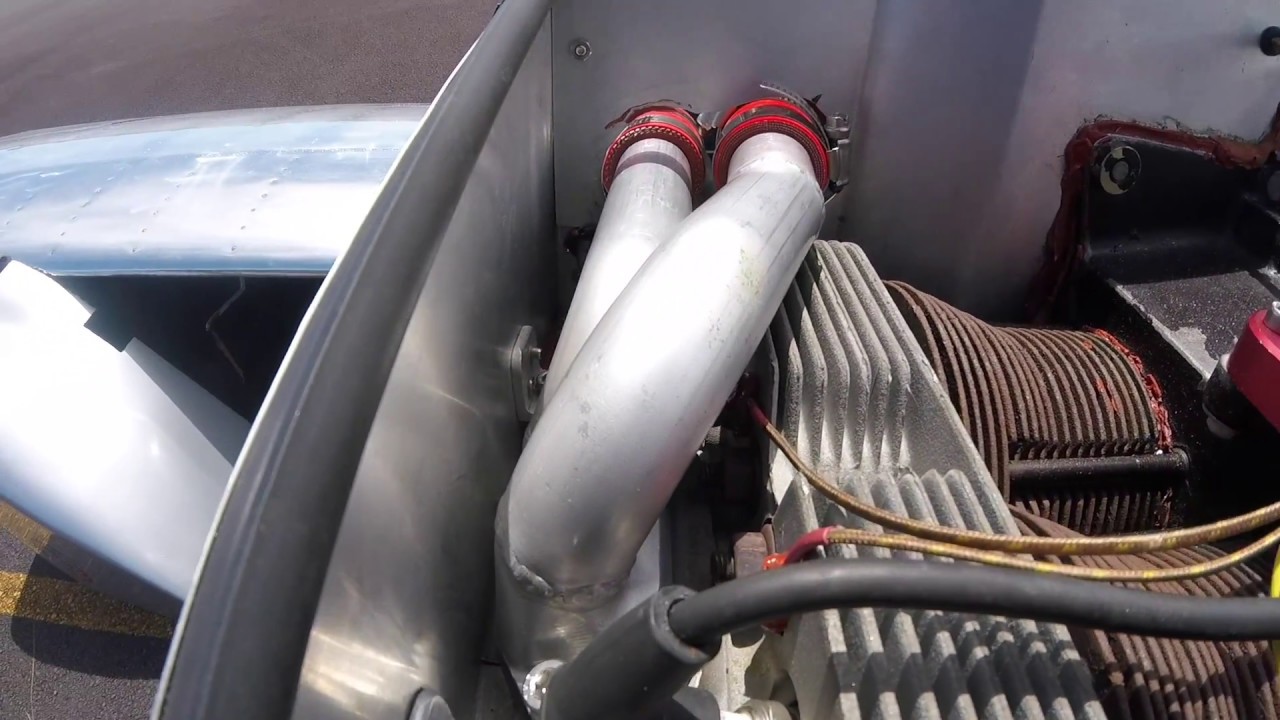
Yep! If only there was some way to balance those mixtures!
[quote=“WesRagle, post:7, topic:5286”]
He said OK but you will have to use TCP fuel additive to scavenge the lead.
[/quote]
I have been using Decalin since the beginning - basically the same stuff but not certified.
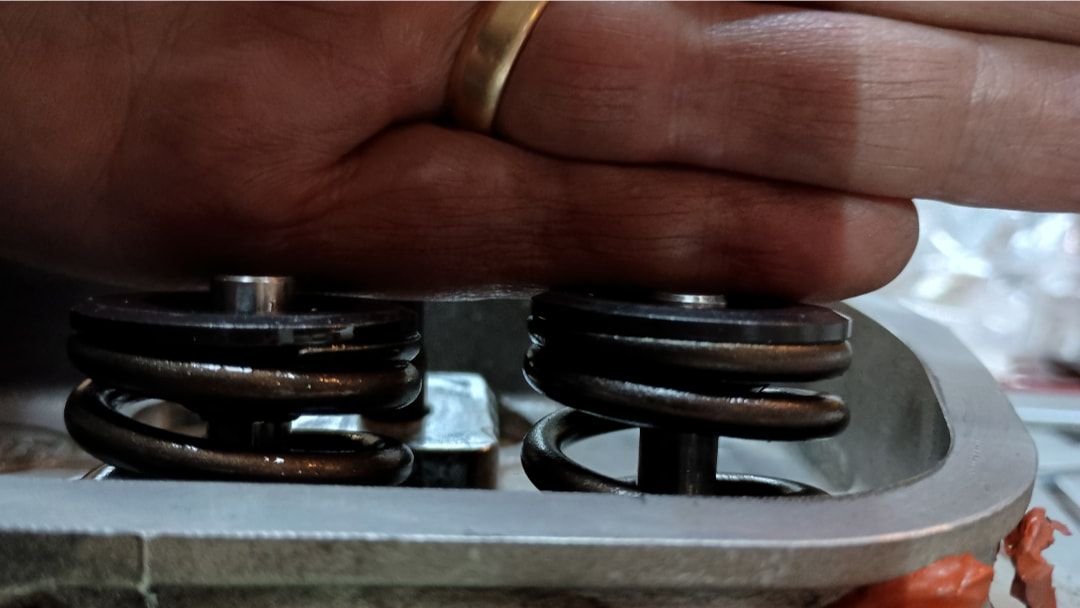
Here’s an oddity. Early on I screwed up a valve adjustment. I was trying the “loose zero” adjustment and #3 was tight. Ran bad on startup. I replaced that valve. Note how the #3 exhaust doesn’t stick up as far as the #3 intake. The #4 valves look like the #3 intake. I took the keepers out to make sure I didn’t screw up, but they were installed correctly.
Anything that provides a reasonable length individual intake runner has to help.
The pioneers of VW conversions were focused more on frontal profile than balanced fuel distribution. Besides, they really had no way to check fuel distribution. We are still using those intakes that were designed back in the ‘70s.
Here is an intake that Ross of SDS was impressed with.
Here is what you need for an intake: https://vaxell.com/vaxell-engines/vx-60i/
One of my customers was able to purchase just the manifold apparently. I don’t know the cost.
The big hurdle to VW EFI has, in the past, been that nobody made a well designed, inexpensive EFI intake manifold.
If only …, hummmmm.
Wes
Hi Bryan,
For info in IXL: IXL Metal Conditioner - IXLOIL
I buy it from an IXL local rep up in Canada.
I noticed what looked like a little corrosion on both the manifold and spacer on the leaking side. If corrosion on an AeroVee isn’t a sign of end times, then I think we should be ok for a while. When I made these spacers I flattened them by sanding on a granite block. I decided to touch them up a bit. I think flatness has been improved by what I saw during the process.
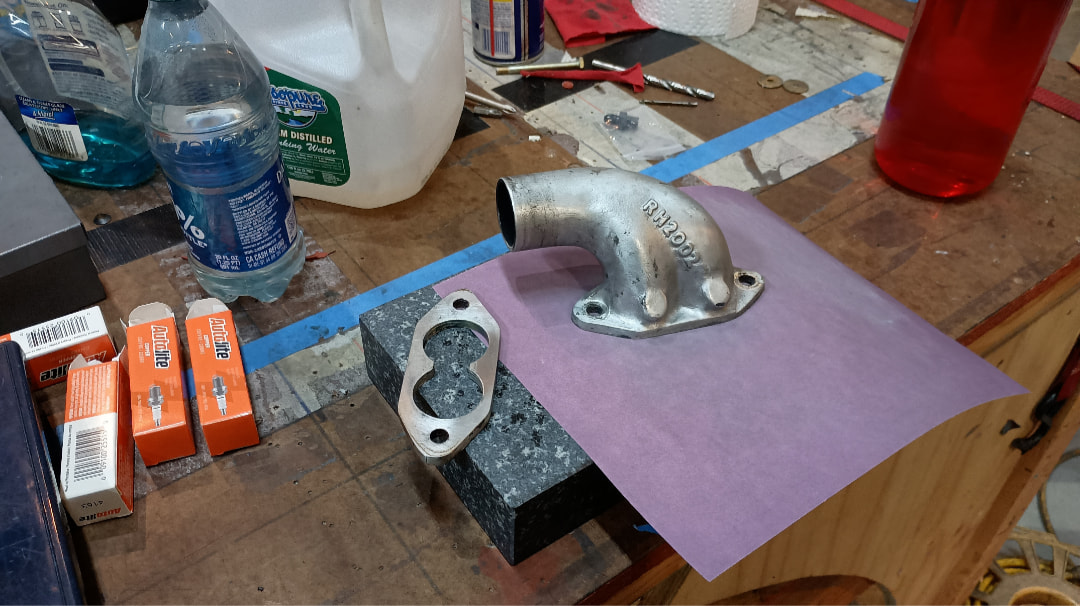
Here is a good view of the slotting I put in my manifolds, like a stock VW manifold. I think it helps fore-aft mixture balance.
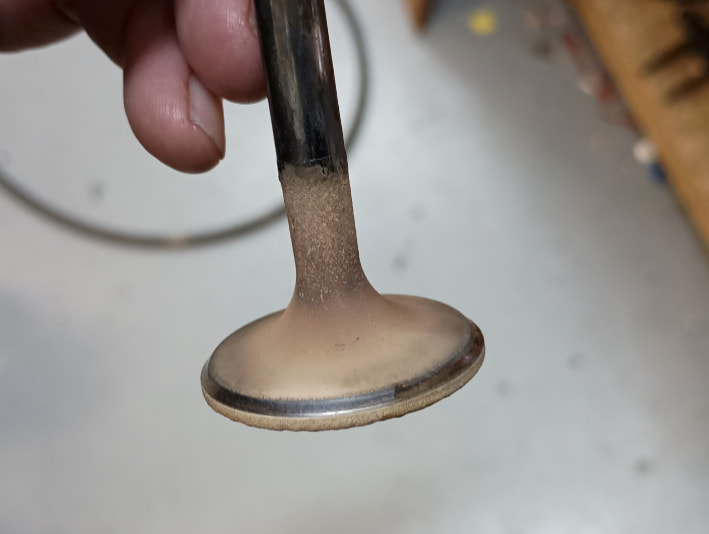
Here is a picture of my valves from a few years ago. I found low compression on pulling by hand.
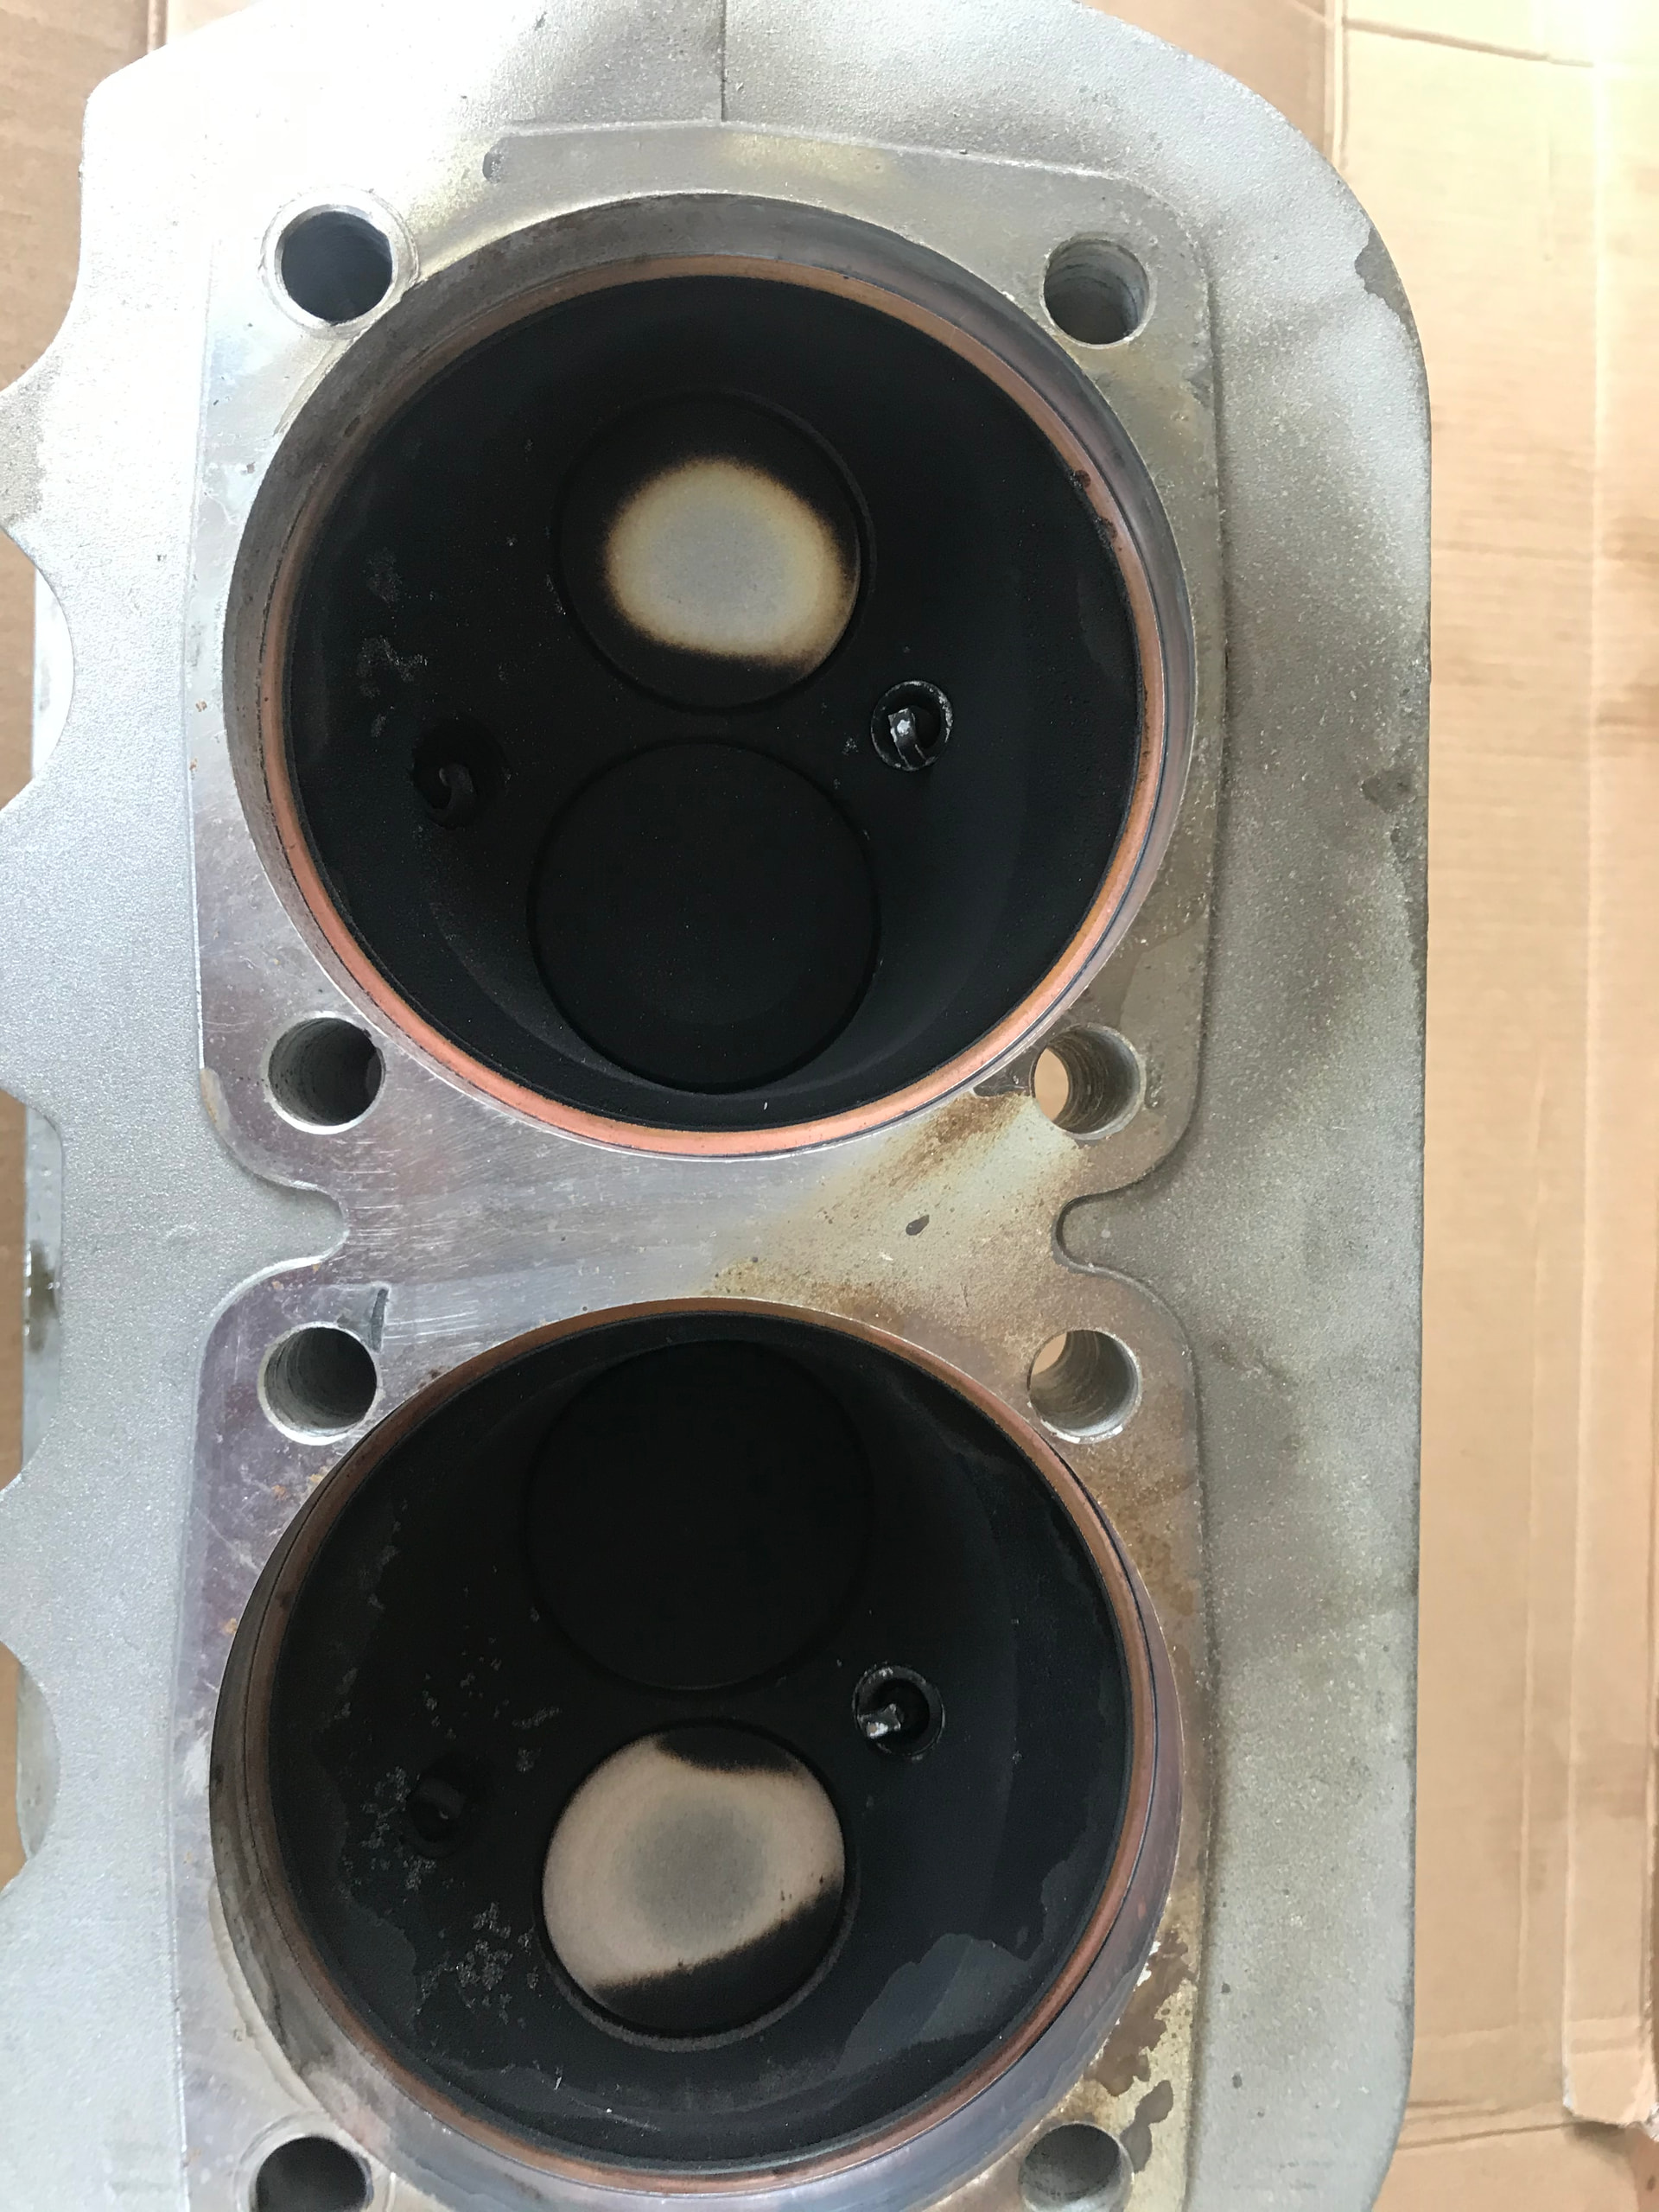
We lapped the valves and reinstalled the head. All good till next year… did the other head for same reason.
Pulling through by hand really works. And like @q2rd2100 said, if you catch it early you can lap them and get back to flying.
My valves have always had a symmetrical pattern, which I believe means they are rotating.
Back to the agony of defeat. Engine back together, 3 really strong compression strokes and one dead cylinder. Did a quick run to see if it would get happy, no luck. Compression in #4 was 80/20 warm - before I lapped it was 80/78. So I took the head off again to have a look. I found what seemed like a deposit on the valve seat, and after lapping again it looks like some material may have transferred from the valve to the seat. That valve must not have been rotating, but when I lapped it I changed the orientation and compression got bad. Here you can see the spot on the valve.
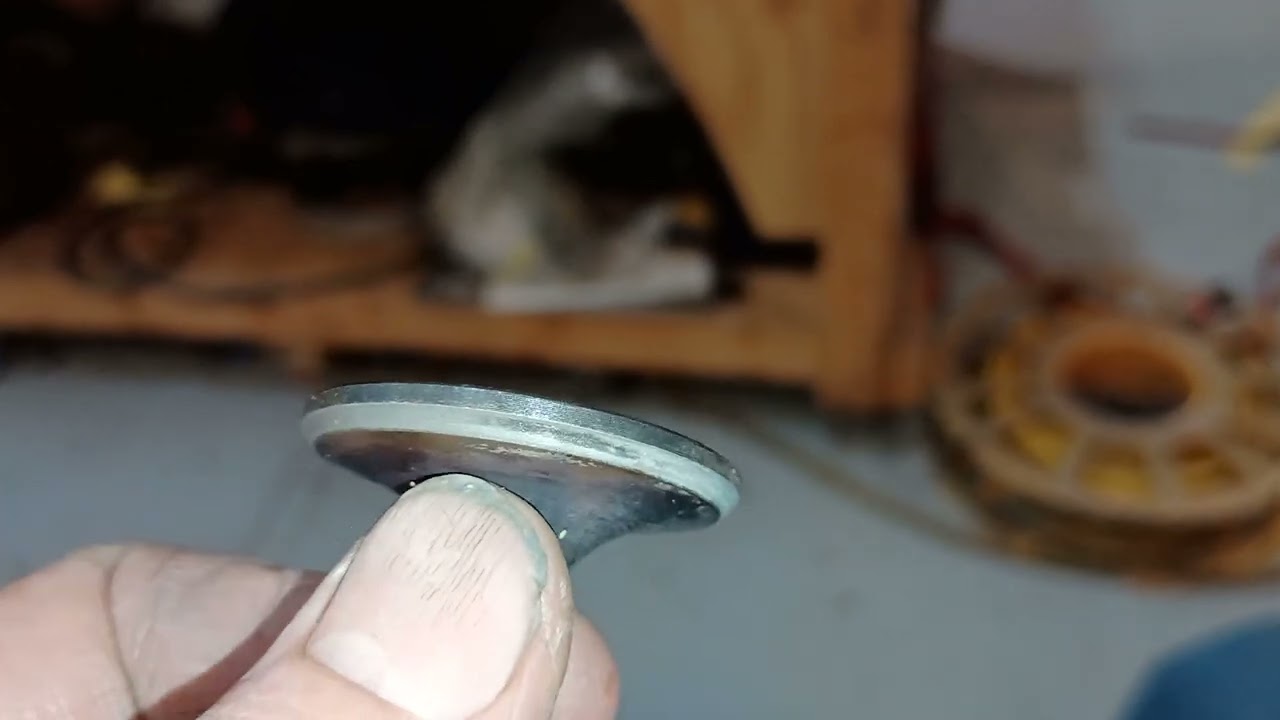
One of my Waiex/AeroVee buddies in Ohio says he always does a valve leak check with mineral spirits before reassembly. Seems like a good idea and I’m going to start doing that.
Weight control…… I knew there’d be a catch
Don’t underestimate the benefit of this!
Hi Bryan,
Thanks for starting and continuing to populate this thread. It looks to be very useful information for the group if they choose to implement their own investigations if needed (or not). I wish I lived as close to the hangar as you do!
Sean
Hey Sean, glad you found the new forum!
I got my errant cylinder up to 80/70 cold, and will be reassembling for a ground run and warm leakdown tests. I’ve decided I need valve seat cutting tools and you can buy the real deal for not much more than the cheap Amazon and eBay stuff. Email snip from Jim for reference:
Hi Bryan.
I would be happy to give you a recommendation. This one’s easy.
CU234 Valve seat cutter, 38mm diameter, 30 degrees x 45 degrees $ 124.50
CU205 Valve seat cutter, 38mm diameter, 60 deg. $ 73.75
If you are working with new valve guides, or “like new” guides, you would want the 8mm standard and the .001” smaller pilot (7.98mm). If you’re working with the existing guides (some wear, but still good), then you would want the 8mm and the .001” bigger (8.02mm). The pilots are $ 26.25 each.
TW505 T-wrench $ 10.25
CA160 Case $ 16.50
KACC246 Accessories kit $ 5.25
Total (assuming two pilots) $ 282.75
Jim Schultz
Neway Mfg. 800-248-3889