When I switch from my SDS coil pack ignition to the AeroVee secondary, the rpm drop is 4-500 rpm. I changed the plugs. I checked the secondary resistance, it’s about 13,000 ohm. I’m a little puzzled how to check secondary resistance with the coils wired up. All 4 cylinders fire statically with a test light in line. I have a query in to Sonex and a new coil on order. Your thought are solicited. This is a 2.0 engine with green coils, serial #113.
Have you checked timing?
1 Like
I Started checking it after exhausting all my other ideas. Made things MUCH worse 
Next time I get to the hangar I’ll go about it in a more systematic manner, but I think this is the right track.
With the waste spark, will it run if the trigger is set 180 degrees out?
180, I don’t think so. That would be firing at bottom dead center. If you have a reference of the happy ignition, meaning a mark on the case and another on the flywheel that you can see align with a timing light, you can use that to check the unhappy ignition. I’ve got a picture on the old forum somewhere, I’ll see if I can find the archived thread.
1 Like
I found the archived thread:
Here is the picture:
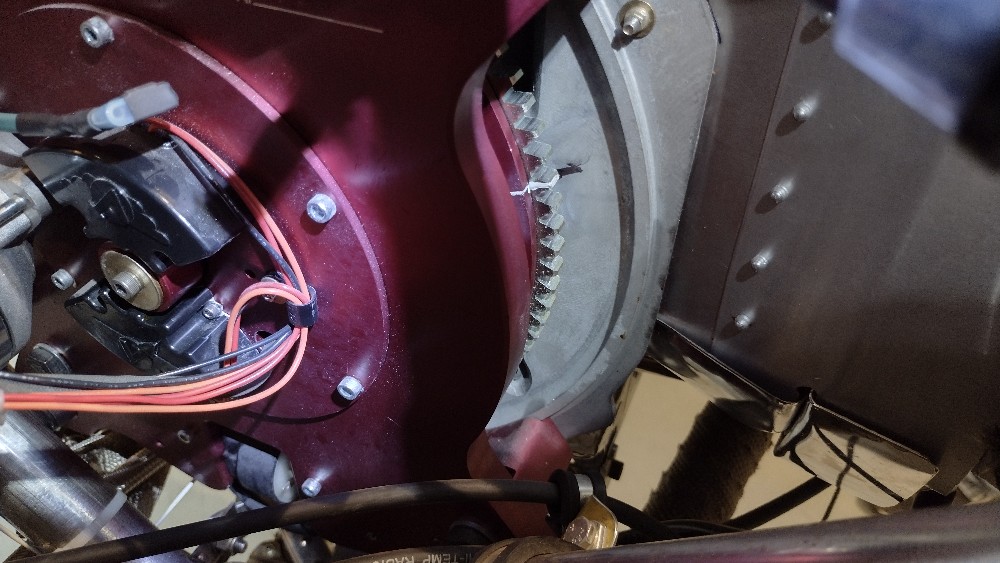
I got the flywheel close to the 28 degrees BTDC, and marked the flywheel and case together. I got Adam to run the engine, while I stood on the right side and shot the timing light at it, while clipped to my primary ignition. That would be the SDS ignition for you. I’d check the alignment, shut down, and move the sharpie mark on the case until my fixed ignition for the primary gave me alignment of the marks. Then I set the timing of the secondary by clipping onto a secondary plug wire, looking at alignment, and then making a timing adjustment on the secondary. Took a bunch of tries.
Fixed. It was the timing. I have a 2.0 engine, but the instructions in the 2.1 manual are WAY better, that’s what I used, and now the RPM drop is imperceptible. I bought a spare ChinCom coil when I was still troubleshooting, and I’ll put it on the shelf with the spare head.
2 Likes
Unfortunately, I’m still in trouble. The Secondary Ignition failed on the first flight. I was explaining to a friend helping me troubleshoot how the ignition worked, and was showing him where the trigger magnet is, except it wasn’t there. Bought a new trigger cap from Sonex, went to put it in, no go. Pulled the upper magnet trigger, it’s all chewed up, the lower is fine. Rotating the prop, the runout of the trigger cap is about 1/16th of an inch.
Fixing this means pulling the engine off the airframe, and redoing the installation of the trigger shaft to get it concentric with the crank. Plus new ignition modules, which you can only buy as a complete set. I think it may have been assembled wrong from the beginning (not by me). It’s something to check if buying a second-hand or project Aerovee. I used drill bits as gauges, checking the clearance between the trigger cap OD and the edge of the lower ignition module.
It’s not hard to pull the engine. I’ve done it a few times. Leave the accessory plate on, pull the spark plug wires, and use a little shop crane. But still a bummer to have to do all that.
Did you leave the carb fuel and control connections attached and just pop the carb off the intake manifold or ?
1 Like
I’ve done it both ways. The Y pipe needs to come off but the carb can dangle there.
Edit: You need to remove the Y pipe from the manifolds and also unbolt the mounting tab that goes to the engine. The Y pipe is behind the accessory plate that is staying on, of course.
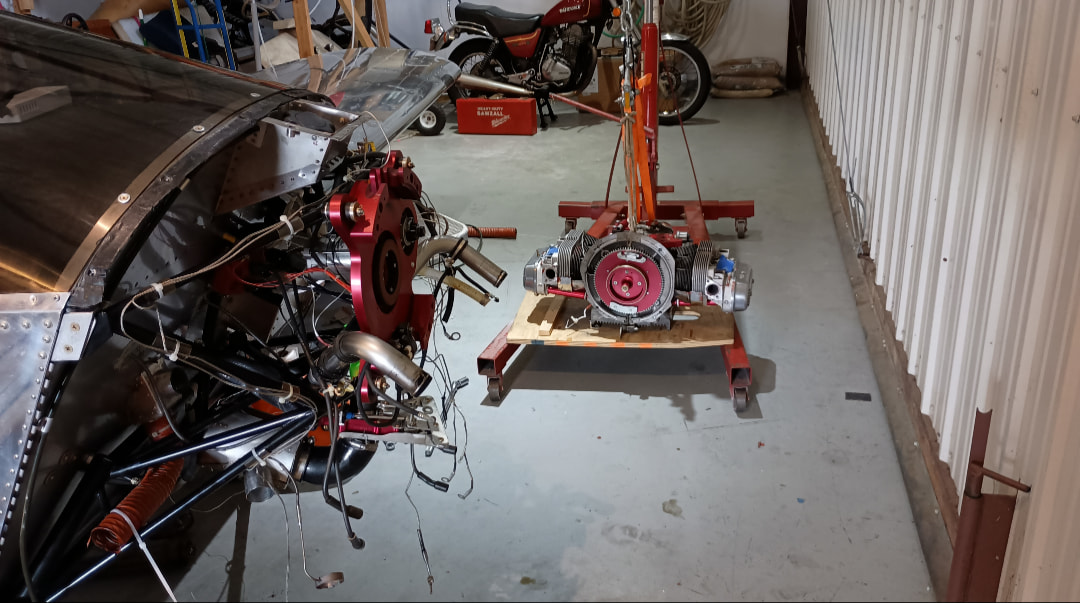
In this picture the Y pipe is only attached to wires via tie wraps. You can see the AeroInjector with the elbow and air filter still connected.
I think I’ve taken it off once with the exhaust still bolted on.
Edit: the elbow and filter are still connected to the aeroinjector, but the aeroinjector has been removed from the Y pipe. The wires mentioned are the #1/#3 primary plug wires, and a couple others I had secured to the Y pipe. It’s possible you could leave the aeroinjector on the Y pipe, but if it was causing problems it’s not hard to take off. Also the fuel line and controls are still connected to the aeroinjector in this picture.
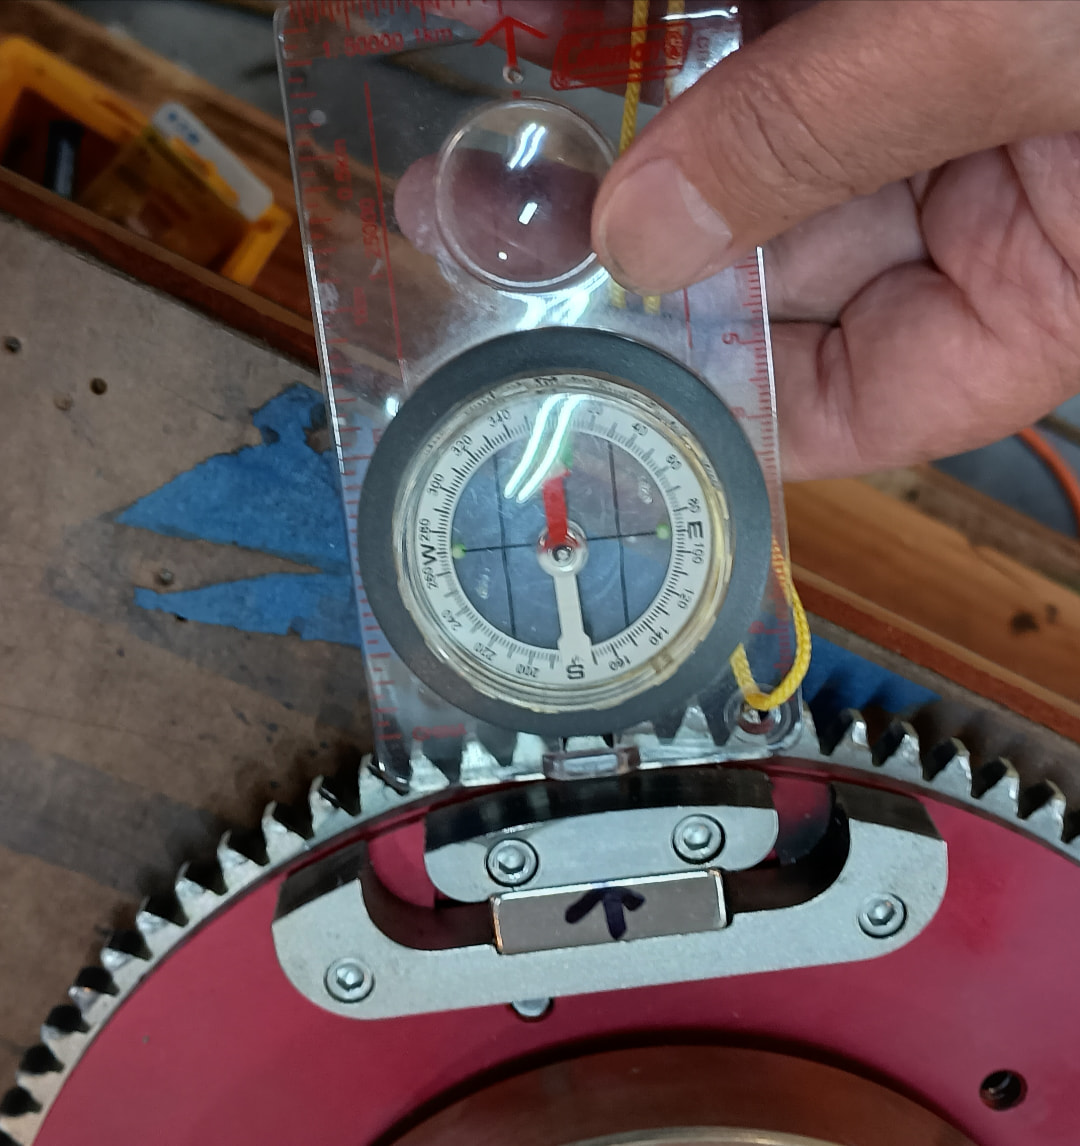
One thing to consider - keep your SDS ignition and replace the secondary with the stock Sonex primary ignition. There’s a lot to be said for an ignition that needs no 12V power. And you can put that on without pulling the engine, as long as your magnet is both good and installed correctly.
Edit: this is how you tell if it’s installed correctly.
2 Likes
You make a good point, but I’m fairly certain my magnet is no good. It’s the only ignition component that wasn’t renewed during our struggle to try and get the AeroVee primary ignition to work. I think it was initially installed without the proper clearance, and whacked itself against the magnetrons until it lost it’s magnetism.
Once the engine is off, the only extra step to get to the magnet is to remove the flywheel.
If you have the Force 1 crank & hub, it changes the magnetron clocking and you need to switch the wires to different plugs.
1 Like
That’s an interesting bit of info! I just found karmarepair’s build log and it looks like standard AeroVee. I’m assuming 2.0, it still has the distributor gear on the crank.
The aerovee has the normal shrink on prop hub. The force 1 adds an additional bearing at the front of the engine case and a much different looking prop hub. If your prop hub looks like the stock aerovee then you have the stock sonex crank & hub.
1 Like
Pulled the engine. Thanks for the encouragement. It was easier than I expected. The cap screws holding the trigger shaft to the magnet cup were loose, and so were those holding the magnet cup to the flywheel. The stator and the magnet cup were in contact. Put everything back together with red loctite. I had to shim the trigger shaft to the magnet cup to get the runout down.
3 Likes
Very cool, glad you are getting through it!
If it’s not back on- check the polarity of that magnet. If it’s wrong, pull the flywheel and swap it. You could get your magnetrons back.