Ground block part number
Posted: Tue Jan 05, 2016 5:36 pm
by Sonex1243
Anyone have a part number for a brass ground block to use on the wing tip spar web to ground the landing light and the nav/position/strobe light assy with the fast on spade type connectors? My alternate plan is to use a 10/32 screw mounted as a post with ring type terminals to make the ground connections.
Re: Ground block part number
Posted: Tue Jan 05, 2016 6:24 pm
by saddler
http://www.steinair.com/storedetail.cfm?productid=14
Re: Ground block part number
Posted: Tue Jan 05, 2016 7:03 pm
by tonyr
If you are using the Airframe as your return path, you are probably better off just running the extra couple of ground wires back to the common firewall ground block.
Otherwise you are relying on the clean bonding of all the parts from the wing tip to the spar root and the fuse angles, wing bolts etc.
Over time any corrosion in these areas will degrade the return path resistance and possibly cause issues later on.
Re: Ground block part number
Posted: Tue Jan 05, 2016 7:07 pm
by mike.smith
tonyr wrote:If you are using the Airframe as your return path, you are probably better off just running the extra couple of ground wires back to the common firewall ground block.
Otherwise you are relying on the clean bonding of all the parts from the wing tip to the spar root and the fuse angles, wing bolts etc.
Over time any corrosion in these areas will degrade the return path resistance and possibly cause issues later on.
Absolutely! Grounding issues are THE number one cause of electrical and avionics issues, and they can be very hard to track down. Running every device back to a common ground block is worth the few ounces in added weight.
Re: Ground block part number
Posted: Tue Jan 05, 2016 8:21 pm
by Bryan Cotton
I go to the same church as Mike and Tony on this one. Especially with modern LED lights the wire gauge is so small anyway.
Re: Ground block part number
Posted: Tue Jan 05, 2016 11:50 pm
by Sonex1243
This could get interesting!
The AeroLED wing tip light wiring diagram has you ground the light mount and light ground wire to structure close to the light for minimum RFI interference. They also show the shielded power wire braided shield for the light assembly grounded at both ends of the cable run, one end would begin at the tip close to the light. The duck works LED light could also be grounded at the tip, per duck works.
This made it easy, so I thought, because I would only have to run the nav, strobe and landing light power wires, the strobe sync wire and wire shield on each wing back to the fuselage using a single five pin molex connector.
Re: Ground block part number
Posted: Wed Jan 06, 2016 11:36 am
by thad14433
This maybe what your thinking of, the bolts go thru the firewall and you have a ground block on both sides.
http://www.bandc.aero/groundblock2424-t … llkit.aspx
Re: Ground block part number
Posted: Wed Jan 06, 2016 7:29 pm
by mike.smith
thad14433 wrote:This maybe what your thinking of, the bolts go thru the firewall and you have a ground block on both sides.
That’s what I have all my grounds going to, but I think the original question was about a ground connection to attach to at the wingtip?
Re: Ground block part number
Posted: Thu Jan 07, 2016 7:47 pm
by Sonex1243
Both ground blocks are exactly what I was looking for. Will be re-thinking the wing tip grounds and running them all to a central ground as everyone has suggested. If so, it will entail a little reverse engineering on the right wing as everything has already been run and the wing closed up. I did run conduit through the nose rib tooling holes, so, re-threading wire should be relatively easy once the leading edge is cut open for the landing light and tip cap left off.
Re: Ground block part number
Posted: Fri Jan 08, 2016 10:02 am
by Rynoth
Sonex1243 wrote:re-threading wire should be relatively easy once the leading edge is cut open for the landing light and tip cap left off.
One good method for fishing wire through the conduit would be to attach a piece of string to the end of an existing wire, and pull that wire through. Then attach both the old and new wire to the string, and pull them both together using the string. Just overlap the ends of wire/string by 2-3 inches and wrap electrical tape tightly around the overlap them to keep the diameter small enough to pull through the conduit.
Re: Ground block part number
Posted: Fri Jan 08, 2016 12:08 pm
by sonex1678
Another way to pull the new/additional wires through the wing is to solder the new wires to an existing one and pull them through as the old wire is removed–this is stronger than the tape method and also takes up less room in the conduit. As a last resort, the entire wire bundle can be removed (with a wire attached to aid in pulling the bundle back through), then the additional wires added, and the bundle pulled back through. The limiting factor to any of the methods is usually the conduit side and relative straightness of the conduit/bundle routing–the tighter the turns in the conduit/routing and smaller the conduit ID the harder it is to do. If new wires can’t be pulled through the existing conduit/route, there may be a way to add the additional wires via another route–if this is done, it is best to ensure that the least protected/secured wires are grounds so any chaffing or subsequent shorting would be on the ground vice power side of the circuit.
Ground block part number
Posted: Fri Jan 08, 2016 1:50 pm
by mfazio
What size conduit are folks using? I’m thinking for a wing with light and strobes there would be 5 wires in the bundle. I believe wire size AWG 20 is the right size wire for LED lighting.
I have some ¾" OD soft tubing I was considering using and running it through the forward tooling hole. I’m concerned about chaffing so also considering grommets, in the end that is a pretty big hole in the forward rib.
Can anyone offer a better solution?
Mike
Sent from my iPad using Tapatalk
Re: Ground block part number
Posted: Fri Jan 08, 2016 2:24 pm
by Sonex1243
Mike;
I used 1/2" OD tubing from the “lowes” aviation department. I wouldn’t go any bigger than that. Can’t remember the brand, but, it was a milk white type that came in a 25’ length.
Re: Ground block part number
Posted: Fri Jan 08, 2016 2:54 pm
by Bryan Cotton
There is a good article that Bob Nuckolls wrote on the topic. You can find it here:
http://www.aeroelectric.com/articles/wiresize.pdf
Bob likes to keep his losses under 5%.
Also AC43.13 chapter 11 tells us acceptable voltage drops for aircraft. For a 14V system, they are ok with a half volt continuous or one volt intermittent.
My Whelen nav/strobe has 4 wires- nav power, strobe power, power ground, and synch. The strobes pull 5.2A when on, but only average 1A. The nav lights pull 0.48A. For the Waiex I estimate a 26’ round trip for the wires. For 16ga wire, the drop to the strobes is 0.68V and the percent loss is 4.9%. This assumes the nav lights are on too, which makes for a bit of additional voltage drop on the shared ground. For 18ga the numbers become about 0.85V and 6%, which should be ok. For 20 ga it goes to 1.4V and 9.5% losses.
My landing lights are 0.68A and 22 ga is good with 0.4V/3%.
I plan to run 2 conductor 16 ga (2C/16) for the strobes. I will run 2C/22 or 20 for nav and synch. I had some 1/4" OD poly tube which fits nicely in the tooling holes, but this will be tight with 2C/16 and 2C/20 run together. I will likely upsize the aft holes for 3/8" OD tube. I will run my 1/4" poly in the front holes and 2C/20 or 22 for the landing light.
Re: Ground block part number
Posted: Fri Jan 08, 2016 2:55 pm
by Rynoth
mfazio wrote:What size conduit are folks using?
I believe I used the same 1/2" OD tubing that Ken used. I just drilled up the fwd tooling holes to 1/2" and carefully slid it through the ribs 1 at a time (work slowly so you don’t end up bending the ribs as you pull down the line.)
I won’t be installing lights before first flight, but this was an easy step that would make future installation of lights far easier.
Re: Ground block part number
Posted: Fri Jan 08, 2016 6:55 pm
by Sonex1243
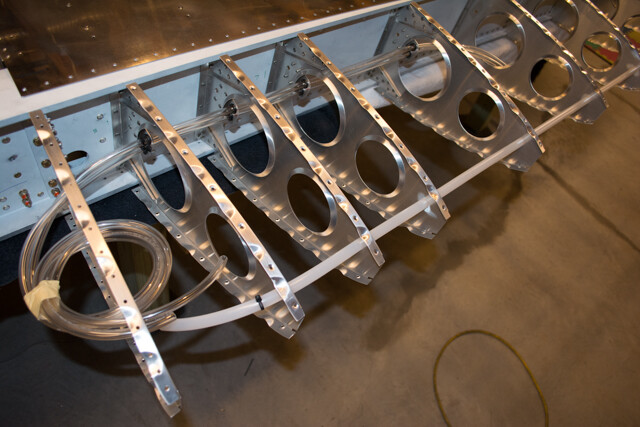
I used 1/2" OD x 3/8" ID polyethylene tubing. Drilled the forward rib tooling holes to 1/2" with a unibit making a nice snug fit while threading it through the ribs like Ryan did.
I transitioned to the rear tooling hole at Rib #10 and #11 since the duck works light was installed between the two outboard ribs.
The AeroLED light wires are 3 conductor 20 gauge shielded and the duck works light wires are 18 gauge tefzel.
Re: Ground block part number
Posted: Sat Jan 09, 2016 10:00 am
by DCASonex
If using all LED lights and strobe, consider one multi-conductor shielded cable for all. 1/4" OD poly tube is a bit tight for this, 3/8" OD should work fine.
David A. Sonex TD #1327