Canopy install
Posted: Sat Aug 30, 2014 9:16 pm
by Gripdana
I just got my canopy and am getting ready to trim and fit it. I know it goes on perpendicular to it’s form but is there a front and back? Is the front where Sonex has put the sticker?
Re: Canopy install
Posted: Sat Aug 30, 2014 9:41 pm
by MichaelFarley56
Is there no marking or label indicating the front of the canopy Dana? Did they write anything on the masking tape outline?
I’m fairly certain the front is where the label is, but it’s been a while since I fit mine. Hopefully someone else can provide confirmation!
Re: Canopy install
Posted: Sat Aug 30, 2014 11:12 pm
by Gripdana
Well I should have unpacked it. I was looking at it in the box and the edges were pressed against the sides of the box. I saw the markings after I unpacked it. Wow do I feel stupid. Thanks.
Re: Canopy install
Posted: Mon Sep 01, 2014 6:36 pm
by Gripdana
I found the front and today my brother came over to help cut the canopy. I followed the Sonex video instructions exactly. Everything went very well so far. The canopy is cut down to close forward and aft (needs sanding to final size). The sides are close and will be final trimmed as I get the fore and aft finished.
Re: Canopy install
Posted: Tue Sep 02, 2014 7:37 pm
by mike.smith
Now that I’ve been through a summer with my canopy I’ll throw this out there.
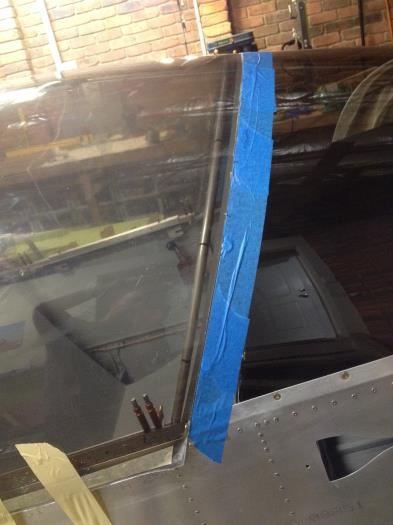
The canopy will expand and contract a lot with temperature. DO make sure you oversize the holes for the screws. DO make sure you leave a sufficient gap between the back edge of the canopy and the turtledeck, and between the front edge of the canopy and the windscreen.
My inclination was to make the gaps as small as I could. But in the first summer sunshine it began pressing against the turtledeck and the windscreen, and I had to do some sanding to make the gaps larger.
Don’t force anything. I had a perfect canopy going until I tried to force a rivet into a hole that should have been drilled out just a tad more. Then “crack!” I stop drilled the hole, but it is forever a reminder that if I had been just a LITTLE more patient I would have been totally crack free.
Mike Smith
Sonex N439M
Re: Canopy install
Posted: Tue Sep 02, 2014 7:44 pm
by Darick
What do you consider a sufficient gap…1/16, 1/8, 3/16…?
Re: Canopy install
Posted: Tue Sep 02, 2014 10:50 pm
by Gripdana
Thanks for the advise Mike. So far I am keeping around a 1/16" gap forward and aft per the plans. I think the gap will change when I frame it up. I cut the canopy in the sun and it was 100 degrees out. That helped with the cutting. Today was spent trimming and finessing the fit. Next I will assemble the frame and attach the canopy.
Re: Canopy install
Posted: Thu Sep 04, 2014 12:11 am
by mike.smith
Darick wrote:What do you consider a sufficient gap…1/16, 1/8, 3/16…?
I think the 1/16" on the plans is a good start, but just wouldn’t go smaller. I tried to go smaller, figuring I was going to make a nice airtight canopy (OK, not really airtight, but I couldn’t think of another description). I ended up trimming.
Mike Smith
Re: Canopy install
Posted: Thu Sep 04, 2014 8:21 am
by Sonex555
Word of Caution: the canopy will expand in the sun. I know a gentleman that spent a month getting a perfect tight fit only to close the canopy in the afternoon sun and came back to find a huge crack in the canopy.
John Davis
Posted: Thu Sep 04, 2014 1:30 pm
by Fastcapy
Re: Canopy install
Posted: Sat Sep 06, 2014 7:42 pm
by Gripdana
I’m getting the frame assembled. Since the canopy is sort of a bubble I can’t quite figure out how to set the bows in relation to rest of the airframe. Should the bows be 1/8" inch below or flush with the airframe and windshield. Or is there another way to set this so that the faces are flush?
Re: Canopy install
Posted: Fri Sep 19, 2014 12:22 am
by Gripdana
I finished the canopy. 100 degree heat while cutting and drilling. Here is a link to the photos on flicker.
https://www.flickr.com/photos/90889513@ … 1591930853
https://www.flickr.com/photos/90889513@N04/
Starting on mine
Posted: Tue Dec 02, 2014 6:54 pm
by rizzz
Ok,
I’ve just started fitting my canopy, haven’t started cutting yet, only laid it in place for the first time last night. As pere the instructions I will start by cutting to the factory placed tape first and then go from there.
I’m still debating if I will cut using the factory band saw method or with the Dremel tool with cutting wheel, the latter I can do by myself which is an advantage.
Now for the (scary) drilling part, I will just make drill bits as per the Sonex method, i.e. dull the edges and flutes, most people seem to have success with these.
To do the actual drilling though, is it best to use high speed and low pressure? My intuition is yes but would like to hear from people who have done it.
Also, to you drill a very small pilot hole first and very gradually up-drill? Do you maybe up-drill in only a few steps? Or; Do you drill as close to the final size as possible from the start?
Thanks.
Re: Canopy install
Posted: Tue Dec 02, 2014 7:45 pm
by falvarez
I did my canopy install completely by myself using the advice of another Sonex builder…no cracks and it was fairly easy to do…
What he had advised me to do when cutting the canopy is to set it on an elevated padded surface with the sides draping down (like a square card table with a couple pillows on top). This way you have easy access to all the edges. I used the Dremel cuttoff wheel method and it worked great for the rough cuts. I found that a belt sander with 120 grit worked great for removing the last 1/16 to 1/8 inch up to the line. Then I just used a sanding block to smooth the edges before moving the canopy…of course I repeated this process numerous times throughout the fitting.
Regarding the bits, I rounded off an my old bits…and I mean almost a completely rounded tip. It took about 10 to 20 seconds to drill each 3/32 hole and it was clear that the bit was melting the plastic rather than cutting into it. I think the key thing on the bits is to make sure you are melting the plastic. I then updrilled the holes with rounded off 1/8 and 5/32 bits.
Re: Canopy install
Posted: Tue Dec 02, 2014 8:39 pm
by rizzz
falvarez wrote:I think the key thing on the bits is to make sure you are melting the plastic.
That’s what I hear.
You’ve got to wonder though, If we’re really melting our way through the canopy rather than drilling, wouldn’t it be easier to make a pointy piece of 3/32 rod (or whatever gauge required), heat it with a propane torch until glowing red and then just “push” it through the plexiglass?
Re: Canopy install
Posted: Tue Dec 02, 2014 9:35 pm
by fastj22
drilling is easy. Just take your super sharp, brand new, fancy bit, put it in the chuck and drill a shallow hole in concrete. At that point, its perfect for drilling the canopy. It will melt through and leave you a perfect, crack free hole. Practice on scrap and you will agree. I’ve done two canopies. Trust me.
Re: Canopy install
Posted: Tue Dec 02, 2014 10:23 pm
by sonex892
Hi Michael
I totally fitted my canopy by myself. I don’t recommend it but my helper wasn’t in town the weekend I got keen to fit it.
My choice of cutting tool is a small angle grinder with standard metal cutting wheels. Not the ultra thin blades! The plastic goes semi liquid and bubbles up a bit from the heat when cut, and the narrower gap of the thinner blades seems to allow the perspex to touch and stick back together before it cools. Whereas the wider blades and cut gap don’t seem to have that problem.
For trimming I also used the angle grinder with a flap disc. With a coarse flap disc a lot of material sands off real quick. So can get it down to near where it needs to be, then go to a finer flap disc for final shaping. I didn’t sand anything by hand until it was basically to the finished size. The canopy being a 3 dimensional shape is a lot like trimming the cowling.
I know we can grind our own drill bits, but for the price of a few dollars each I bought perspex drills from spruce. They work great. They are also very cheap compared to the cost of freighting a canopy to Aus.
My canopy has been on the plane and in use for over 4 years. So far no cracks. It was also the old material which had been sitting in the box for over 4 years. I still have a brand new, now 9 year old spare canopy in the box as insurance.
However you do it good luck
Cheers
Steve
Sonex 892
Re: Canopy install
Posted: Wed Dec 03, 2014 10:45 am
by DCASonex
Best tool I have found for cutting canopy is the half moon wood/plastic/soft metal saw blades for oscillating multi-tools such as the cheap ones from HF. Trick is to drag the blade along the cut line, cutting deeper with each pass, and not cut all the way through in one pass. While blade is cutting the surface, vibrations are in same plane as the material and do not cause the material to vibrate. If saw plunges deep into the materiel, the vibrations become more in an up and down plane like a saber saw. It is very easy to cut a nice straight line with this, and progressive trimming is easy with minimal handling of the canopy.
Same tool also works great for trimming the cowl. However count on wearing out one blade on this. (Blade for cutting canopy should be new and sharp.)
David A.
Re: Canopy install
Posted: Wed Dec 03, 2014 10:50 am
by Gripdana
I did it exactly the way Sonex recommends. Everything worked out great. My brother came over and assisted with cutting.
Re: Canopy install
Posted: Thu Dec 04, 2014 6:28 pm
by rizzz
So far it’s been going well, cutting using the Dremel tooll with cut off wheel, initial sanding using a small palm belt sander, finishing off with a bit of block sanding.
I have been able to do it all myself, I know it’s not advised but I feel being very careful it’s doable.
Some pictures:
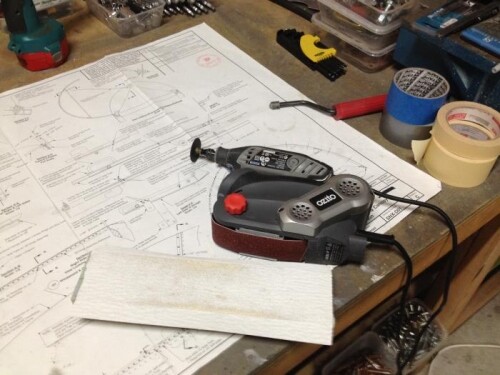
The tools Dremel tool, palm sander and sanding block:
Cutting setup:
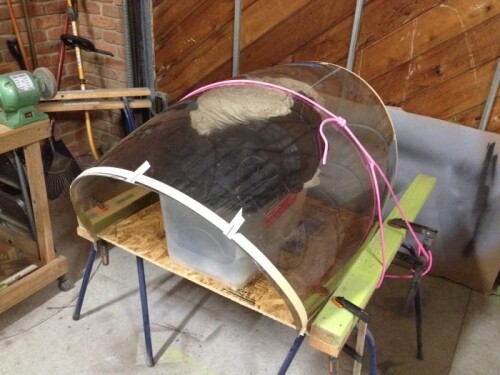
After 2 Initial cuts a slight overlap remains on the aft side:
Another cut, good fit between the turtledeck and windscreen now, will need more material removed to achieve the 1/16 gap but I’ll do that later:
Now I need to start cutting the sides.
I’ve done some drill tests on a bit of the scrap pieces I’ve been cutting off and I must say, this “Sonplex” material is much harder to crack than I initially thought.
Even using sharp new drill bits and high pressure I’ve not been able to crack it with the 3/32” or 1/8” drill bits, only when using the real thick drill bits without pilot drilling I’ve been able to crack the material.
That’s encouraging but I’ll need to make sure I don’t get overconfident and remain cautious.
Re: Canopy install
Posted: Fri Dec 05, 2014 9:11 am
by DCASonex
Word of caution on tests to see if drilling causes cracks in Plexiglas. The drilling itself rarely results in cracks, but creates conditions where when the material is stressed, cracks will start and propagate.
David A. Sonex TD with Bonded (no holes) canopy.
Re: Canopy install
Posted: Tue Dec 16, 2014 8:41 pm
by rizzz
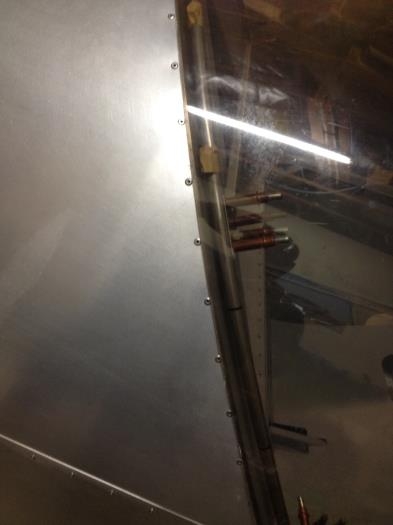
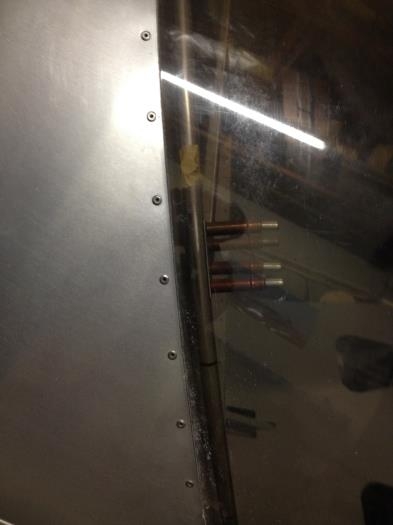
Nearly done with the canopy:
Quite happy with the result.
As others have done I did not worry about getting the bows positioned 100% right, just made sure during test fitting that they did not push the canopy outward, or were they too far away from the Plexiglas which would not allow installation of the screws.
I then just used nylon washers to compensate for the gap between bow & Plexiglas. In one place I needed no washers but in most I needed 1 or 2.
It is very easy to do this way and the results are great, I have a smooth transition between the windscreen/canopy/turtledeck
Now I just need to remove it once more so I can sand a bit off the aft edge as it is a bit closer to the turtledeck than the required 1/16"
After that I’m done with it.
Re: Canopy install
Posted: Tue Dec 16, 2014 10:04 pm
by Rynoth
Looks awesome!
Re: Canopy install
Posted: Sun Dec 21, 2014 6:39 pm
by rizzz
Took the canopy off and did some final sanding to achieve the required 1/16" gap.
Put it back on and removed the protective plastic film.
I’m happy to say I’m now done with the canopy!
During my 5 year build I have pretty much experienced every common issue Sonex builders come accros in their project, like stuffing up the wing rigging etc, plus I’m proud to say I invented a few new ones.
Anyway, after all that I was almost expecting to become a member of the cracked canopy club as well, but I’m very happy do say I didn’t! (so far ![]() )
)
I actually found the canopy installation not to be that hard, I followed the plans and instructions, apart from the cutting which I did with a Dremel tool & cutoff wheel.
I think it’s just a matter of taking it slow and never ever ever trying to force anything (I had to keep repeating this one in my head constantly).
Initially I was planning to install a gas strut instead of using the canopy cable, I had even bought all the parts for that, but I’m at the point now where I just want to be done with it so I stuck to the plans for now, I might still retrofit the gas strut later.
Well, here are some pictures:
Looks cool doesn’t it?
One happy camper ![]()
Re: Canopy install
Posted: Sun Dec 21, 2014 7:15 pm
by Bryan Cotton
Very cool!
Canopy install
Posted: Sun Dec 21, 2014 7:30 pm
by Sonex1517
Awesome to see this! Congratulations!
Robbie Culver
Sonex 1517
Chicagoland
Tails and Wings complete - finishing fuselage.
N1517S reserved
Re: Canopy install
Posted: Sun Dec 21, 2014 8:52 pm
by MichaelFarley56
Congrats on a beautiful job!!
Re: Canopy install
Posted: Sun Dec 21, 2014 10:22 pm
by rizzz
Thanks for the kind words guys.
Now lets see,
- V-Tail done
- H-Tail done
- Aft Fuselage done
- Fwd Fuselage done
- Wings done
- Wings rigging done
- Electrical done
- Engine installation done
- Cowling done
- Canopy installation done
Running out of things to do here… ![]()
Canopy install
Posted: Sun Dec 21, 2014 11:23 pm
by Sonex1517
rizzz wrote:Thanks for the kind words guys.
Now lets see,
- V-Tail done
- H-Tail done
- Aft Fuselage done
- Fwd Fuselage done
- Wings done
- Wings rigging done
- Electrical done
- Engine installation done
- Cowling done
- Canopy installation done
Running out of things to do here…
Huh…I can think of one more… ![]()
Robbie Culver
Sonex 1517
Chicagoland
Tails and Wings complete - finishing fuselage.
N1517S reserved
Re: Canopy install
Posted: Thu Jul 20, 2017 11:42 pm
by kevinh
Hi ya’ll,
I’m reviving this old thread to ask a related question: Is it okay to do canopy before cowl? I’ll be placing the windscreen as high as possible and it is much easier for me to work on the canopy first for shop space reasons…
Re: Canopy install
Posted: Fri Jul 21, 2017 12:52 am
by wlarson861
I did my cowl first but either order should be ok.
Re: Canopy install
Posted: Fri Jul 21, 2017 2:28 am
by NWade
I did my canopy first and think its fine to do so. Just get the forward bow as high as you can and be very careful not to trim too much from the lexan forward windscreen, and you’ll be fine.
Good luck,
–Noel
Sonex #1339
Re: Canopy install
Posted: Fri Jul 21, 2017 8:51 pm
by Corby202
Is it okay to do canopy before cowl?
I wouldn’t recommend that. In my opinion, to get the front of the plane looking nice I think its important to get a straight line from the cowling above the prop hub to the top of the canopy bow.
Re: Canopy install
Posted: Fri Jul 21, 2017 9:41 pm
by Darick
I took a piece of the canopy trimmings and applied heat from a hair dryer, in search of a way to relieve the canopy stress at the hinge and latch hook attachments. I held the 1" x 20" piece in an roughly six inch radius and applied heat with an old Conair hair dryer on high. After about 5 minutes the plexiglass was not resisting as much to the bend and took a slight set to the six inch radius.
It wasn’t very scientific but proved the point that it could be changed to a new radius. Now how much did that change the specs? Will it be more brittle, more prone to cracking, less flexible? Any engineers out there who could tell us?
I then tried a higher watt heat gun and was easily able to bend the test strip to a one inch radius.
My thought is to hold the canopy tight against the frame sides with, say a 1" dowel rod and apply heat to the area directly behind the dowel rod, in an attempt to put a slight bend or at least enough heat to make that area “relax”.
I know it sounds kind of risky with an expensive canopy. Perhaps someone with an old cracked canopy might be able to investigate how difficult this would be. Another reason this is called experimental.
All thoughts welcome.
Re: Canopy install
Posted: Fri Jul 21, 2017 10:35 pm
by jeff0196
Watch this, well worth your time:
http://www.eaavideo.org/video.aspx?v=1925319079001
Re: Canopy install
Posted: Sat Jul 22, 2017 8:01 am
by WaiexN143NM
Hi darick,
How did the heat do to the optics, still clear?
WaiexN143NM
Michael
Re: Canopy install
Posted: Sat Jul 22, 2017 10:25 am
by lpaaruule
I tried a heat gun to get my first canopy to fit better. The back of the canopy was extending beyond the turtledeck about 1/4". I tried heating is and bending it in. Unfortunately I discovered that it shrinks slightly from the heat.
The heat also removed the nice, natural, looking curvature of the canopy, and messed up the optics…I got it way too hot.
Maybe a hair dryer would be ok, but my first canopy became a hot mess. The more I tried to fix it, the worse it got.
I didn’t just blindly hit one spot with the heat gun. I was careful to only heat the area for a few seconds at a time.
Re: Canopy install
Posted: Sat Jul 22, 2017 10:50 am
by Darick
Thanks Jeff, I watched the video.
Michael, on the small piece I tested the optics did not change. If you are in Tucson, I may be visiting the area in the fall.
Re: Canopy install
Posted: Sun Jul 23, 2017 12:02 am
by jeff0196
Good, the EAA really does have some nice videos.
To add to Paul’s comment on the plexiglas shrinking with the heat gun, he may have experienced the heat gun removing the moisture from the plexiglas. It is well documented that plexiglas changes dimensions with changes in moisture. The changes are usually said to take a days when exposed to the natural humidity changes, but I think the heat gun can speed up the process. The change in dimension from humidity is one of the reasons the mounting holes are to be drilled oversize.