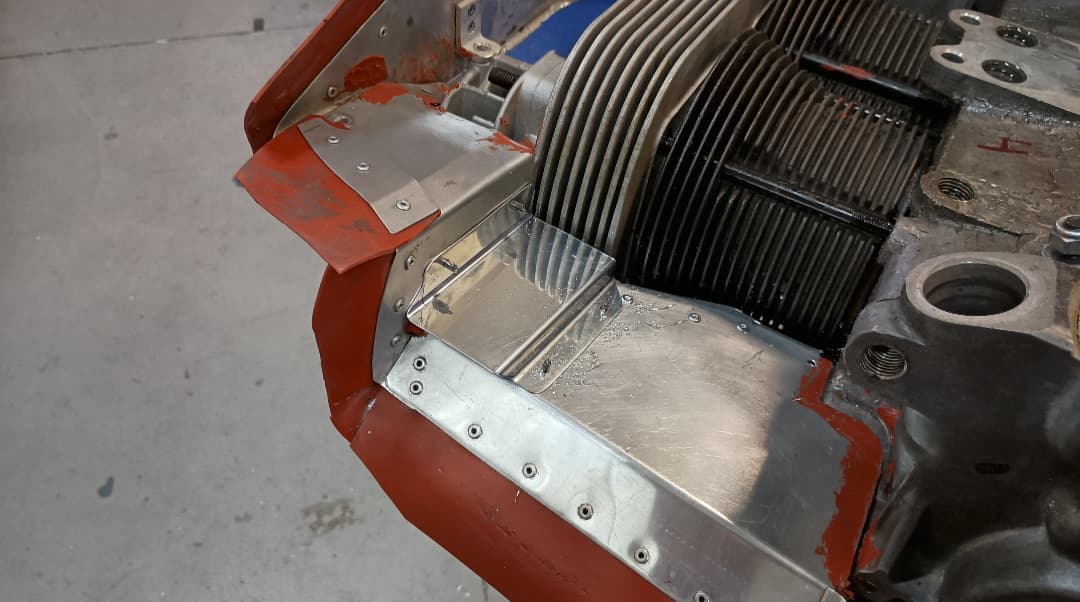
So in this next picture, I’ve made a baffle that forces the air through the fins, and makes it turn the corner and exit through the bottom cooling fins.
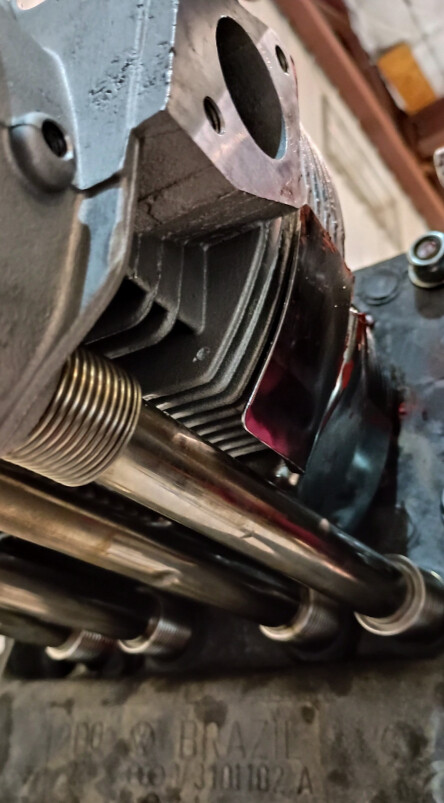
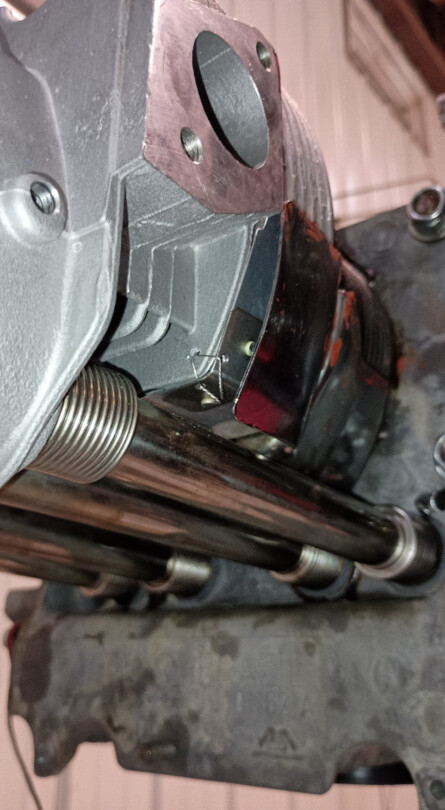
I drilled a hole in the cooling fins, and riveted a little piece of stainless to my corner baffle so I could safety wire it in place. The main baffle tucks both into the super tin and my new baffle so the air gets directed only through the cooling fins, and without the leak that the super tin has.
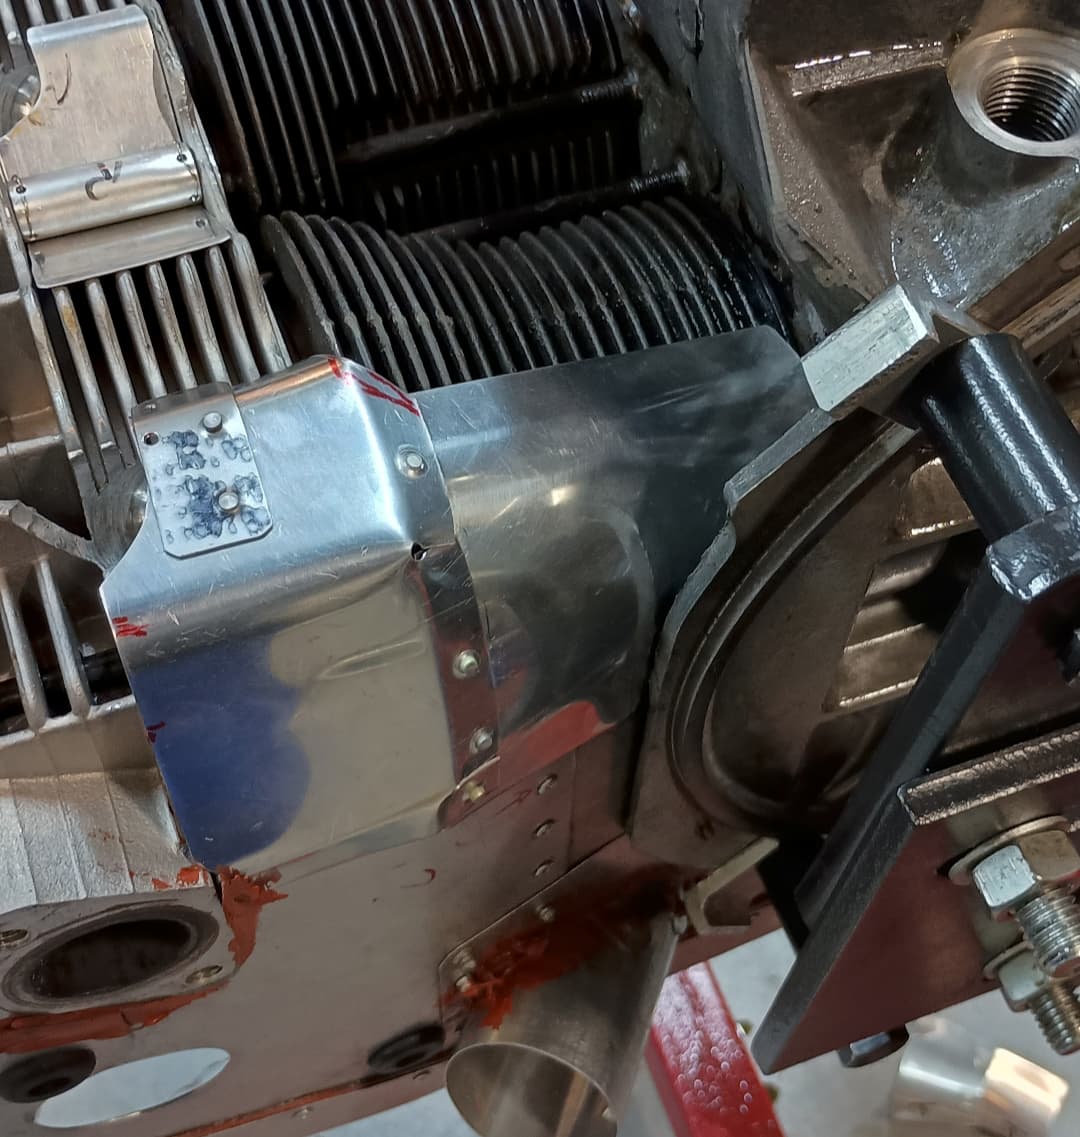
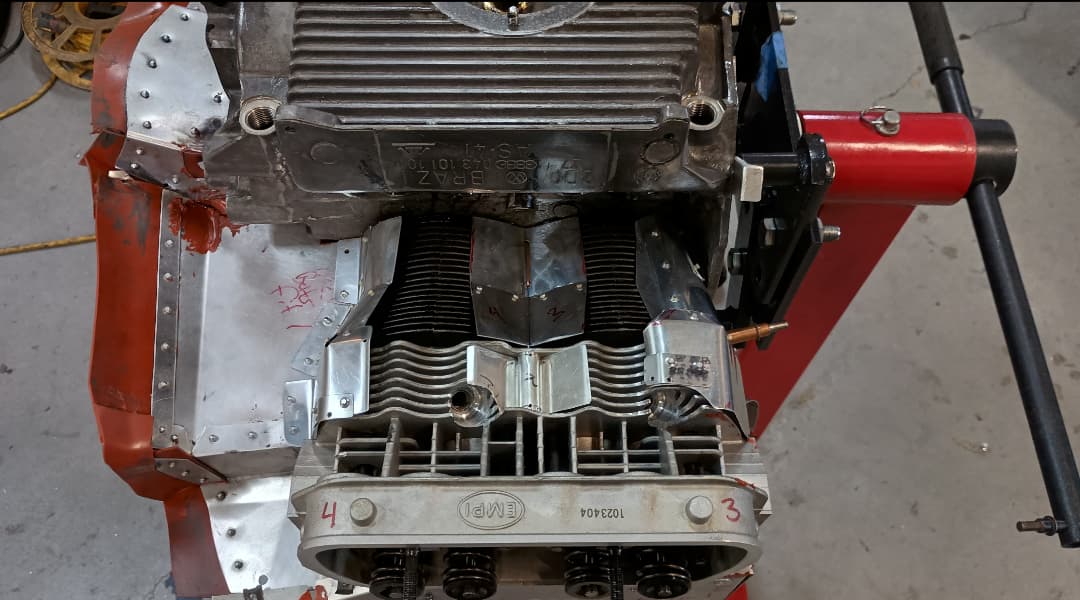
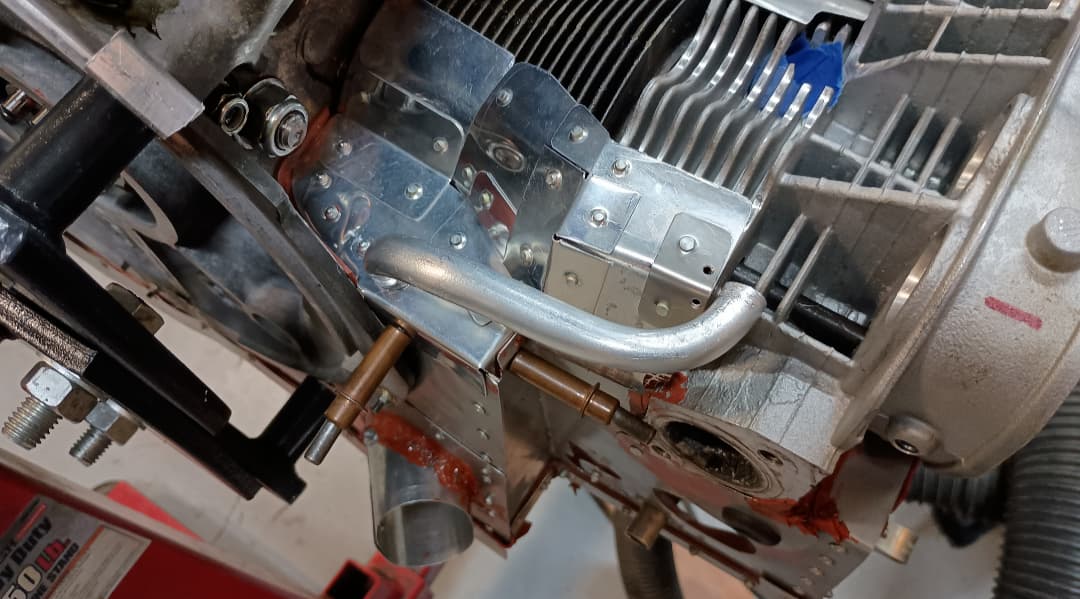
Here is the right rear baffle. Note that this is just a rectangular piece of metal, same width as the span of the cylinder head cooling fins. I have bent it to shape, and clearanced as required to miss the spark plug holes and also the exhaust outlet boss. Again I have a piece of stainless for safety wire. In this iteration the super tin captures the other side against the head.
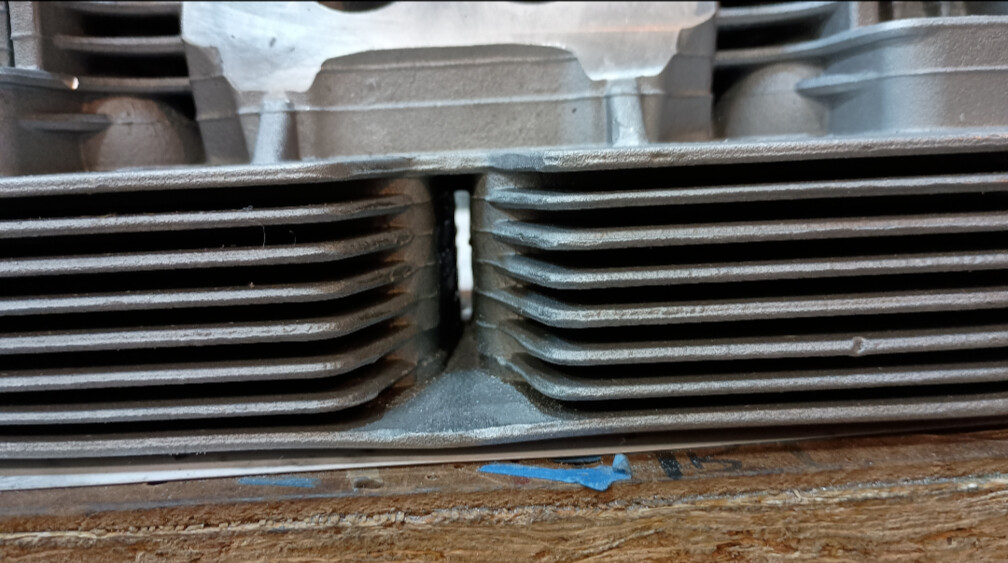
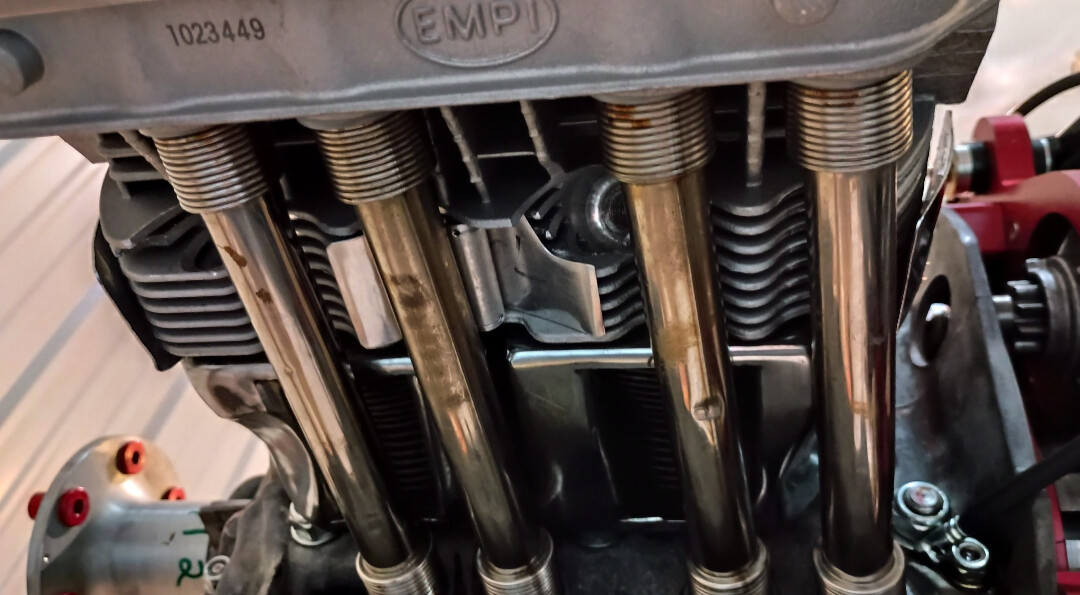
Here is the space between the cylinders, after I cleaned up the casting. A bunch of air goes down there but really does not do much. It doesn’t go through any cooling fins and once it gets out the bottom it is done cooling.
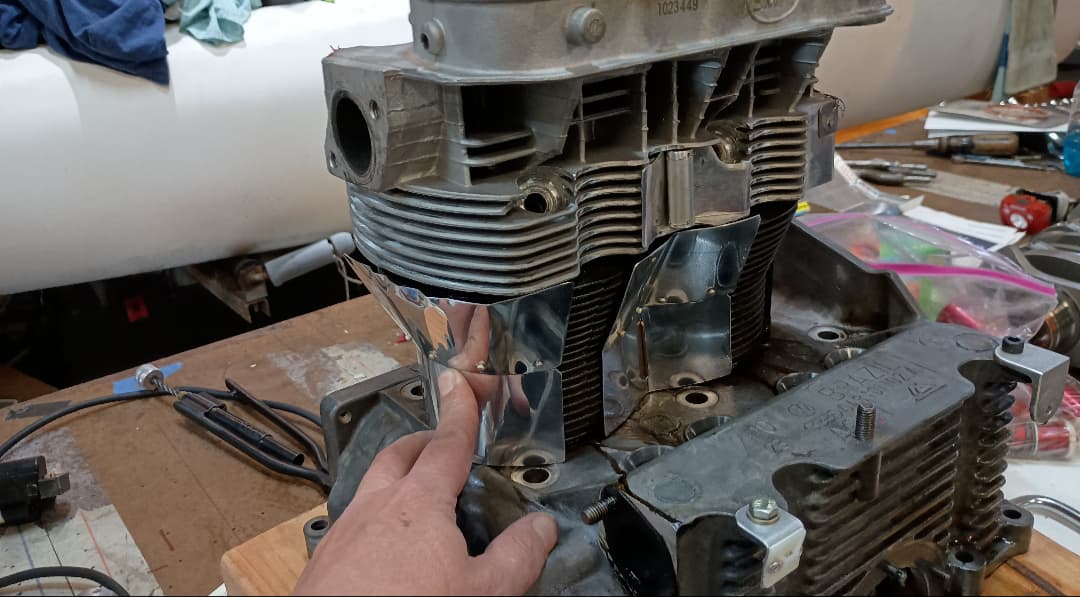
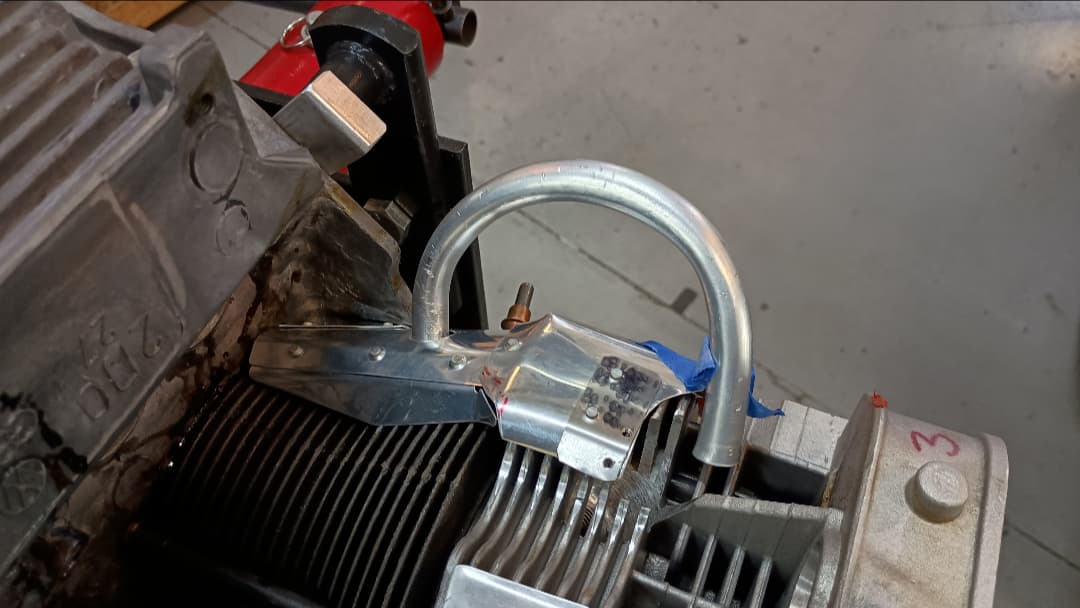
That picture is from the top. I made this baffle, basically a V shape that goes in the valley of the inter-cylinder gap. I used an aluminum tube with safety wire to secure it.
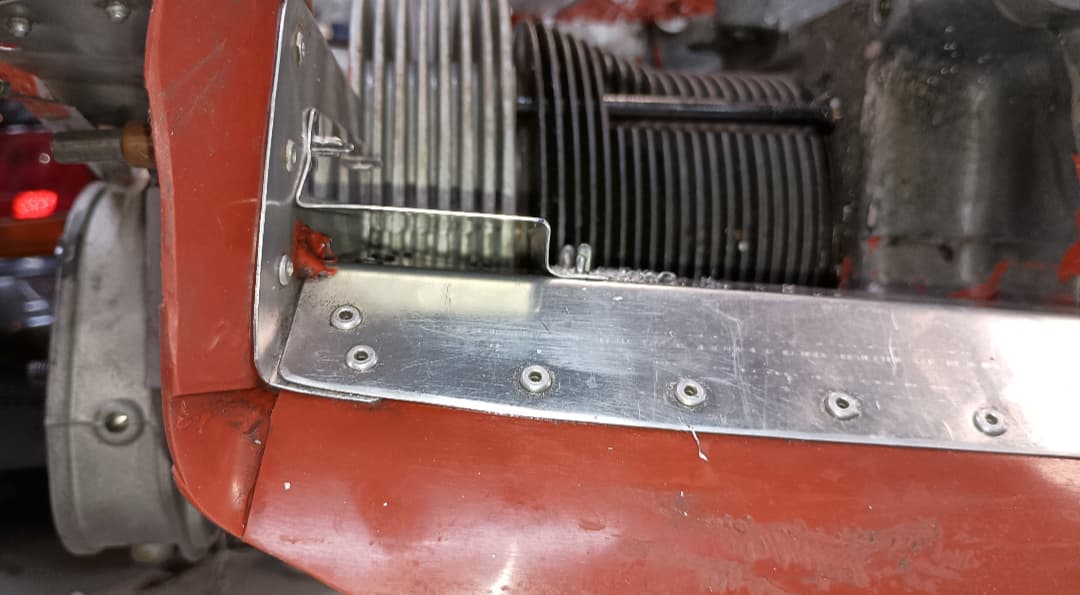
On top I’ve drilled a couple of holes in the cooling fins for the safety wire.
I was going to post the picture here but am still figuring out picture limitations. The key thing is the air coming down through the slot now divides, and goes fore and aft through the cooling fins.
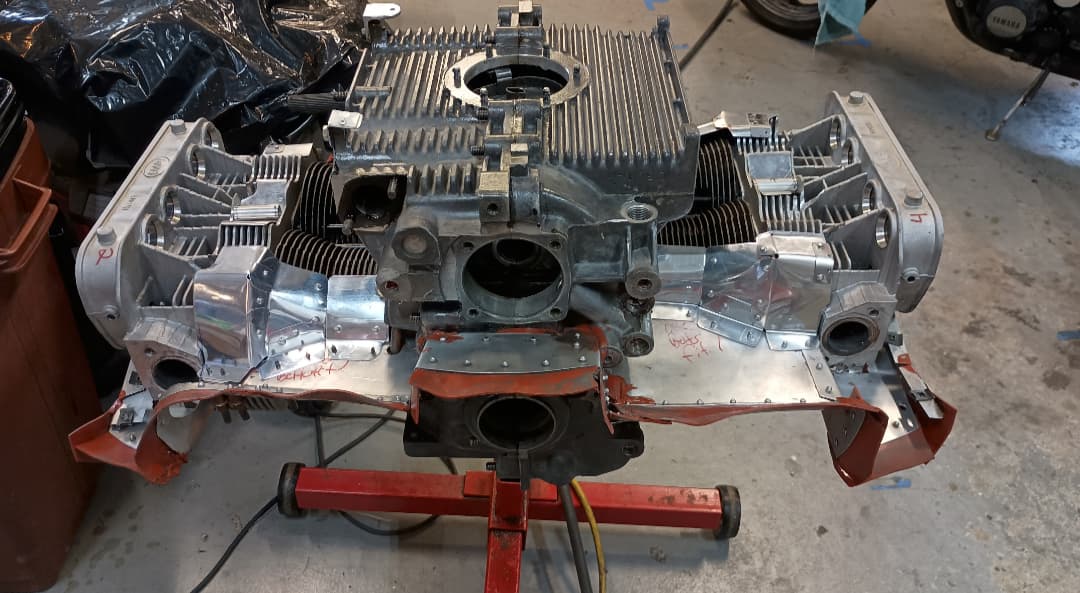
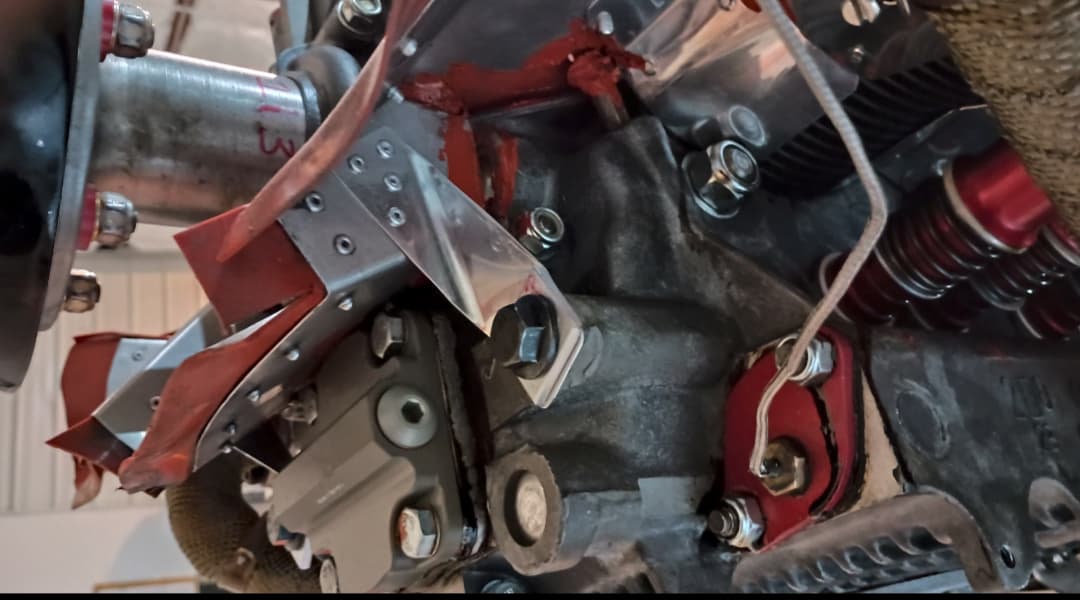
So I’ve decided I don’t like the super tins that much. Mostly because there are a lot of air leaks, up at the head where it is critical and down on the cylinders which should not need as much cooling as the head. Plus I put on a big spring loaded pushrod tube to fix a leak (success) but I had to hack the super tin for clearance. Later I changed all my pushrod tubes to that type (which will be another post sometime) and the super tin hack-a-thon was intense. And I still had some interference. But back to cooling - I felt like I could make an aluminum baffle that would do a better job and be lighter. The jugs are basically cylindrical on the bottoms, and a conic section on the top. I played around with paper and came up with some patterns, and started making pieces.
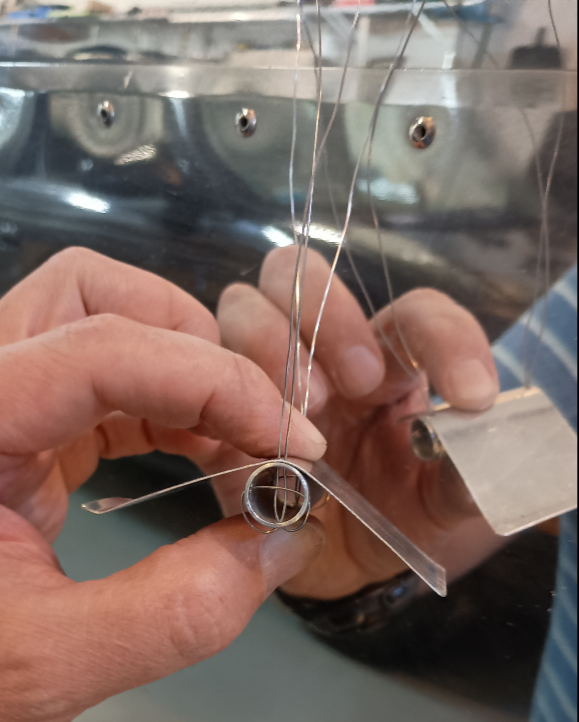
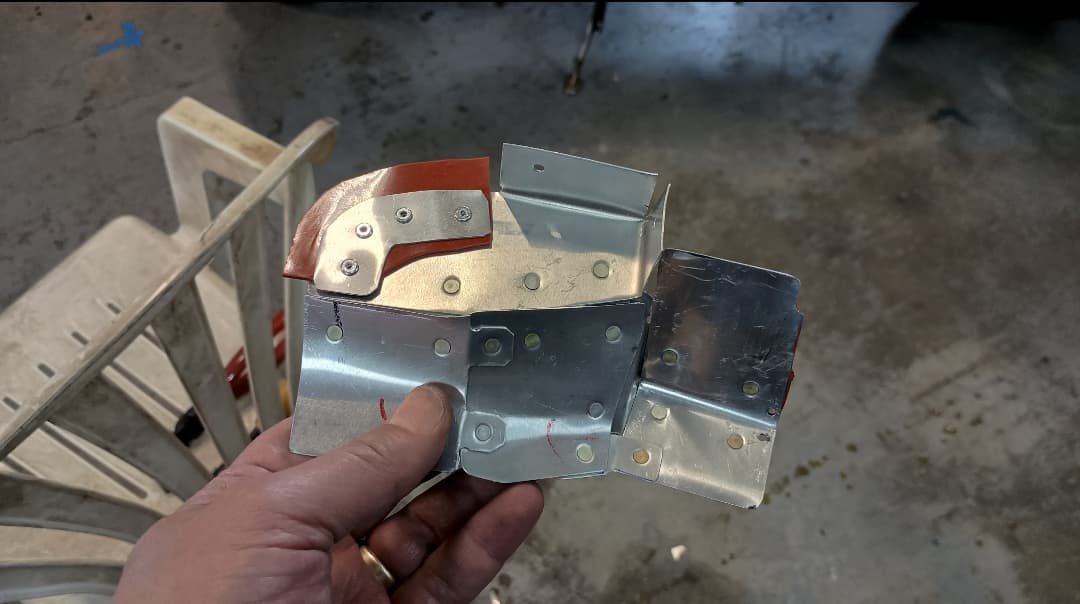
The inter-cylinder baffle was a little tricky. Made the pattern in paper and then the real parts. I made a “staple” out of welding rod which will be used to safety wire the baffle into the valley. It will attach to the studs on the top side.
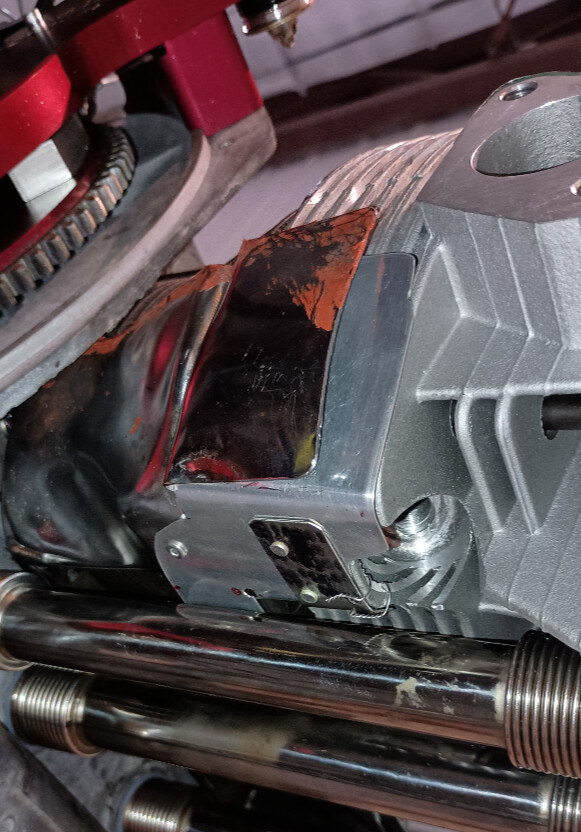
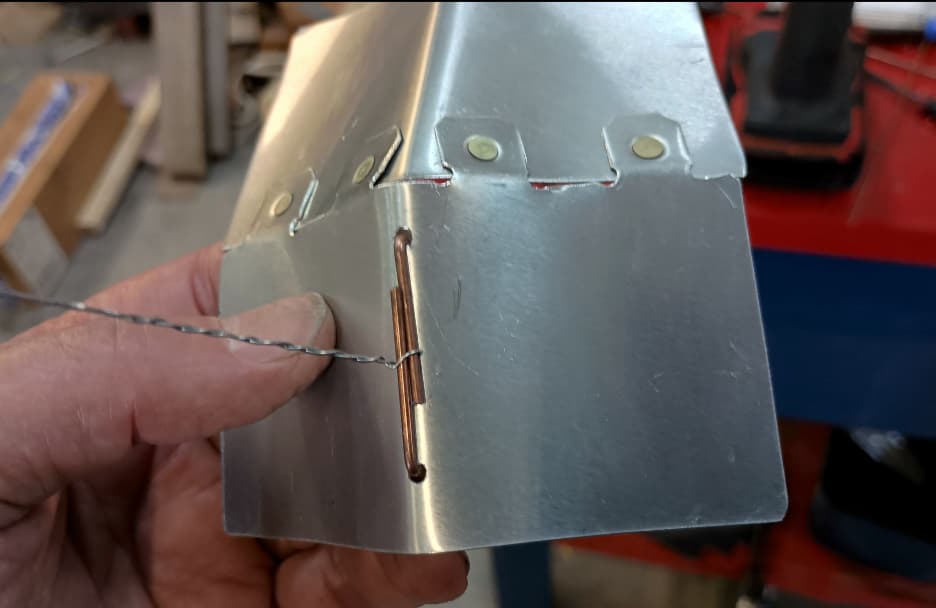
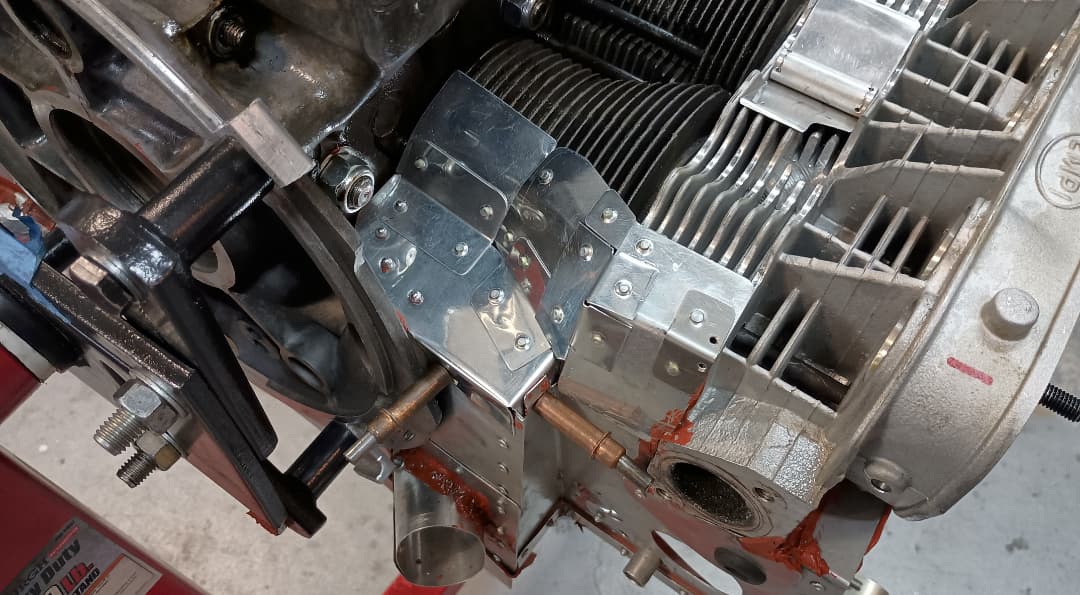
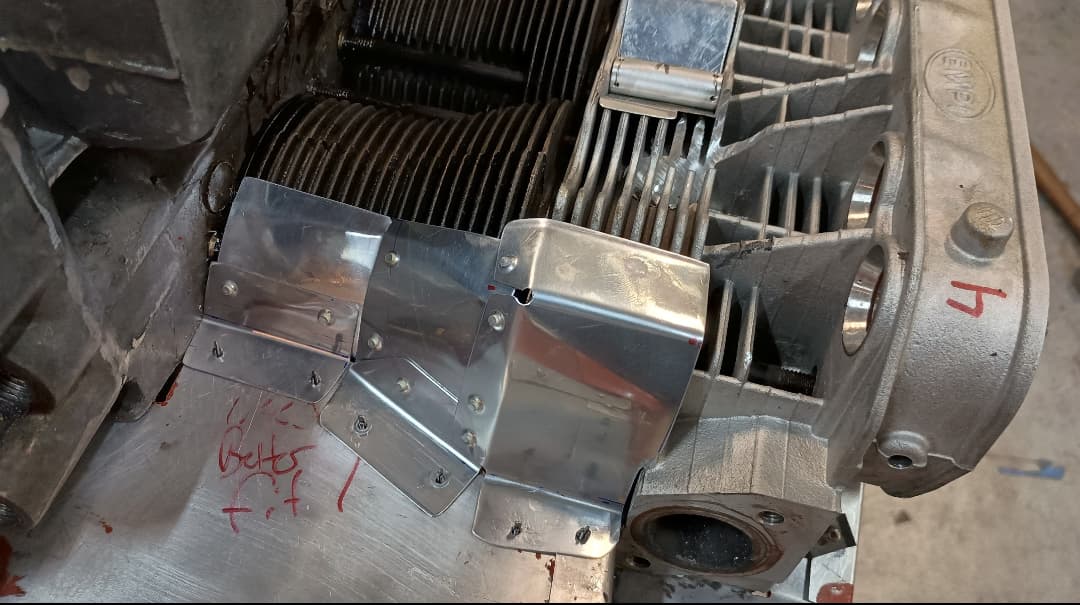
I remade my corner head baffles to be a little wider, and to rivet to the cylinder baffles. That was sort of tricky because the head baffle is rectangular, and the cylinder is circular. But with some creative bending and cutting, I got it done. Here is #3.
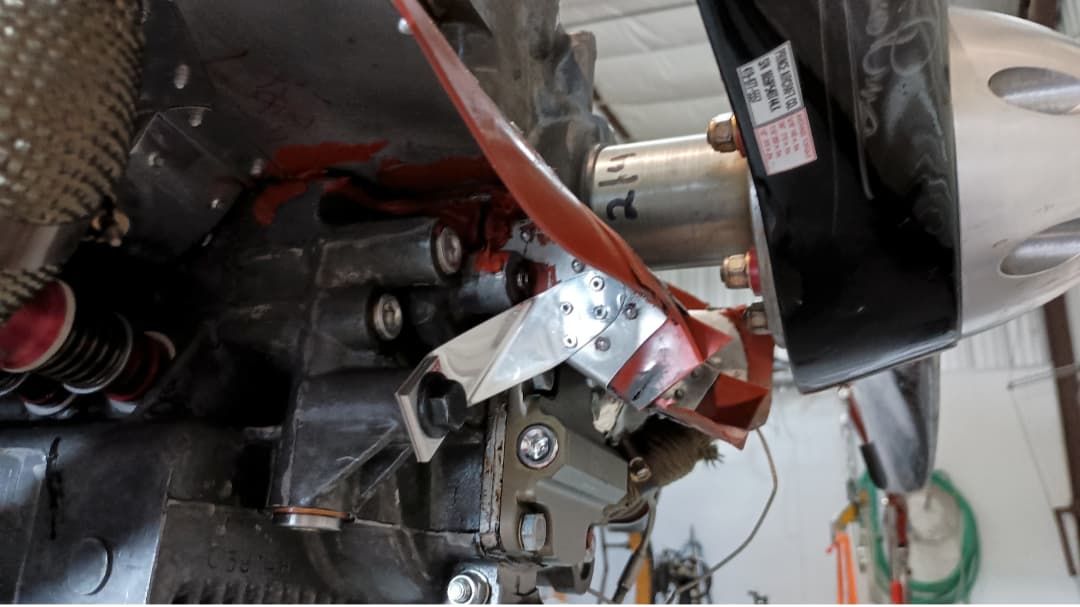
I totally redid the #1 corner. I never liked what I had before. Here is the removable piece, it will be pop-riveted on after the rest of the baffles are in place. I’ll use aluminum pops to make it easy to drill out later.
My #4 cylinder, right front, has been the hottest especially during climb. I’m thinking that the ramp on the front baffle and the prop going up on that side make the air go up and over the cylinder. I talked to another Waiex builder/pilot and he observed the same thing. So I made this little scoop for #4:
So far the hottest I’ve seen is cylinder #4, right front. In a climb to 6000’, from about 850, it got to 322F. In cruise my fronts are hottest. This was at 3200 RPM, 4500’ (about 4200’ pressure alt), 60F, 110 kts.
Those are excellent numbers. I think lots of people worry about CHTs being too low. I was discussing this with Scott Casler of Hummel engines. At one point he said “The lower the CHT the better”.
I have fooled around a lot with After Start Enrichment. Even on the coldest days the engine evens out and runs strong, with no enrichment needed, after CHTs reach about 150 Deg. F. So, I think the temperature inside the cylinder is hot enough to run well even when the outside is 200 F. But does low operating CHT effect cylinder wear? I don’t know.
I’m with Scott on this one. If the cylinder wears, power is down and oil consumption up. If the valve seat fails again, and I’m flying this time, that’s more excitement than I want. Plus a set of cylinders & pistons from Sonex is only $700.
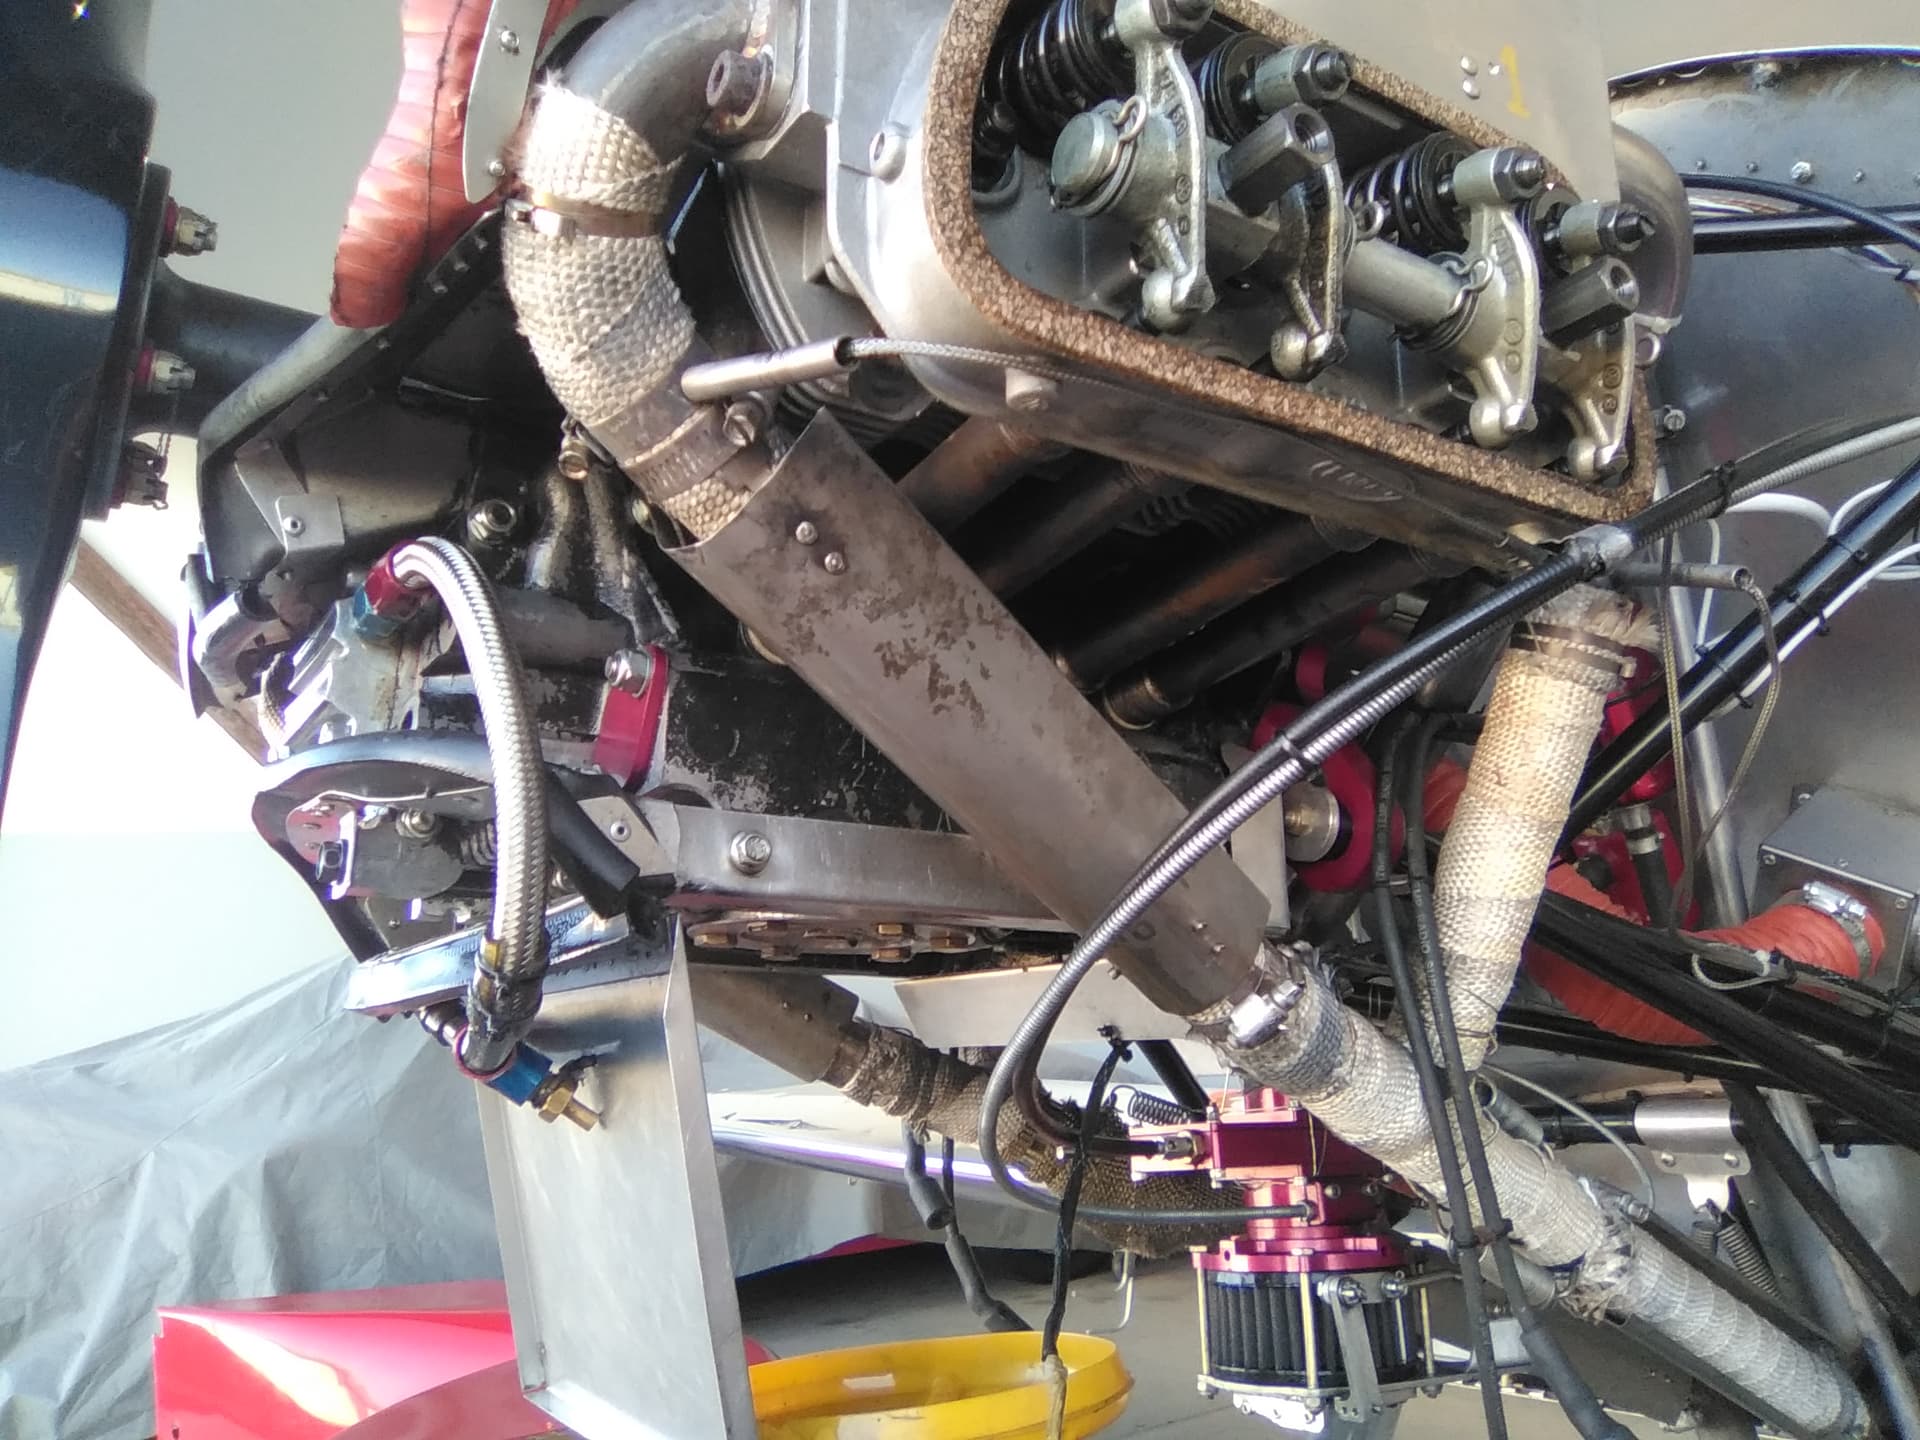
We have always had a hard time in the summer climbing more than 5500’ two up. Oil gets too hot. Right now after rebuild, my oil is still too hot, and I’m hoping the temps come down. We have about 12.7 hours since the rebuild, so over halfway to the mythical 25 hours. I’d really like to be able to climb to 10,000’ in the summer two-up.
Before the rebuild, it had always been around 70PSI. Way too high. Couldn’t figure out why. On the last rebuild I discovered my oil cooler was plugged up. I have a new oil cooler now. My cruise oil pressures have been about 46 psi, and oil temps have been about 195. I did add a supplemental spring to the bypass, which will ensure the bypass piston is forcing all the oil through the cooler at 52psi or below. So I believe I am getting good oil flow through the cooler, and good air flow through it as well. The exit plenum behind my oil cooler is plumbed into cabin heat, so when I turn it on there is plenty of flow into the cabin.
Just to add my $00.02 on CHTs … mine are very cool. In the summer I might get to 250-260ºF and winter is lower at 225ºF or so. I asked Dan Weseman (engine builder from SPA) about this and he asked what problem I was trying to solve.
I know Lycoming says that when a cylinder is at 150ºF it is ready for work. If you consider an auto engine (water cooled) is set to run at 195ºF to 220ºF that seems to indicate that our cooler temps should not be a concern. I understand we fly air cooled engines but the cylinder & combustion process isn’t aware of how it’s cooled.
My Corvair has returned excellent oil analysis reports and the engine uses zero (yes that’s correct) oil between changes, usually between 25-30 hours.
As an aside I recently began using Camguard (Diesel version with the Rotella) and the latest report showed my wear metals decreased with iron decreasing over 70% from the last report! This has been an excellent power plant for this airframe.
I hope you don’t mind, but with a lot of VW engine companies going away I’m afraid a lot of tribal VW knowledge will go away with them. So, I’m going to upload GPAS’s take on engine cooling here. Brock, it would be nice to have your pics of the RevMaster cooling baffles back as well.
Up until I did these mods, my front baffle would sit nicely against the motor and I would glue it down with RTV. Right or wrong, the only fasteners I had for the front baffle was a pair of screws on either side. But now I had this big gap behind the prop and that’s no good. So I added some straps and fastened them onto the big M10x1.25 holes in the front.
The geometry was sort of tricky to figure out and I ruined some scrap while playing around. The first one took 2 hours, the second one about 40 minutes. I sort of want to bring those huge bolts to the lathe and center drill them. They seem heavy.
Question about your oil pump cover. Did you replace the whole oil pump or just the cover?
I’d like to replace mine. Currently the original cover that had the hoses going to a bottom cooler is still there. The bottom cooler was removed when the top cooler was installed and the hoses just looped also to make use of an oil temp thermistor in the joint. It would be much cleaner to get rid of the hoses and find an other location for the thermistor.
It looks like you have the oil pump for the external cooler, which is this unit from Sonex:
If you just replace the cover, you will get no oil flow. So you need this pump:
I bought a pressure relief cover. If you get a spike in pressure, like for a cold engine startup in the winter, this keeps the galley pressure from getting too high.